
200SX Rear Brake Conversion
by Ed Johnson and Steve Allen
Published 2009 Updated 2021
Well, we always have to start off with a disclaimer. A sign of the times I guess. Any thing you decide to do to your braking system is done with no liability to 311s.org or Ed Johnson. Brakes are a serious matter and if you do not feel comfortable working on them, take your car to a reputable brake shop. So why do a rear disc brake conversion on a roadster? "Why not!" is my answer. This is not for the masses but more for the person that likes to tweak on a car trying to make it better. This might be of real interest to the engine swap crowd. I was not the one who figured this all out. Much thanks to Ed Johnson for sharing his knowledge and parts that go into the installation of 200SX rear disc brakes on a roadster. Again, there is nothing wrong with the stock rear brakes. This conversion is just something I had longed to put on my latest project because it can be done. I have the first hand experience now as I used a spare 1600 rear end I had lying around to mock up the conversion with the parts Ed graciously loaned me.
This conversion is best suited to the dual master cylinder cars. I plan on using a 280Z brake master for my SR20 project and this works well in an early car.
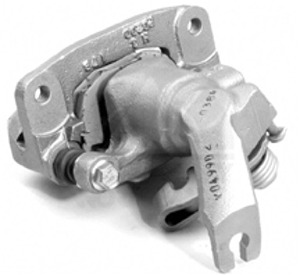
The rear calipers that will work are from a 1982-83 Nissan 200SX. They are left hand and right hand. They are stamped on the inside of the caliper. These calipers are pricy new so it is best to go to the local Pick-N-Pull to get your initial setup plus the other components as detailed below.
So what do we need besides the calipers? Grab the rotors, caliper mounting brackets, and the 200SX emergency brake cabling and hardware that is attached to the 200SX rearend. The caliper mounting brackets are unable to slide off of the 200SX axle until you remove the bearing on the axle. Take a big chisel and a hammer with you when you go to the wrecking yard as there is no sense buying the 200SX rear axle. You do not need it! The 1984 200SX has the correct caliper but it has a IRS and does not have the same mounting bracket. I grabbed the 200SX studs from the rear end as well. Put a lug on and whack it with a hammer to pop it loose.
The 200SX rotor will mount directly onto the roadster axle/hub as the bolt patterns line up perfectly. The 200SX has 12mm studs versus the 7/16" of the roadster. Ed used some rather large studs on his and drilled the axles and hubs to match the slightly larger diameter of the shoulder. The studs were then spot welded in place. Of course new wheel nuts to match are required. I used the stock 200SX studs as they will work with my Mini-lite rims.
The stock caliper mounting brackets for the 200SX have the correct bolt pattern to attach to the axle tube however in the oringinal location the caliper will hit the leaf spring. The best course of action is to have the oringinal mounting holes welded up and then re-drill the mounting holes to tilt the bracket up about 15 degrees for clearance.
Ed used the stock brake line mounting bracket, shortening it to bring the steel brake line closer to the rotor. This was again to clear the leaf springs. New steel brake lines were made using the stock roadster parts but with metric fittings at the caliper to match the fittings of the 200SX brake lines.
The backing plates for the stock drums must be removed and replaced with the retaining bracket we will fabricate per the axle retaining plate drawing. This will require removal and replacement of the wheel bearings, seals, and collar. Ed made retaining plates but I decided to use the old backing plate and cut it to fit. I do not plan on going retro any time soon.
Once the caliper bracket holes have been welded up it is easier to cut the center diameter to the larger dimension before cutting away the "end piece" that allows you to install the bracket over the axel tube. Additionally, the shaded area in the drawing of the caliper bracket is milled .125" and the area that is double shaded is radiused where the bracket bends. This provides the proper distance for the rotor to line up in the new caliper.
The caliper bracket is installed on the axel tube and uses the flange on the axle tube for a monting surface. The bolts that retain the axle in the housing come through the retaining plate, the axle housing flange and then the caliper mounting bracket. The caliper bracket only uses only three of the four bolts which should be more than adequate. The rear brakes do not do alot of the braking work with the fronts catching around 60% to 70% of that duty.
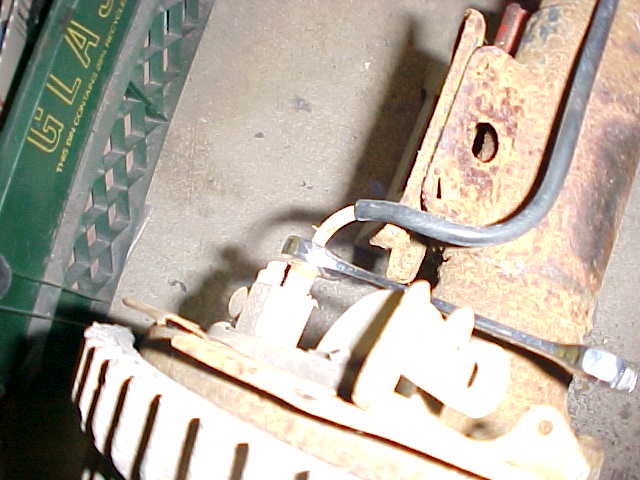
The stock emergency brake cables from the 200SX can be used. It will be necessary to build a bracket to attach to the stock mount on the roadster axle housing. This will enable you to use the stock emergency brake mechanisim on the roadster body.
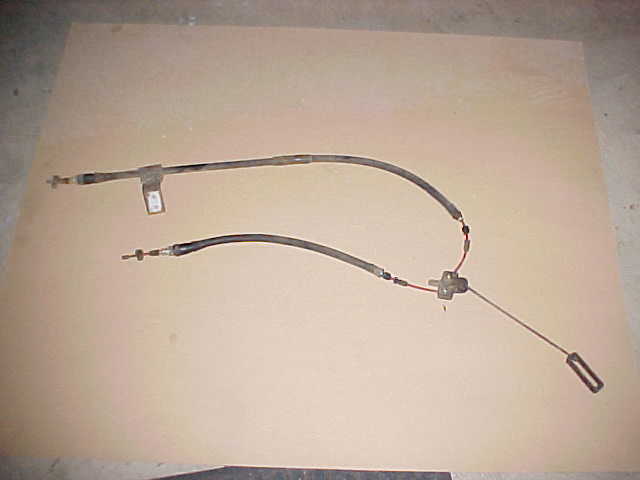
200SX e-brake cable assembly.
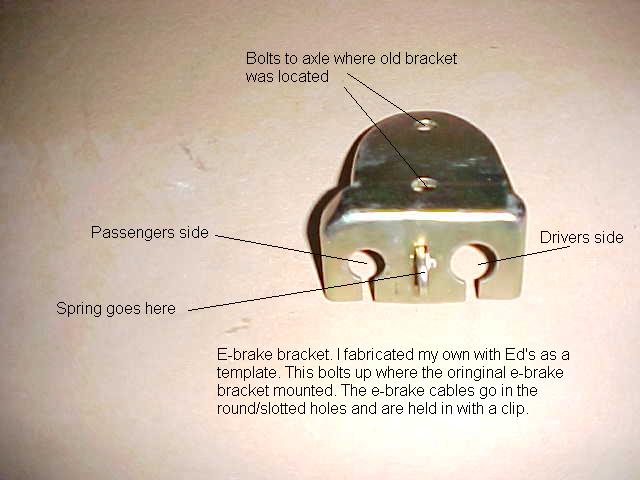
This is the e-brake bracket you must fabricate. Bolts up where old one was.
PDF files of the drawings of the bracket and modifcations can be viewed below:
Caliper Bracket Axel retaining plate Bracket modifications
Below are some pictures I took as I dis-assembled and re-assembled a stock rear end to accept the conversion.
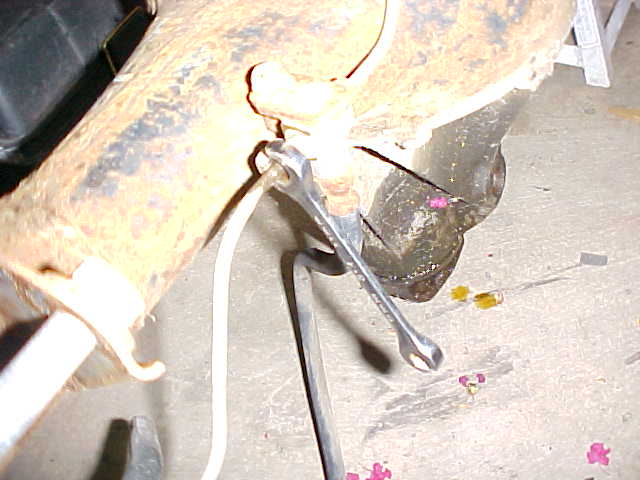
Dis-assembly- This is going to be alot more difficult with the rearend still in the car. Still very doable though. First let's disconnect some things to get us going. Loosen and remove the brake lines from the rear wheel cylinder and the junction where the rubber brake line attaches. Remove the spring assist for the emergency brake and the cotter pin and keeper for the e-brake linkage. Next remove the brake drum.(Sometimes a difficult chore) Followed by the brake shoes and springs. Remove the four bolts that retain the axle in the housing tube. With a littel luck a few whacks with a rubber mallet you should be able to remove the axle itself. Sometimes it may take a slide hammer to get the job done. Next you will need to remove the old collar, bearing and backing plate. I used a cut-off tool to cut the collar and bearing. A couple of whacks with a hammer removed them easily. Be careful not to cut into the axle.
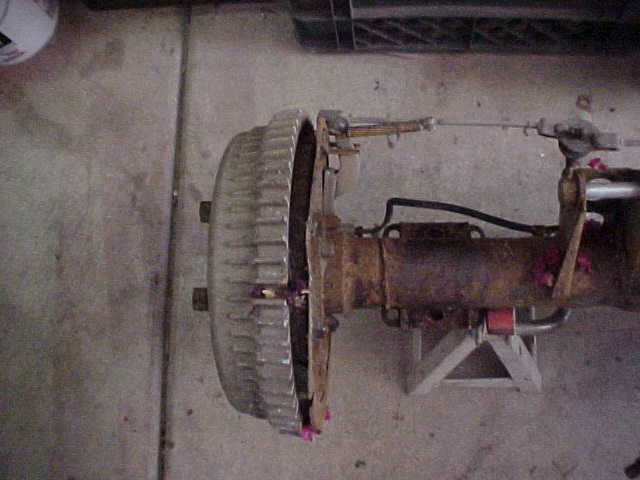
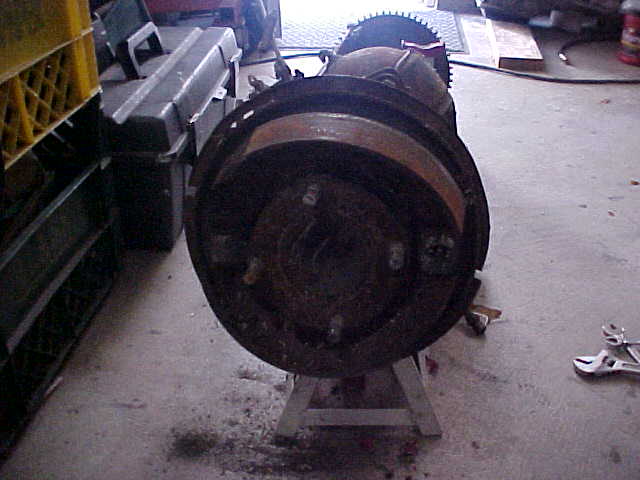
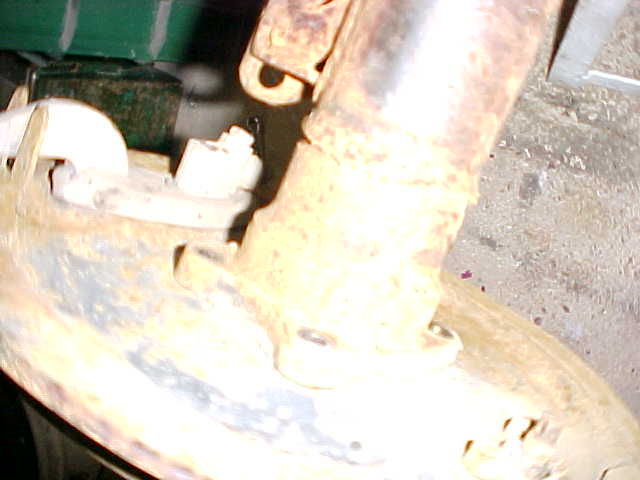
View of stock axel, drum, and backing plate.
Remove brake line to wheel cylinder.
Remove brakeline at junction of rubber hose.
Remove the drum as best you can.
Remove the shoes along with their springs.
Remove the four backing plate bolts.
Remove the axel with backing plate.
Fabrication/Parts to Order- The axles need to be taken to a machine shop so they can be redrilled for larger studs. Check for any severe wear. New seals and bearings are required. You must have the new retaining plate fabricated so you can have the machine shop press the new collar and bearings, seals and new backing plate on. You do not have to have the new studs fit first as you can drive them in later. You may have to redrill the rotor stud holes depending on what size of studs you used. If you use the stock 200SX they are 12MM which requires the axles to be drilled out. The hubs will fit fine over the 200SX studs. Here are the Nissan part numbers for the parts you will need to order plus some of the miscellaneous stuff.
- 2 each axle bearing-43215-08000
- 2 each axle collar-43084-10600
- 2 each outside catcher seal-43234-18401
- 2 each inner seals-38212-04104
- 1 each pinion seal-38189-P0101**
- 1 each differential gasket-38320-B3002**
- 6 each 5/16" x 24 x 1-1/2" grade 8 bolts with locking nuts*
- 2 each 5/16" x 24 x 1-1/4" grade 8 bolts with locking nuts*
- 2 each new brake lines Beck Arnley part number 073-0283**
**You may not need these but I replaced mine so I included them. *I used regular bolts and ground off one side so it fit into the locking tabs on the outer grease seal.
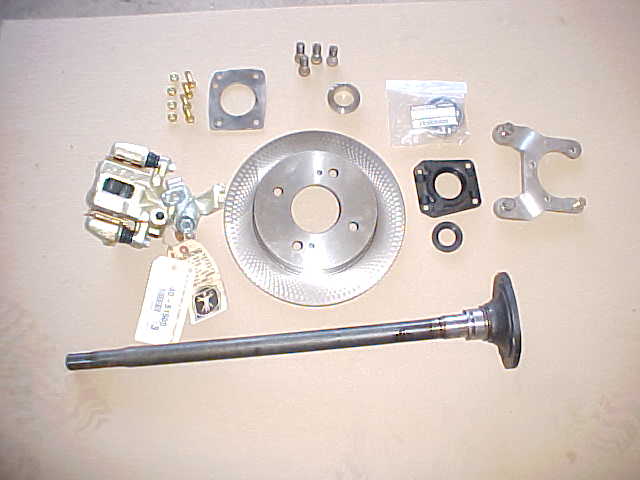
Here are the major parts you will need ot including hardware i.e. bolts.
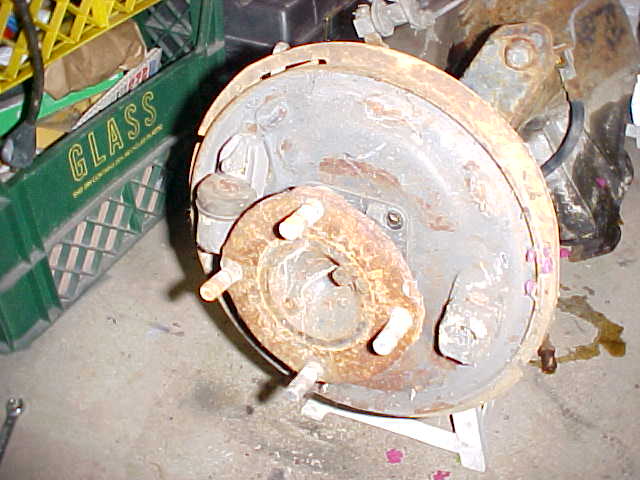
Assembly- Once you have the axles done and all of the bits fabricated this conversion is pretty much a direct bolt-on. First slide the retro-fitted axle back into the tube lining up the oil hole in the backing plate we fabricated. I did not worry about any spacers for pre-load on the bearing. Not too sure that was a good idea but we shall see. Align the caliper mounting bracket so it is oriented towards the back at approximately 15 degrees. Secure the axle and caliper mounting bracket with four locking nuts. Slide the new 200SX rotor into place over the studs. Install the 200SX caliper bolting it securely to the mounting bracket. You should buy at least eight 10MM washers as I had to shim the caliper from the bracket to get it to line up with the rotor. Next you will have to replumb the brake lines using a metric thread on the 200SX end and standard thread on the roadster end. The e-brake is a snap if you get all of the clips that hold it onto the calipers and e-brake bracket mounted to the axle. I fabricated a bracket to attach to the axle. Route the cables and hook it all up and you should be in business.
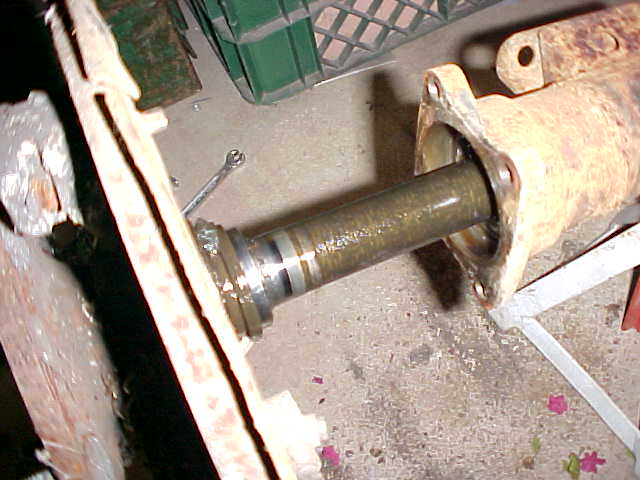
Modified axle ready to be installed.
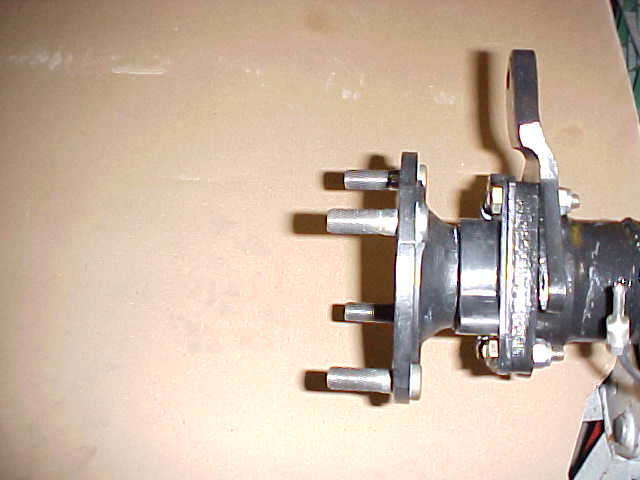
Axle ready to be bolted up with caliper bracket hanging loose.
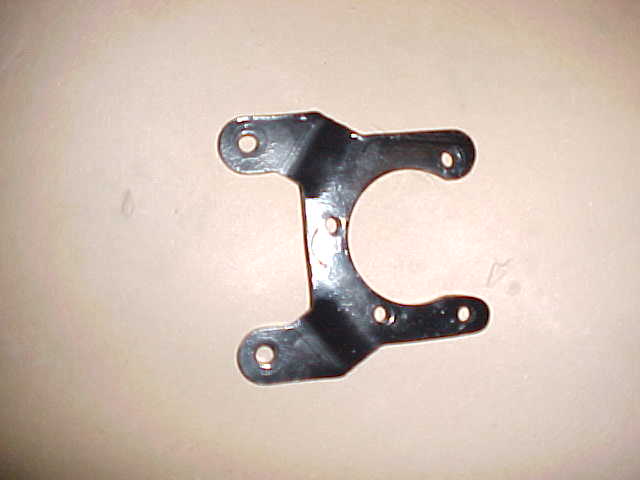
Caliper mounting bracket.
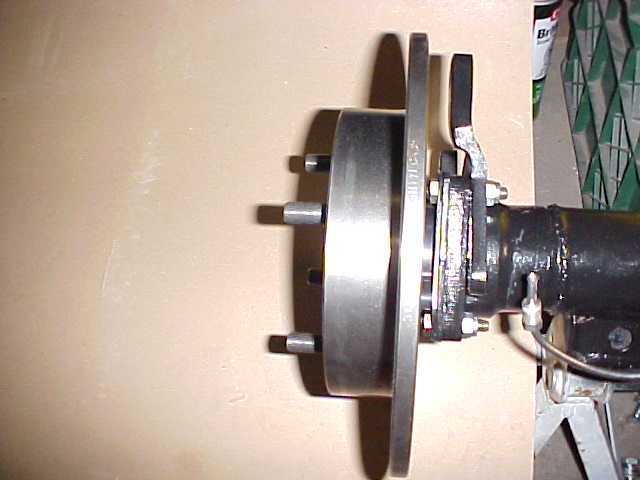
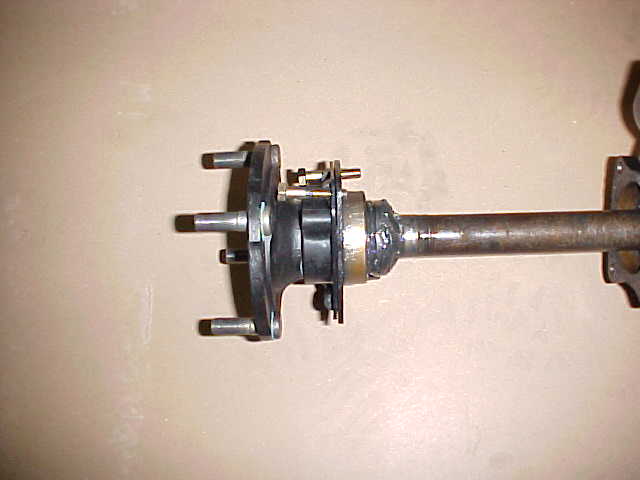
Caliper bracket mounted on axle with new rotor.
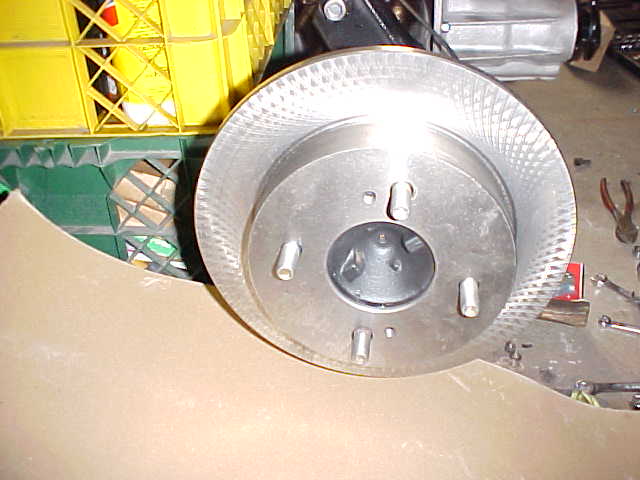
200SX rotor mounted in place.

Caliper mounted over rotor.
Closing Thoughts- I must commend Ed Johnson for figuring this all out. As I stated above once all the parts are fabricated it is pretty much a no brainer. The hardest part is having the 200SX caliper brackets cut, welded, redrilled and then milled. I kind of fleetingly thought about putting a kit together with the brackets, retaining plate and hardware. If there is enough interest maybe that might happen. The clearance between my 14" Mini-Lites and the calipers is good. I would venture to say that most 14" rims would not have clearance problems with this conversion. That is purely conjecture on my part and nothing else. Here are a couple of shots showing the clearance with the Mini-Lites. Any questions--ask and I will try to get an answer for you.
14" Mini-Lites and caliper clearance.
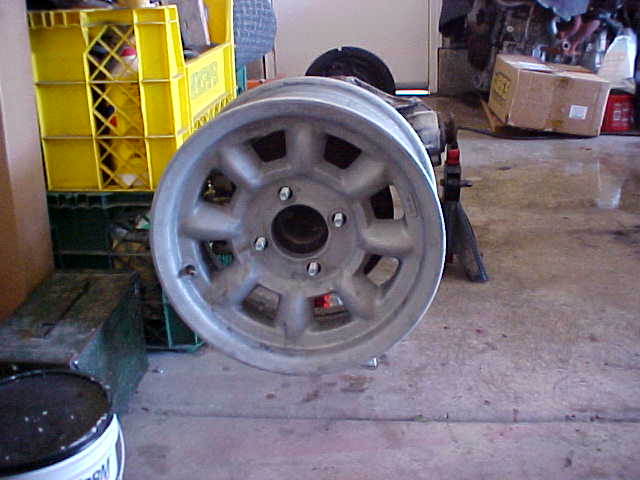
I love those Mini-Lites.
I found some documents Datsunrides sent me years ago of drawings for the brackets for this swap. Thanks goes to Mark for letting me post them here.