
Published 2016
70 Side Marker Conversion
by 70-1600
I took on a little project to upgrade the front side markers on my 70 roadster to be a "park lamp/turn signal" type lamp, just like the front park/turn lamps on the front. I searched this site and across the web in general and found a few similar conversions others had done on a few Datsun models (510, early Z cars, etc), but nothing exactly matching what I wanted to attempt. My conversion was to put a dual filament 1157 type bulb into the side marker, with ~8 watts for the side marker function and ~27 watts for the turn indicator function. The standard bulb for the side marker is a type 97, with ~9 watts.
The type 97 bulb is a single filament. The bayonet base of it is the same physical dimensions as the type 1157 with two major differences: one, there is one contact on the type 97 (single filament) vs two contacts on the type 1157 (two filaments); two, the small keying/retaining tabs on the base are in-line on the type 97, but are offset on the type 1157. The offset tabs ensure the bulb, when placed into the socket, is aligning the contacts on the base for the correct function - park lamp filament vs turn signal filament.
The conversion I had in mind was to change the existing socket on the side marker housing from a single contact type 97 to a dual contact type 1157. I found an example of this on the Ratsun.net site ( http://community.ratsun.net/topic/58513 ... conversion/ ). However, I wanted to wire up my conversion to flash in sync with the front park/signal lamp. Otherwise, my approach was the same as the Ratsun.net example.
I had to source two specific items to make this conversion possible: a 3-wire type 1157 socket that would adapt to the existing housing, and a low profile 1157 bulb that would fit into the assembled marker. The standard type 1157 bulbs are too tall to fit under the side marker lens. I was able to find both after some searching on-line.
Here's how I did it...
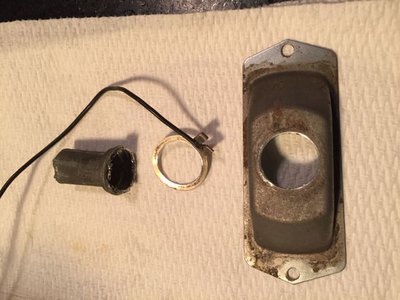
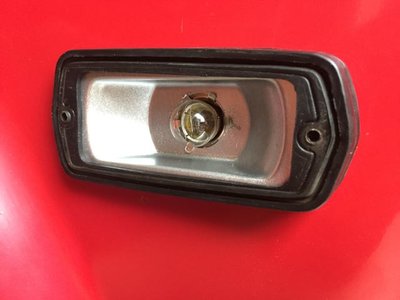
I worked on one at a time...learn on the first, makes the second go faster. Additionally the left and right markers rubber gaskets are different, while the metal housing, lens, and trim ring are identical. First step was the disassembly of the side marker. You can see the major elements in this pic: trim ring, lens, housing, rubber gasket. Pay attention to the orientation of the housing to the gasket The housing is not perfectly rectangular. The narrow end is matched up with the thicker end of the gasket.

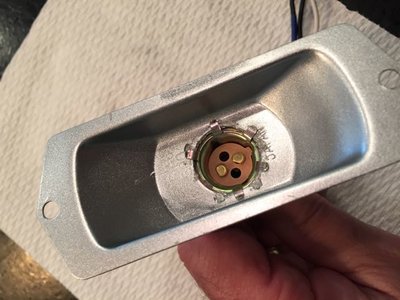
The wiring socket is attached to the housing shell by mechanical crimping. The two leads (green/yellow stripe is positive, the black is ground) I salvaged for wiring up the new socket. I then removed the socket from the shell with some wire cutters and elbow grease, being careful not to deform the shell.

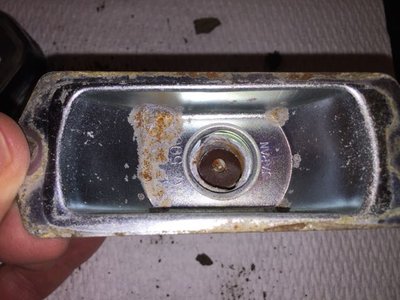
You can see the single contact socket in the above picture. When you remove the socket you'll also have a ring to which the ground wire is attached. Both these items I tossed, as the new socket has three wires instead of two (park, turn, ground).
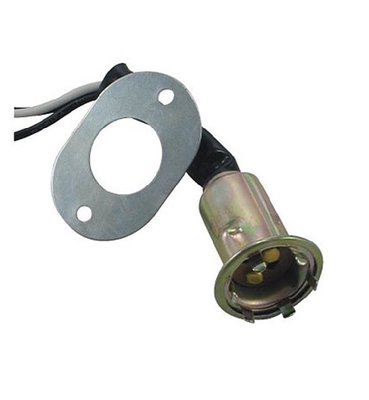
Here is the new 3 wire socket I sourced for this project from Wiring Depot ( http://www.wiringdepot.com/store/p/510- ... -Boot.aspx )
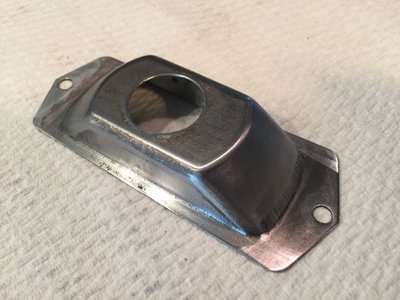
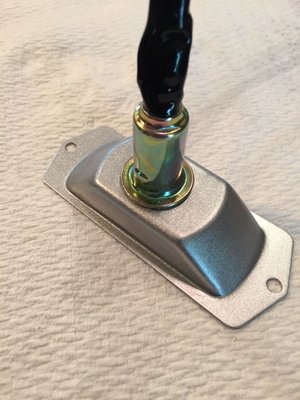
After breaking down the housing I cleaned it up and gave it a fresh coat of metallic paint.

The new socket will fit the existing hole in the shell, even though the hole is a bit over-sized. The tabs on the new socket I bent over as best I could by putting the socket into a deep 13/16 drive socket, placing there shell over the tabs, and gently tapping down the tabs onto the shell. I broke one off in the process (on both assemblies). I couldn't get the tabs to hold the socket to the shell securely, so I added a bead of silicone adhesive/sealant to the back of the socket where it meets the housing to provide good stability and make a water-tight seal between the two. The adhesive I used dries clear, and the amount applied is very small, so it doesn't show in this picture.
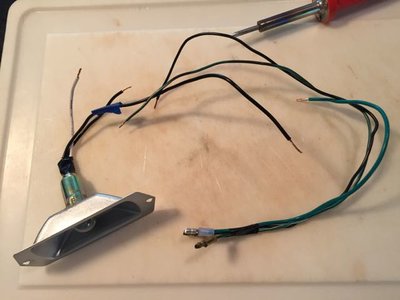
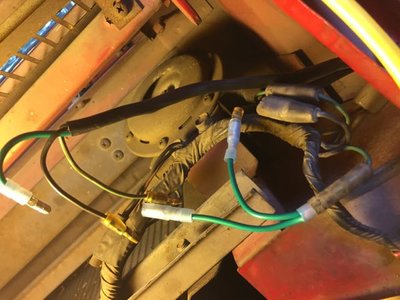
The next step was to wire up the leads of the new socket to the salvaged wiring and bullet connectors from the previous assembly. I had to also create the third wire/bullet connector for the turn indicator function. The white lead on this new socket is ground (match to the black wire). The other two black leads are positive, one for the park indicator (8 watts) and one for the turn indicator (27 watts). To know which was which, I put a standard 1157 bulb into the socket and tested marked them. I used the salvaged grn/ylw lead for the park lamp function, and created a new green lead for the turn lamp function. I soldered the ends together (for long term reliability) to create the completed wired assembly.
Before reassembling and installing, I tested out the function by connecting it in place of the front park/turn lamp, which has the function I was working to replicate.
https://www.youtube.com/watch?v=hmt4r7eVtg4
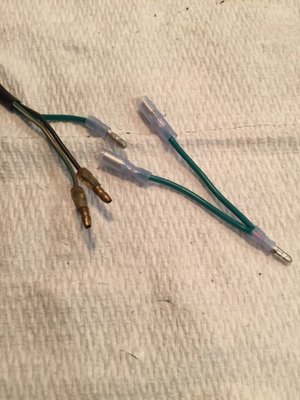
The existing wiring for these two lights (front park/turn and side marker) has three bullet connectors coming off the harness. Two of those have a "double bullet" socket (for the park lamp functions), one is ground (black) one is positive (grn/ylw). The third bullet connector is a single, for the front turn indicator (grn). I didn't want to "splice" into the single turn indicator lead, so I created a little pig tail for each side to split the single turn lead into two.
The last item was the low profile type 1157 dual filament bulb. It took some searching but I found some here: http://www.cruisercustomizing.com/drag-specialties-small-globe-bulb-1157-823w-clear-pair/part/DS-2060-0202 The wattage (8w/23w) is pretty close to a standard 1157 dual filament bulb (8.3/27w). This low profile bulb is needed so the lens will fit over the assembly.
And here's the final product - park lights on, turn signal on, and they are in sync!
https://www.youtube.com/watch?v=pJ_7xE5aEws
I like having this function in the front side markers. It gives a better indication to other drivers you are going to make a turn, especially when making lane changes, as the front and rear turn signals are just that - for viewing from the front or rear of the car.
-jt