
SR20DET Swap - Part 2
by Travis Rowe
Major accomplishments have been made since the Feb. 2 installment. These have included 90% completion of the exhaust system, 75% completion of the intercooler plumbing, realignment of the throttle body, install of a torque strut rear axle and fabrication of the TS mount, completion of the alternator clearance patch, a first pass at the alternator mounting, and delivery of the custom radiator and intercooler. I have also assembled a temporary electric lift mechanism for moving the body, which makes the up and down movements a lot easier. Between writing the above and now, the brake, clutch and fuel plumbing have been completed.
The Exhaust
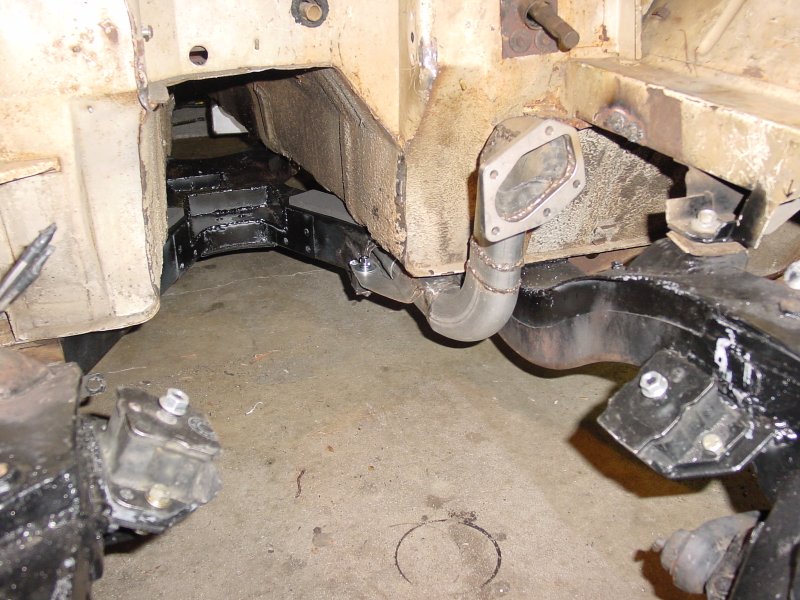
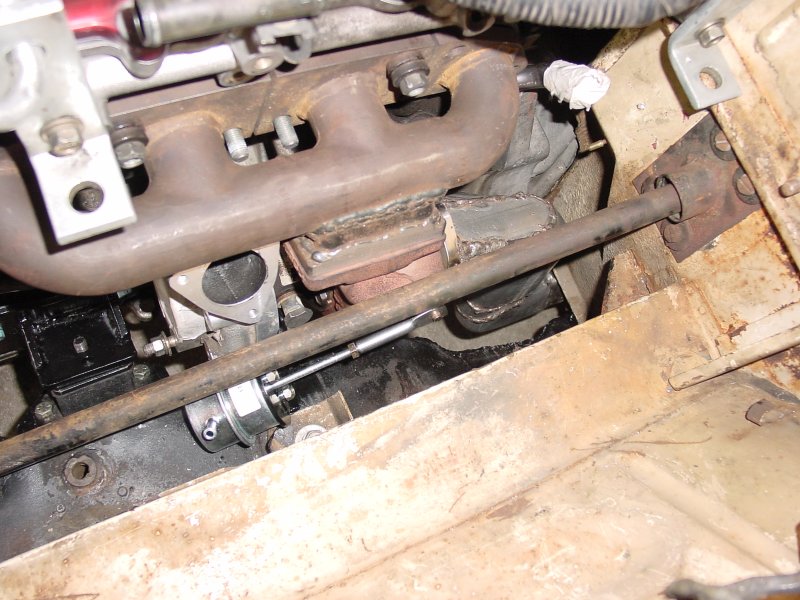
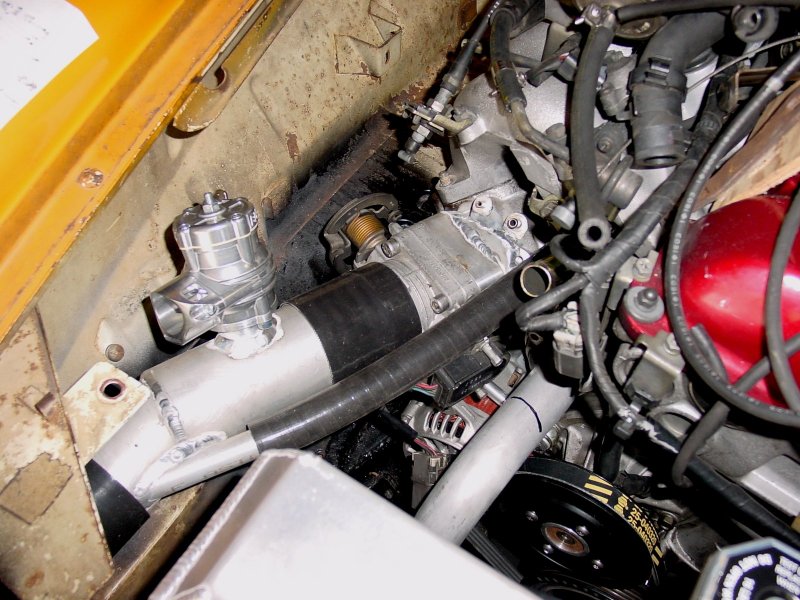
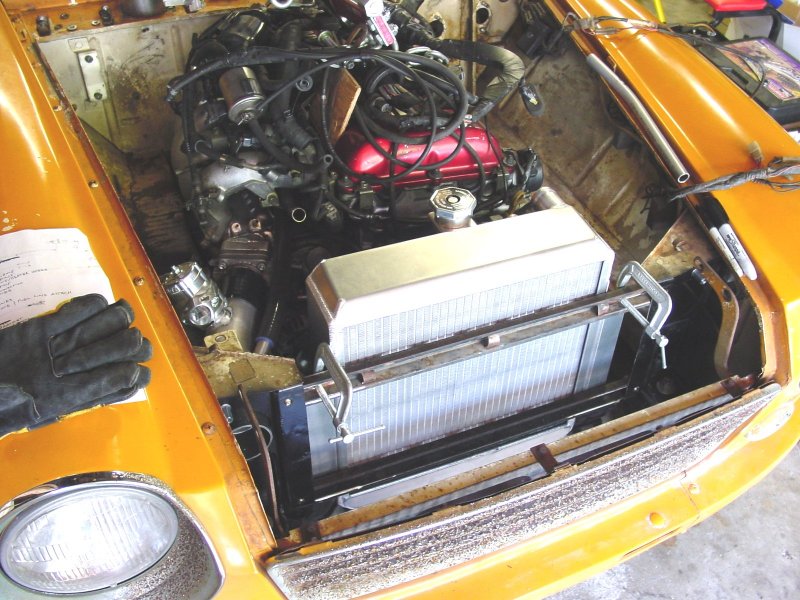
As was shown previously, the size of the passage through the X-member was increased for a larger exhaust. I used 2.5” round equivalent oval tubing from SpinTech http://www.spintechmufflers.com(approve sites) for the exhaust with a larger oval tube for the frame patches. I fabricated a custom flange for the turbo downpipe (actually a few because of a silly mistake!) and pieced together oval components from SpinTech. I tried two methods, at the top I cut and patched pieces together to build the geometry and at the bottom I deformed and hammered the pipe into the desired shape. I think the cut and patch method gave better results faster after the same amount of grinding cleanup. I used the provided slip joints in the oval tubing for connections at the bottom of the downpipe and into the muffler. It would be better to be completely welded or have a solid flange connection, but there just wasn’t enough room. I’ll let you know if it leaks! The last 10% for the exhaust will be to add the tail pipe section after the muffler. That one can wait for some time…I forgot to take pictures of the exhaust system before putting the body back on; here are some shots of the downpipe. The second image shows the turbo with the repositioned waste gate actuator under the steering column.
 |  | |
| Exhaust | Exhaust Turbo | |
| Downpipe | & Downpipe |
| Full Size | Full Size |
Intercooler and Plumbing
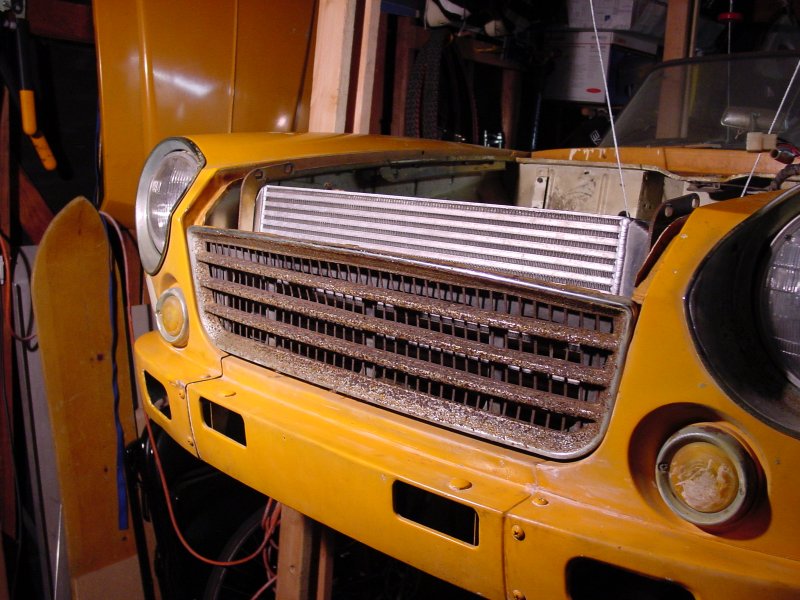
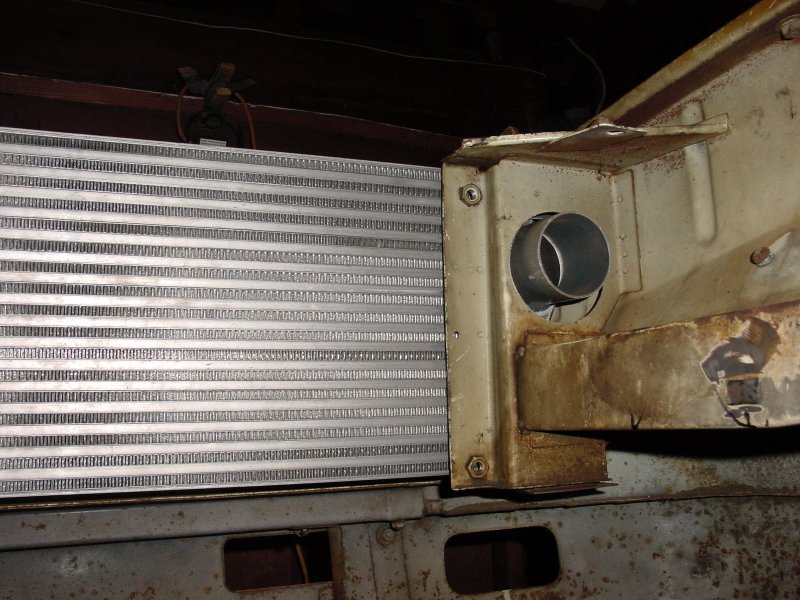
Here are two pictures of the test fits of the intercooler; does it look like Rusty is smiling at the new addition? Fluid Control Products, Inc. http://www.fluidcontrol.net(approve sites) fabricated this unit. I was really pleased with their operation. I sent them a drawing, they quoted it quickly and then delivered a quality assembly in short order at a fraction of the cost of some of the other places I had quote.
 |  | |
| Front Smile | Back View |
| Full Size | Full Size |
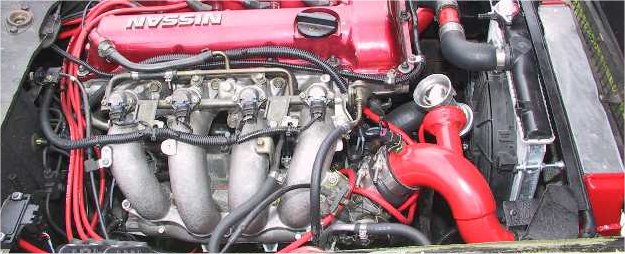
Here is a view of the plumbing coming together. This is the short connection from the intercooler to the throttle body. The funny looking thing is a Blow Off Valve from Blitz. A BOV discharges the surge in pressure when the throttle closes rapidly (typ. during shifts). A friend and fellow Roadster enthusiast has done all of the aluminum welding for me. Without his help, these aluminum welds would be as ugly as my steel welds. Actually, I probably would have had to plumb the whole thing in steel. All of the silicon hoses are from http://www.turbohoses.com(approve sites). They were very helpful with some of the custom sizes/shapes I needed for the radiator. Note that the throttle body has been repositioned on the intake manifold. This gives a direct path from the intercooler to the intake plenum. The stock configuration has the throttle body tilted up at a steep angle, which I wanted to avoid. See the red plumbing as an example. This required a small relief in the body rail, but I think it was really worth the effort (visible in the alternator picture). The last 20% of 25% for the intercooler plumbing is to machine an inlet and outlet to the turbo. I wanted to go the extra yard and machine fresh ones instead of modifying the existing ones. Then the last task will be mounting the intake filter and MAF.
 |  | |
| IP | Red Sample |
| Full Size | Full Size |
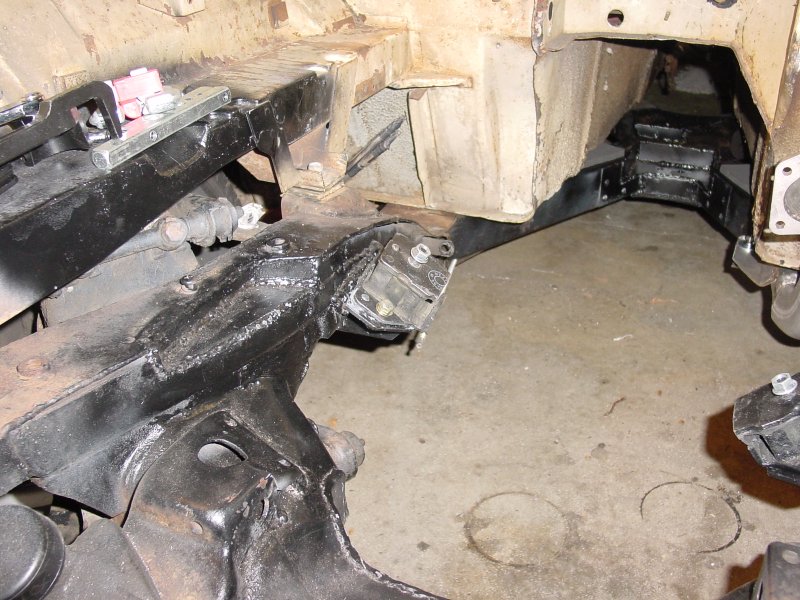
Torque Strut Rear Axle
In order to limit wheel hop, I added a torque strut rear axle from a 2L car. Other benefits included brakes with a chance of working and the 3.7:1 gearing. One unbelievable thing, when I inspected the axle I found a lot of play in one wheel. Normal enough to find some play, just the typical dead axle bearing, right? It seems that the PO cold chiseled (or probably “screw-drivered”) the backing plate so that it could be removed over the bearing. It looks like he was trying to change the slave cylinder. This was apparent by all of the retaining shims being bent and jammed into the slave. The only thing holding the axle in was the plastic/steel seal holder. The moral, check everything when you get a new car or part that someone may have worked on previously.
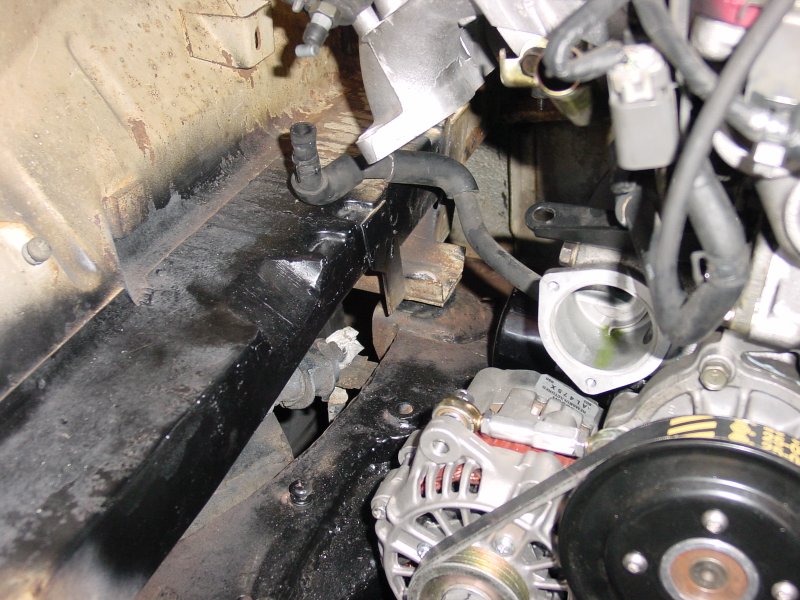
Alternator Clearance Patch and Mounting
Completion of this patch marks the end of the major frame modifications. This clearance provides just enough room for the belt to stretch and be tensioned. I also made a few more minor cuts around the turbo, some not requiring a patch. I removed the lip from the frame in the region of the exhaust and turbo for more clearance. Then I welded, ground and re-welded for a smooth transition. These can be seen in the previous exhaust downpipe images. My first pass at mounting the alternator is a basic “L” bracket with tube nuts attached. This will hold forever, but looks somewhat goofy. It was really easy to trim and position and trim and reposition while I was trying find the correct location for the alternator. I think I will try to machine something nice now that I know where I want it. The tension mechanism is shortened store bought parts from McMasterCarr. http://www.McMasterCarr.com(approve sites)
 |  | |
| Alternator | Throttle Body | |
| Patch | Modifications |
| Full Size | Full Size |
Radiator and Plumbing
Here is a picture of the radiator from Ron Davis Racing http://www.rondavisradiators.com(approve sites). It took many revisions with their sales guys to get the most cooling into the small footprint while keeping the cost reasonable. It is a very nicely crafted piece and should provide plenty of cooling. Hopefully the fan will not be needed to keep temperatures under control. I was a bit disappointed to find that I might not have enough space to build a functional shroud for the fan but those are the kinds of limitations I have found this kind of project faces almost daily. Now that the final resting places of all of the parts are being locked down, it turns out that I probably will have enough room-a project for a rainy day. A major effort will go into the coolant plumbing, as this is one of the last items to be solved.
Radiator
Simple Electric Hoist
I mentioned in my last write up that I spend an inordinate amount of time raising and lowering the body of the car. I realized that I was wasting a lot of my work time doing this task. This was because I was using an engine hoist for this job. So I splurged and purchased a pair of 880-pound hoists from the cheap man’s paradise http://www.harborfreight.com(approve sites). These units were $75 each instead of the regular $150 (and still are as of this writing). They move very fast and therefore make delicate positioning difficult, but it is possible to lower the body onto the frame with some care. I ensure that one end of the body is supported by the wood stilts when I am moving the other end, as the body could tip side to side due to the way I am holding it. This is due to my garage door limiting where I could mount the front hoist. I put a 2x4 under the body rails in the front, the back hoist attaches to the outer seat belt holes.
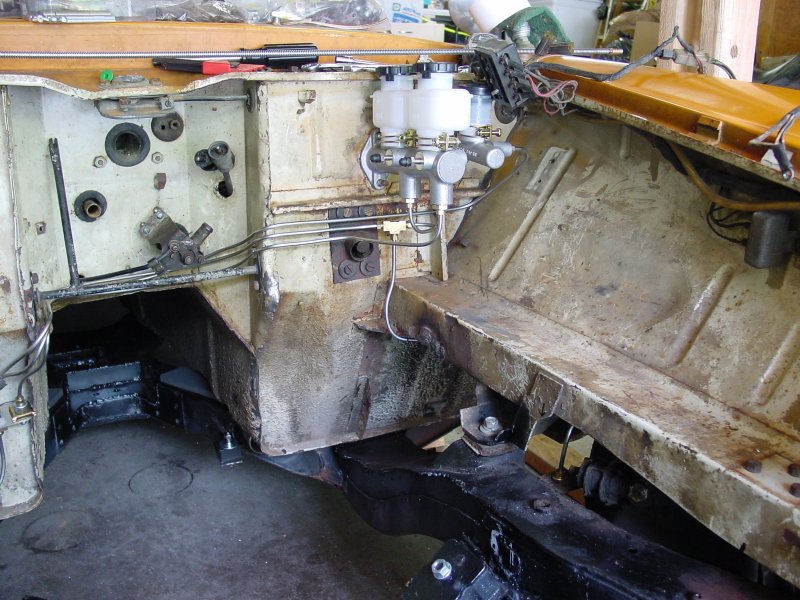
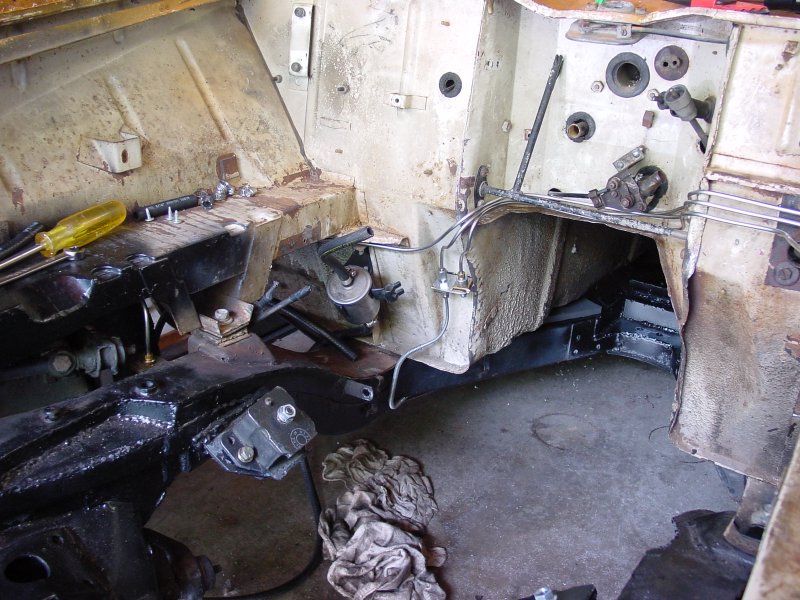
Brake, Clutch Masters and Plumbing
Over the last few days, I plumbed the brakes, clutch and fuel lines. This was a big task made more difficult by cheap tools and stainless steel line. The stainless line beat up the cheap double flaring tool I tried to use. The bending tool just completed the job-it will still bend 3/16” brake line, but not the 5/16” fuel line…Buy the right thing first, don’t bother with the $30 kits out there, go right to Snap-On and get the $100 flare tool, even if you are only going to do a few.
 |  | |
| Brake & Clutch | Lines | |
| Plumbing |
| Full Size | Full Size |
That is where I am as of the end of April, here’s to finishing in time to go to Shasta! TR