
SR20DET Swap
by Travis Rowe
Hello Roadster Enthusiasts! Here is a bit of the story of how and why I am installing a 1993 Nissan SR20DET (2000cc Dual-cam Electronic Turbo) engine and transmission in my 1966 Roadster.
Before purchasing the ’66 (that I call “Rusty”), I was driving a 1970 1600 to work and for odds and ends. The car ran really well, but I decided I wanted something faster. I also thought that adding more reliability (although the car never let me down) would be great. I looked around and saw Michael Spreadbury’s SR20DE conversion. http://www.zparts.com/showcase/msSR20swap1/intro.html
This looked like a great way to build an awesome commuter! And if a NA (Normally Aspirated) SR20 could be installed, why not go a bit nuts and put the turbo version in? If 150HP is good, isn’t 200 great? I asked Michael lots and lots of questions and decided to get a JDM motor. I was still unsure if I wanted to get a NA or turbo motor at this time, but as it turned out, Michael only had a ’93 turbo front clip at this time and I did not want to trust anyone else (eBay sellers, etc.) with the big purchase. I purchased a complete front clip for a very competitive price and Ralph Kenyon (Michael’s partner) ran the engine for me and delivered it. Let the fun begin!
The old drive train as can be seen in these first three pictures, the engine and ancillaries were really neglected and rusty. I left Kroil (2 times better than WD-40) on the middle two cylinders for many days and still could not turn the engine…You can see in the picture that the valves were open in these two. The water pump housing crumbled when I took the hoses off. I’m not sure what chemical process occurred in the clutch reservoir!
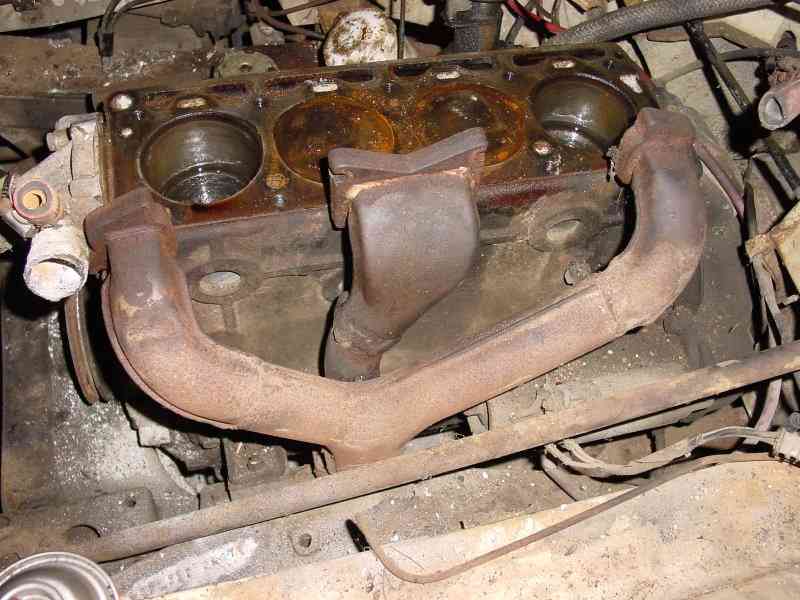 |  | 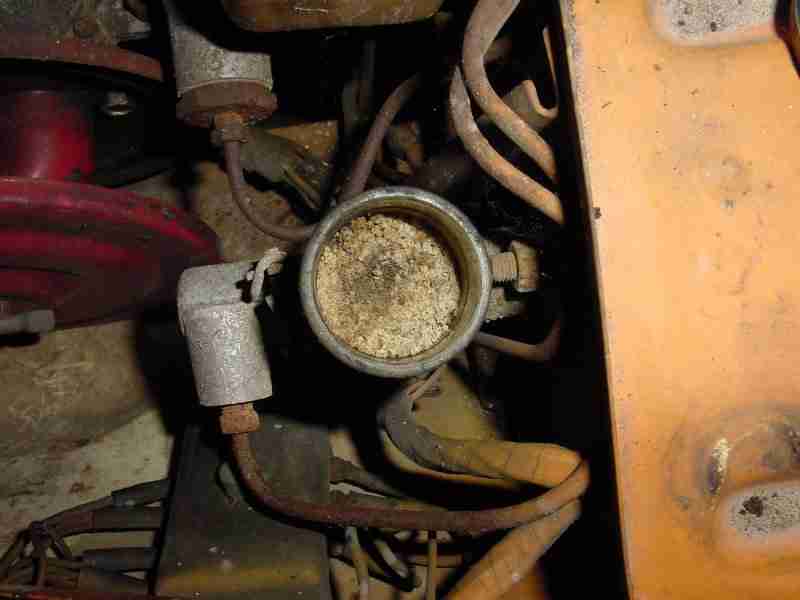 |
| Rusty Pistons | Bottom of Head | Old M/C |
| Full Size | Full Size | Full Size |
The New Drive Train
The front clip has everything functional to the car from the transmission forward. The cool thing about buying a front clip is that you get everything you need and more. You can also start the engine by simply turning the key after adding a fuel pump, gas and a battery to make sure what you are buying is good! Ralph did all of this for me and we were both assured that what I was paying for was good stuff. Luckily not everything in the picture has to be stuffed into the roadster.
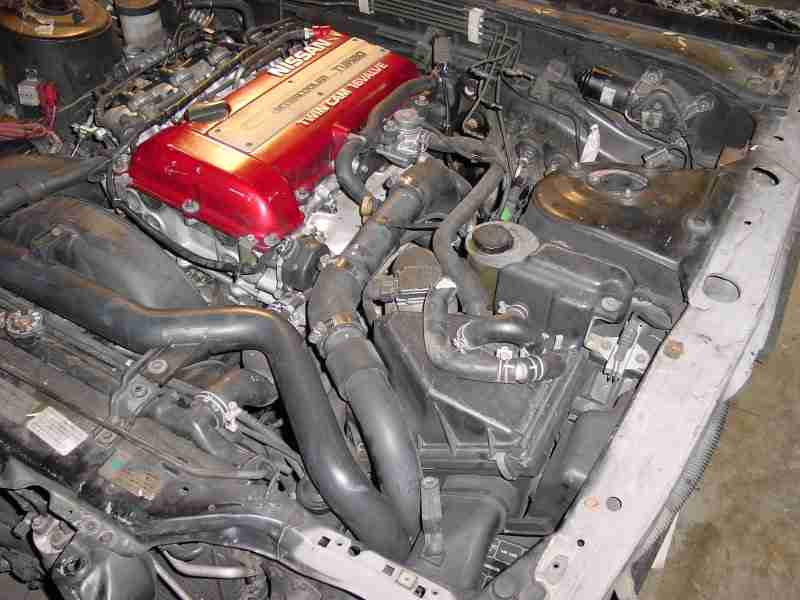
Front Motor Clip
After tearing the front clip apart and recycling everything I did not need from both the clip and the roadster drive train (Keep your roadster driveshaft), I started modifying the roadster frame. I rushed my work, as I am eager to get the project finished and I have limited time to work, and in places it really shows. Also, my welding skills have improved (a lot) as I have progressed. Maybe I will do another conversion some day that I can be really proud of when I am done. Before I could modify the frame, I had to get the body of the car off of it.
Here is a picture of the body on stilts (My wife’s parking spot). The stilts allow for easy movement of the body to work on the frame. The tops of the stilts are “sister-ed” to the garage rafters, the bottom tied together as shown. If I were to do this again, I would buy a second hoist or build one into the garage so that I would not have to continually be taking the engine off the hoist to move the body up and down.
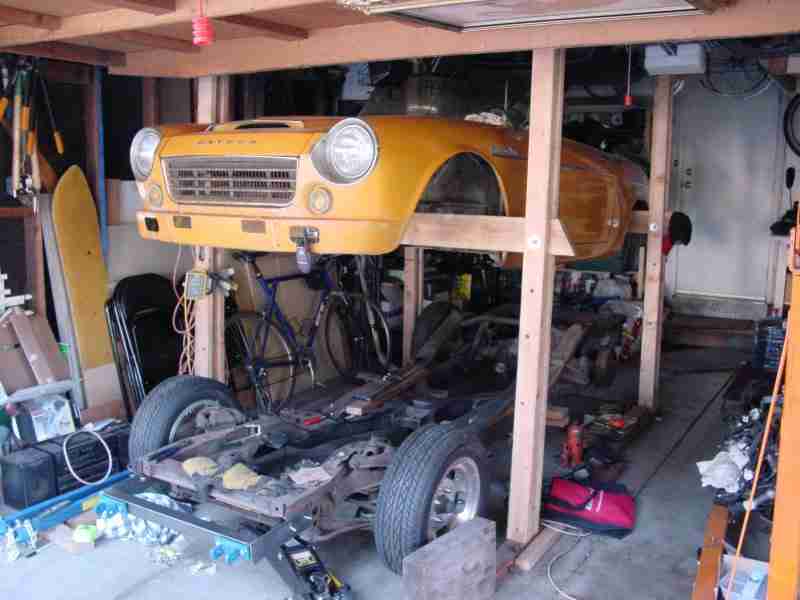 | 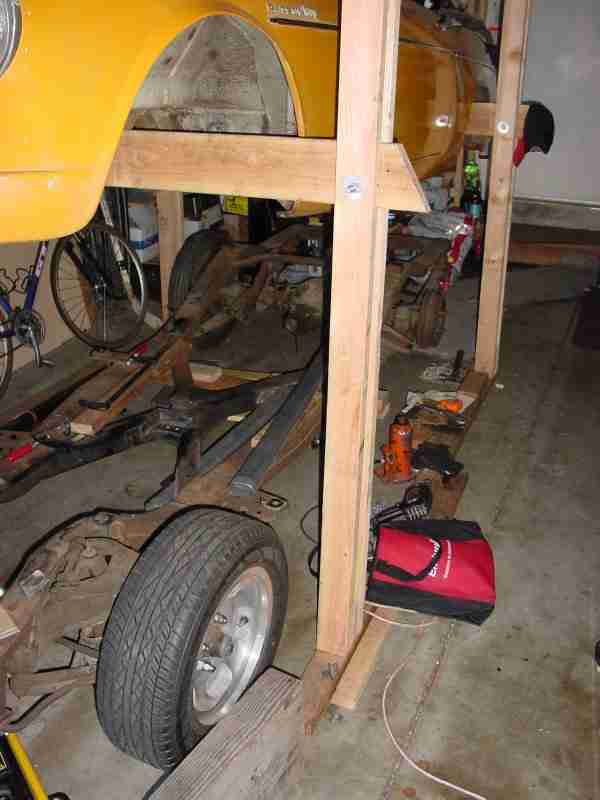 | 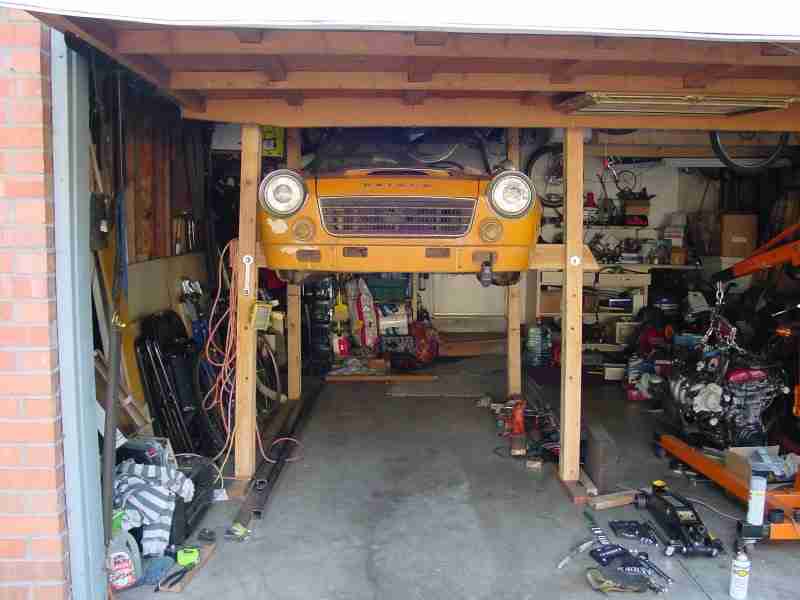 |
| Lift Setup | Frame Under Body | Body on Stilts |
| Full Size | .Full Size. | Full Size |
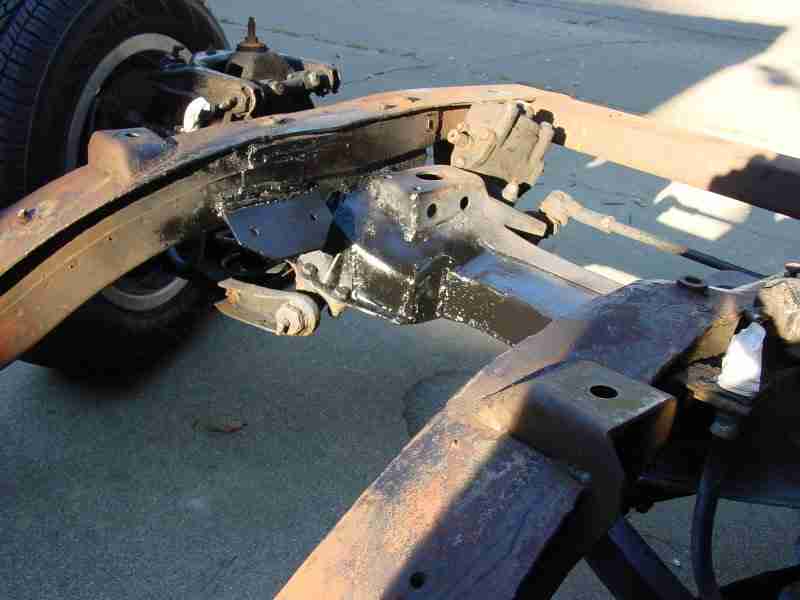
Frame Modifications
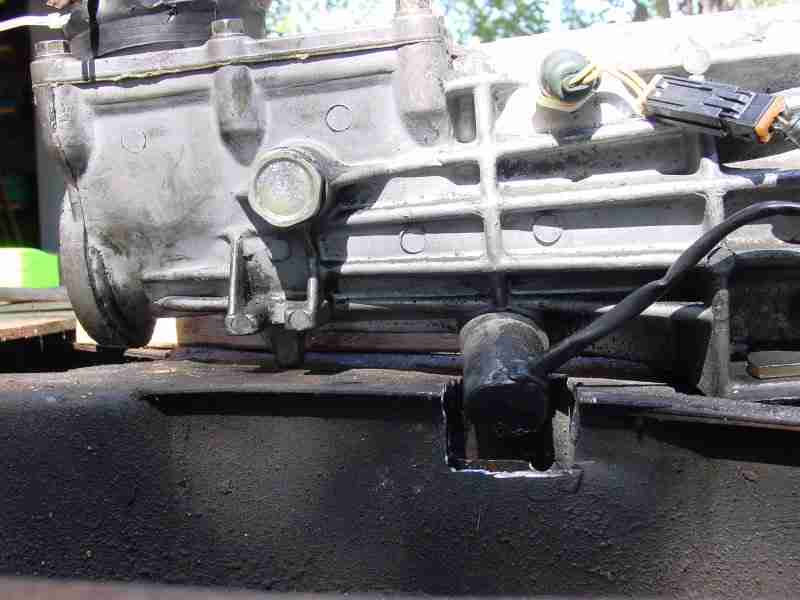
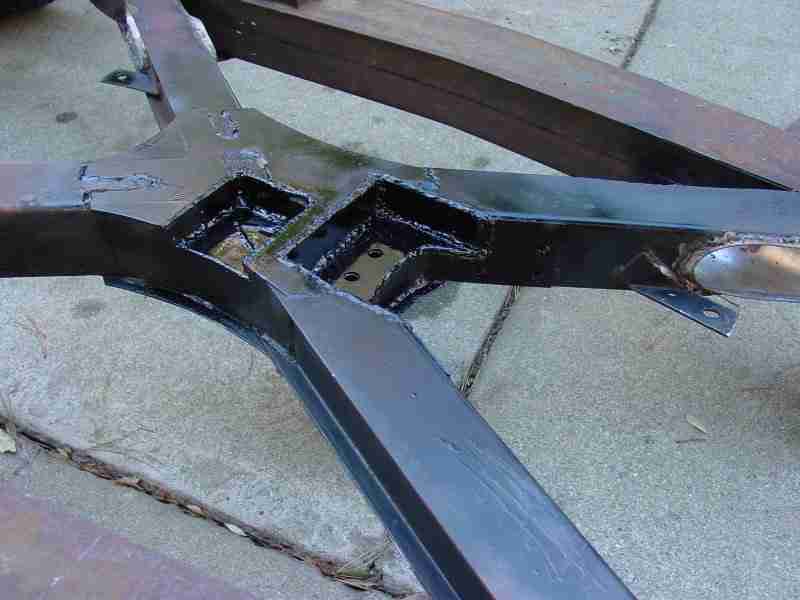
Here are some pictures of the front cross member modification to allow clearance for the oil pan. You can also see the modification to the block (that I think must have been used on the assembly line?) for clearance to the alternator/water pump belt. Also, the stock mount has been removed in the first images and replaced by the last. Note: the beginning of the alternator clearance cut.
 | 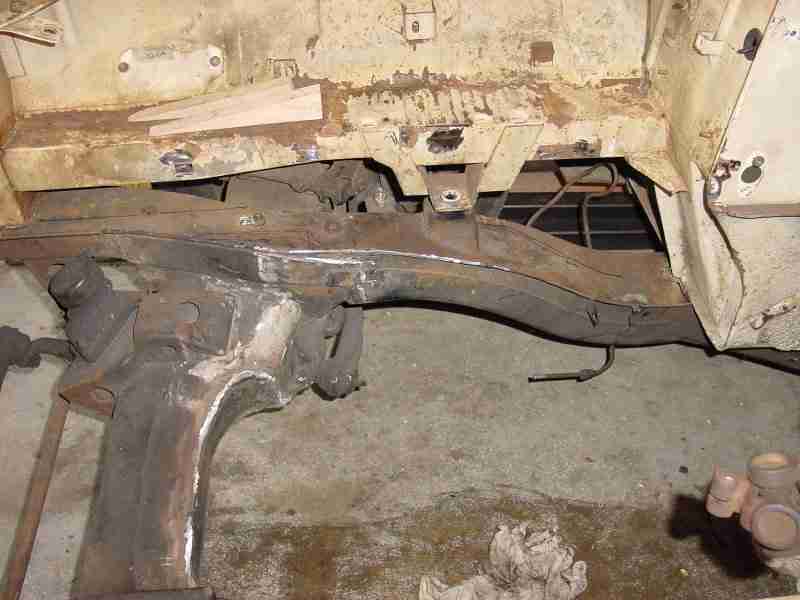 | 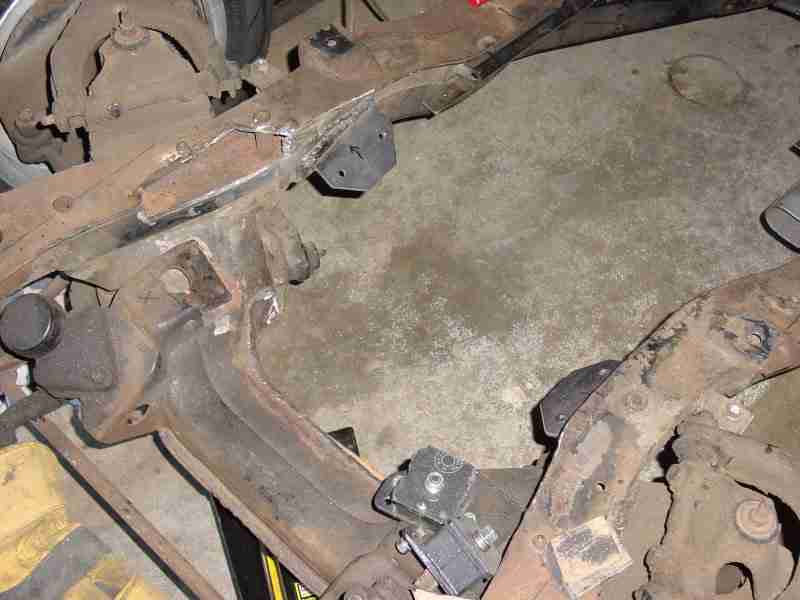 |
| Cross Member | Motor Mounts | Motor Mounts |
| Modifications | Modifications | Installed |
| Full Size | .Full Size. | Full Size |
Here are some pictures of the modifications to the tranny area and the last shows were the shifter would come through the cabin.
 | 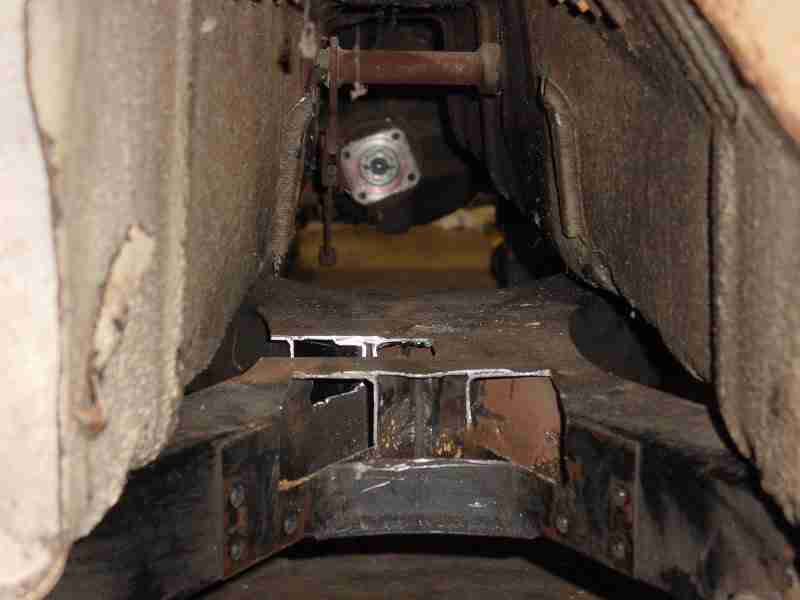 |  |
| Tranny Test | Tranny Tunnel | Shifter |
| Fitting | Modifications | Position |
| Full Size | .Full Size. | Full Size |
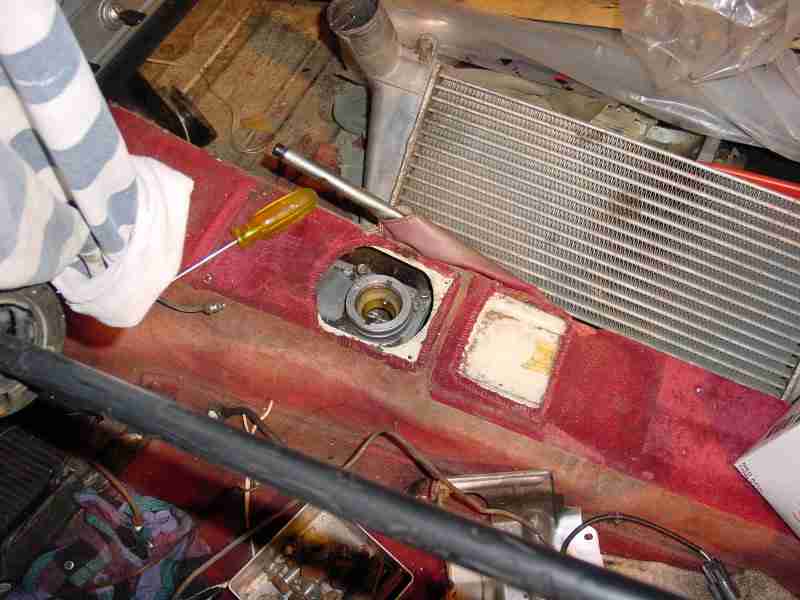
Here’s a picture of the tranny area complete except for paint. Also note the much enlarged exhaust passage. The next picture is the tow bar I made to haul the frame around, after a bit of trimming, it will be useful for towing the complete car. The third is the internal fuel pump modified gas tank (FrankenTank). I followed Michael’s lead on this one. It turned out really nice; lots of fuel should come out of that big tube when it is wired.
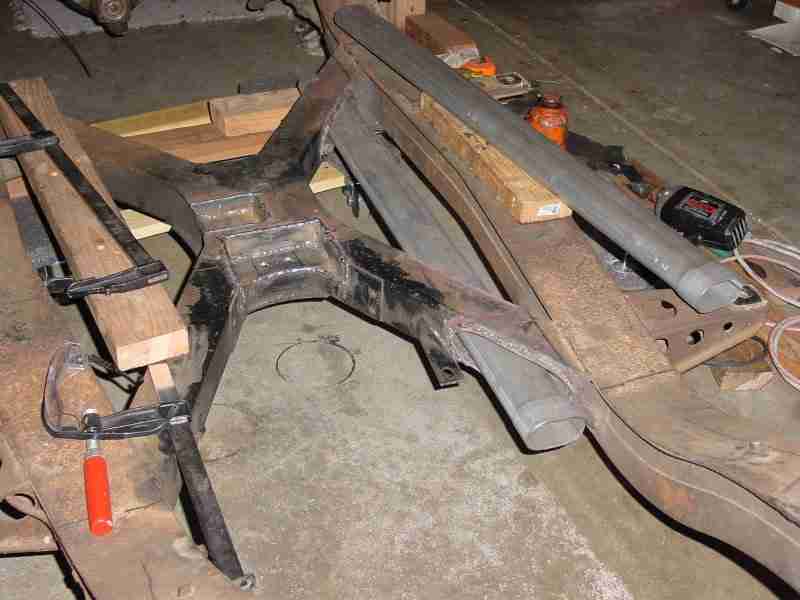 | 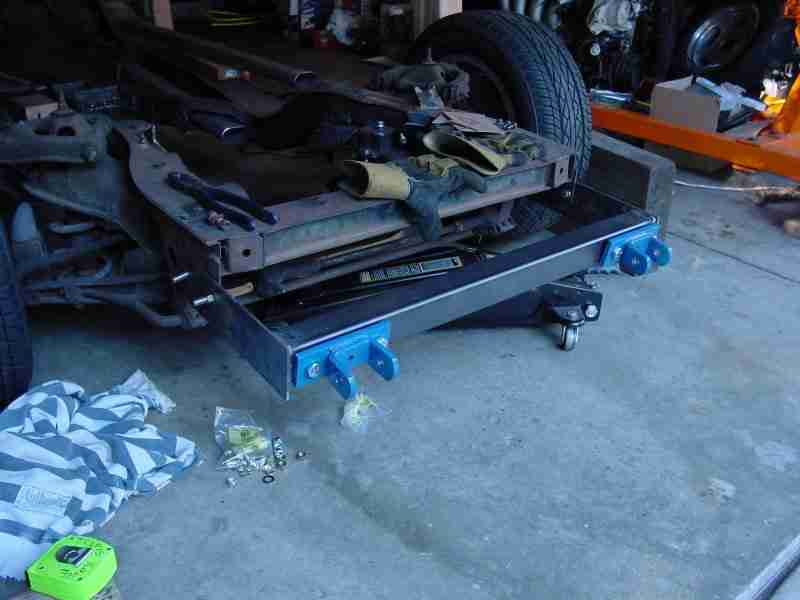 | 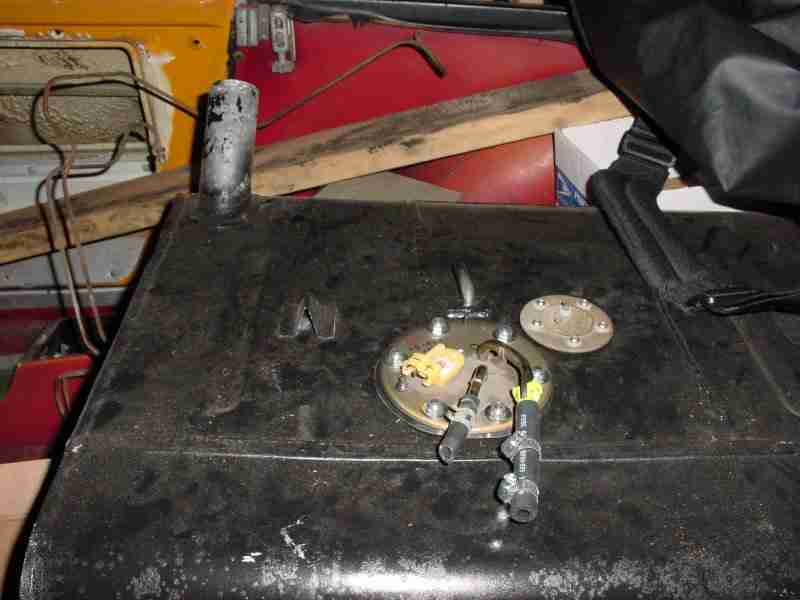 |
| Frame | Tow Bar | Fuel Tank |
| Modifications | Mounts | Modifications |
| Full Size | .Full Size. | Full Size |
Here is the tranny and engine area after a good cleaning and some primer and paint. I still have a bit of work to do in finalizing the alternator clearance patch.
 | 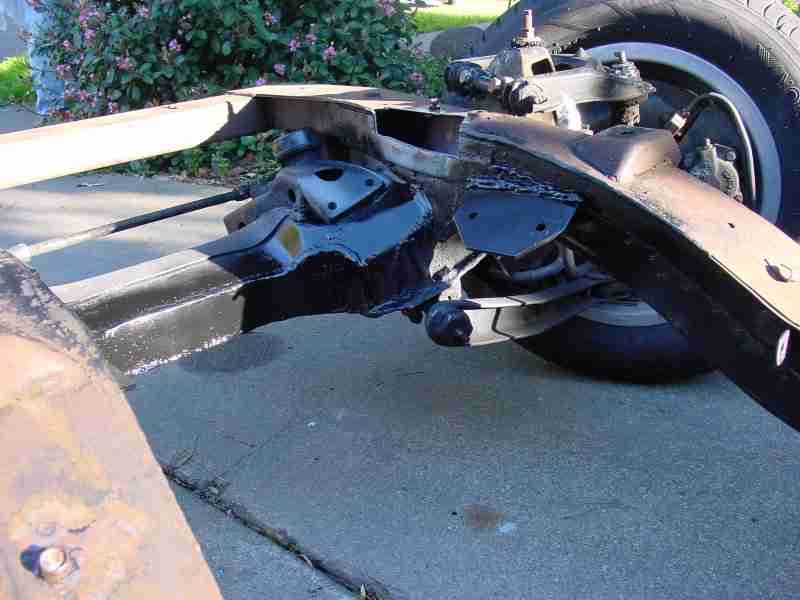 |  |
| Tranny Area | Engine Area | Engine Area |
| Modifications | Modifications | Modifications |
| Full Size | .Full Size. | Full Size |
Here are some pictures of how I am planning on mounting the turbo. You can see just how close the steering column is. The manifold is from JGS Tools. http://www.jgstools.com/turbo(approve sites) The manifold will allow me to mount the turbo closer to the block whereas the stock unit placed the turbo and steering column in the same place. As can be seen in the last picture, I am going to have to change the dipstick tube, too.
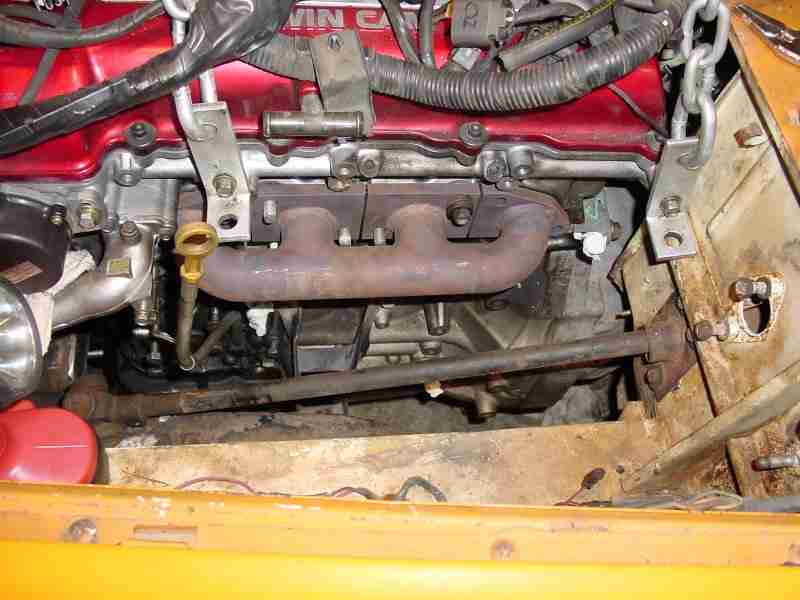 | 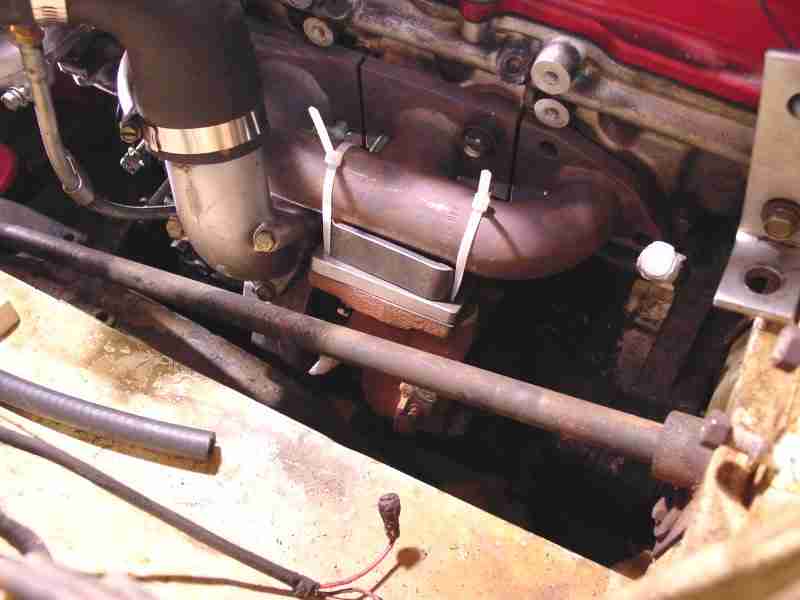 | 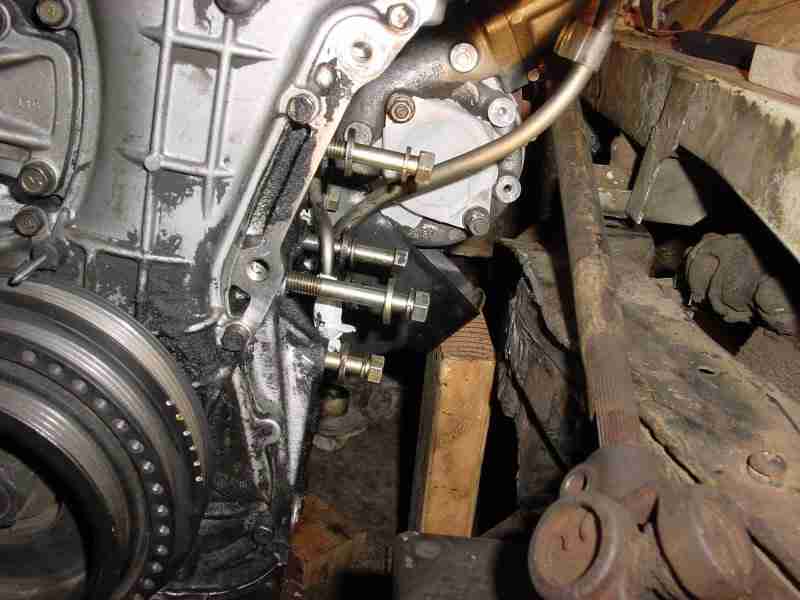 |
| Turbo | Turbo | Turbo |
| Mounting | Mounting | Mounting |
| Full Size | .Full Size. | Full Size |
This is pretty much where I am as of Feb 2, 2003. I will add more as I progress. I hope you enjoyed this, feel free to ask any questions; I will try to answer them quickly (My user name on the 311s.org forum is TR).