
Published 2009
Gas Tank Removal
by Dave Kaplan, Sid Raper, & Andy Conner
Dave Kaplan explains "I just dropped my gas tank 2 days ago. I have to say I was shocked...and a little scared, at how easy it was! It took all of about 10 minutes once the fuel was drained out.
Here's a step by step for you:
- Drain/siphon out gas.
- Disconnect supply and return lines at the tank. Early cars have no return line.
- Loosen hose clamps on fuel fill line in trunk. No need to remove it.
- Loosen hose clamps on vent line in trunk and remove line.
- Unscrew access plate in trunk and disconnect the fuel level sender lines. (If the screws are stripped or the plate is painted shut, don't worry. Leave it alone until step 7)
- Remove forward bolt on each tank strap and slowly drop the tank down. It only weighs about 10 pounds. As you pull it down, the fuel fill line in the trunk will separate from the tank.
- If you couldn't get to the fuel sender wires from the trunk, you will be able to now with the tank free from the straps.
- Remove the straps. The mounting bolts on the rear of the strap have a bent end that simply hook into the underside of the car. That's right, in reality only two bolts threaded into the body hold this tank in!!!
- After washing the tank out with soapy water, take it to a radiator repair shop and have them boil it out to get 40 years of crud out.
- Sid adds the following: This should apply to all years of Roadsters. With the tank out, remove the straps and J bolts at the rear. Measure the diameter of the J hooks and drill holes in the rear frame for them to hook into. When installing the straps, put the J hooks into the frame. This removes most of the stress on the trunk floor and prevents the cracks that are all to common." Cracked trunk floors is pretty common problem through-out all years.
- Reinstall in the reverse order of removal.
Andy Conner supplied the photo pictorial:
 |  |  |
| Drain Plug | Supply Return | Trunk Clamps |
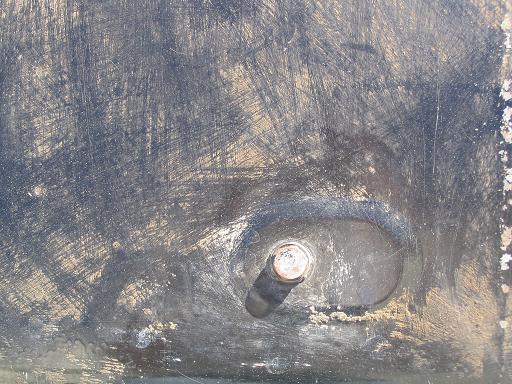
Drain Plug Picture
The tank has a drain plug at the bottom which can be used to drain any remaining fuel from the tank. Mine was a bolt and I used a 19mm socket to remove it, but the original drain plug calls for an allen wrench.
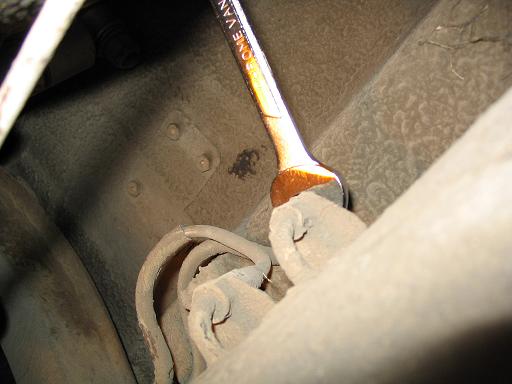
Supply Return Picture
Drain/siphon out gas. Disconnect supply and return lines at the tank. There are two bolts, one for each line. I used a 15mm box wrench to get them loose.
Trunk Clamps Picture
Loosen hose clamps on fuel fill line in trunk. No need to remove it. Loosen hose clamps on vent line in trunk and remove line. You can see the two silver hose clamps. Use a #2 philips head screwdriver and loosen them all the way.
 |  |  |
| Panel Off | Sending Unit | Front Bolt |
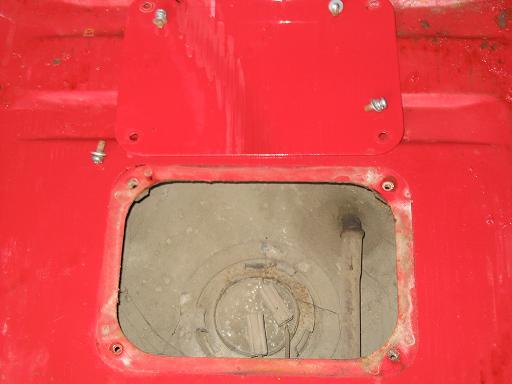
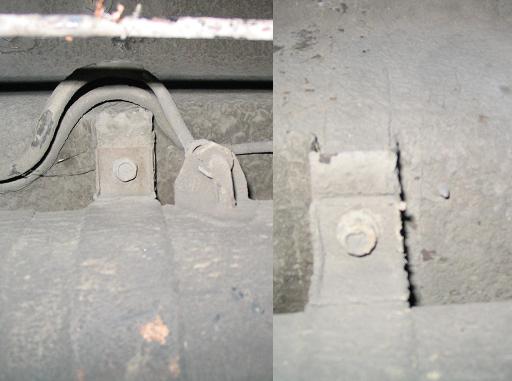
Panel Off Picture
Unscrew access plate in trunk and disconnect the fuel level sender lines. (If the screws are stripped or the plate is painted shut, don't worry. Leave it alone until step 7) Four screws, one at each corner, also a #2 philips head.
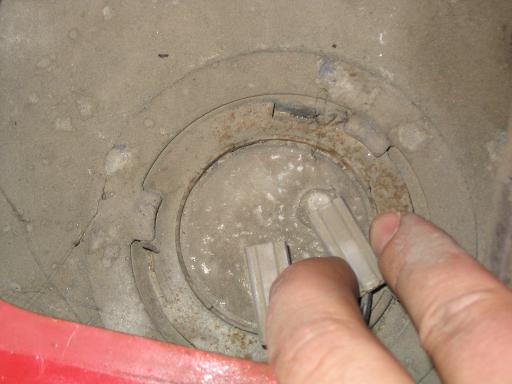
Sending Unit Picture
The fuel level sender lines just slide backwards off each post on the gas tank.
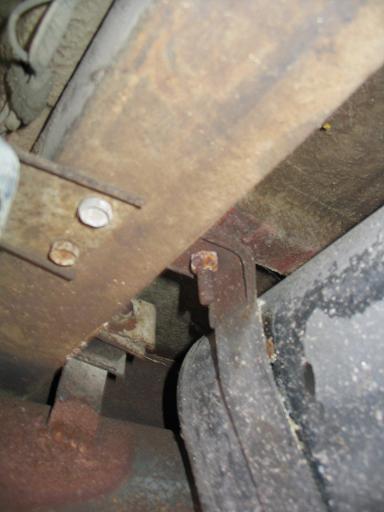
Front Bolt Picture
Remove forward bolt on each tank strap and slowly drop the tank down. It only weighs about 10 pounds. As you pull it down, the fuel fill line in the trunk will separate from the tank. The picture shows both bolts. Both are located towards the front of the gas tank: one is by the supply and return lines and there is one on the opposite side. I used a 13mm socket with a long extension.
 |  |  |
| J Bolt | Tank | J Bolt |
| Dropped | Relocated |
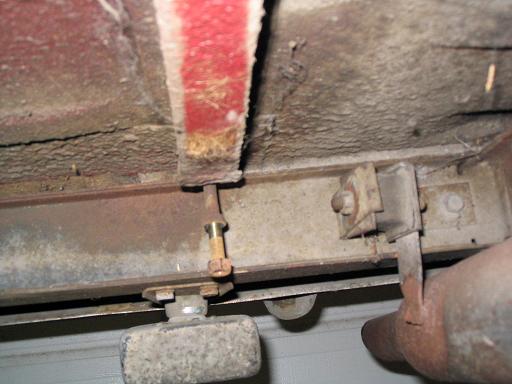
J Bolt Picture
If you couldn't get to the fuel sender wires from the trunk, you will be able to now with the tank free from the straps. Remove the straps. The mounting bolts on the rear of the strap have a bent end that simply hook into the underside of the car. That's right, in reality only two bolts threaded into the body hold this tank in!!!
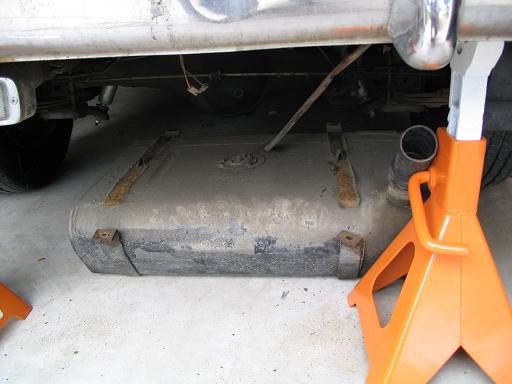
Tank Dropped Picture
I used a 13mm socket to remove the nuts on the j-bolts, then the tank came down and so did the j-bolts. There is one on each side of the tank, both are located at the rear of the car. Wiggle the tank back and forth and get the rubber tube free from the trunk (it will remain attached to the tank), pull the hose clamps off entirely, and the tank will be free.
J Bolt Relocated Picture
A tip from Sid Raper: I have another step to add. This should apply to all years of Roadsters. With the tank out, remove the straps and J bolts at the rear. Measure the diameter of the J hooks and drill holes in the rear frame for them to hook into. When installing the straps, put the J hooks into the frame. This removes most of the stress on the trunk floor and prevents the cracks that are all to common. This picture shows the j-bolt hanging from the trunk supports and how easily it could be relocated to hang from the much more solid frame a bit further back.
This procedure is pretty much the same for the early and late cars. The early cars have no return fuel line being the only major difference. Thanks for sharing guys.