
Published 2018
Early Style Datsun Roadster Choke Cable Rebuild with photos
by RobertD
One of the branches of my choke cables was too short to fully disengage the carb so I decided to rebuild it. Here's how I did it for $5.99 and a couple hours of work.
My assembly ('66 1600, #3456) is different than the cable rebuild for the later cars on the TechWiki http://www.311s.org/pmwiki-311/pmwiki.p ... ChokeCable. For an excellent explanation with photos of the choke function, look here: http://www.311s.org/pmwiki-311/pmwiki.p ... sNewSuTech
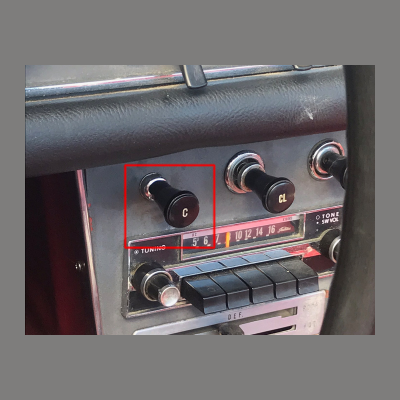
I have the cable type that holds its position when you push/pull�no knob twisting necessary. I'm pretty sure these are the low windshield cars with Hitachi SUs where the knob has a "C" on it.
1. REMOVE THE CABLE AND ASSEMBLY
A. From beneath the hood, loosen the screws that retain the cables and withdraw the cables from the choke levers.
B. Working from just above the radio console, loosen the set screw that holds the knob to the choke assembly and set aside. Remove the decorative nut that holds the assembly in place. Reach behind the radio console and remove the assembly. It's pretty tight so note the routing of the cable around the heater snorkel and through the grommet and firewall before removal. Then pull the cable through the grommet.
2. DISSASEMBLE THE CABLE OPERATING ASSEMBLY
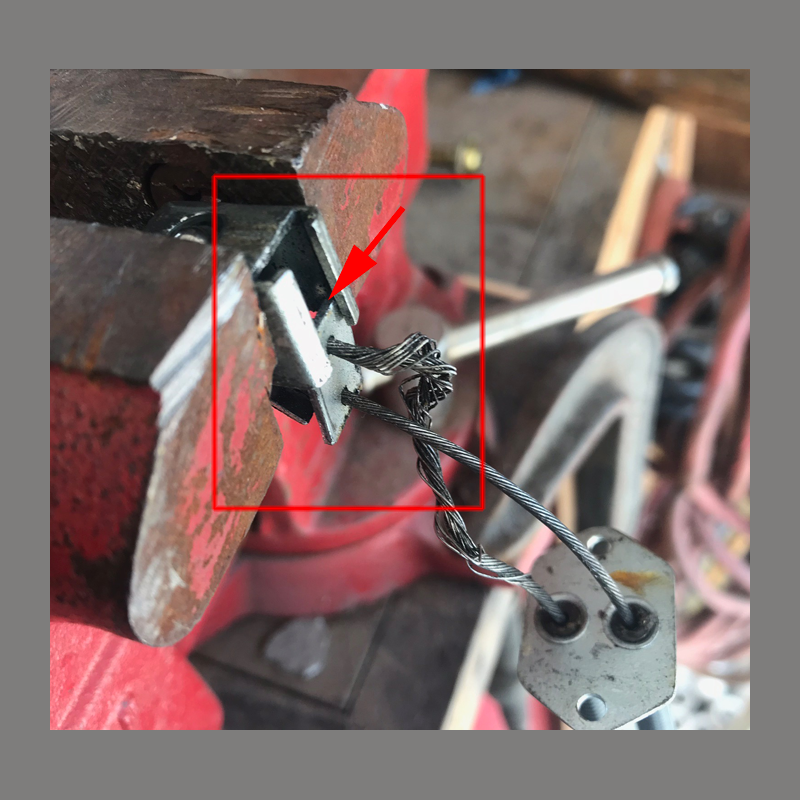
The Operating Assembly consists of a plate that holds the cables and a clever ratchet that employs two sprung ball bearings which engage in holes laterally arranged on a cage. This allows you to push or pull the choke to the desired position for cold starts. As you can see, the problem with my cable was immediately apparent.

A. Remove the tiny nuts that hold the assembly together and remove the "ball bearing/anchor plate" sub-assembly.
B. Grip the ball bearing/anchor plate sub-assembly in a vise and drift out the retainer plate that holds the cable anchors. I used a small chisel and helped it along with a couple light taps with a tap hammer. Be careful not to distort the metal and try not to disturb the sprung ball bearings. The metal is pretty soft, so if you do bend it slightly, you can reshape it with pliers prior to reassembly.
C. Now you will be able to withdraw the old cables
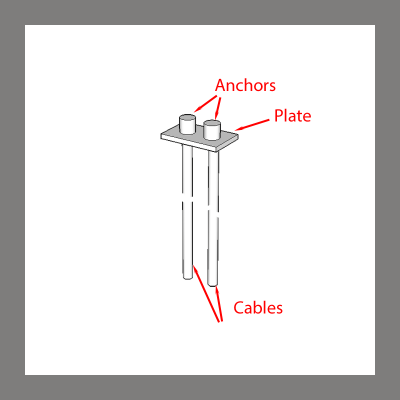
D. I neglected to take a photo of the plate that holds the anchor, so this drawing will have to suffice. But this is how the anchor plate works. There is a barrel shaped anchor on each cable. When you pull the choke knob out the cables are pulled in turn pulling the levers that richen the mixture at the carbs. And when you push the knob back toward the console, the anchors are pushed forward leaning the mixture and ultimately disengaging the chokes entirely.
REPLACE THE CABLE(S)
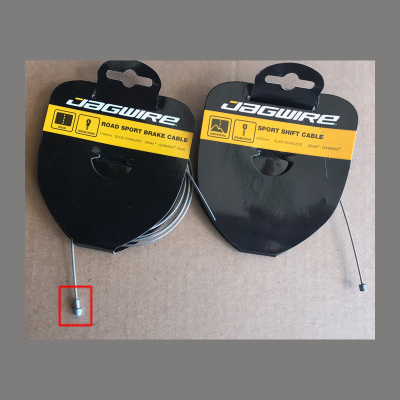
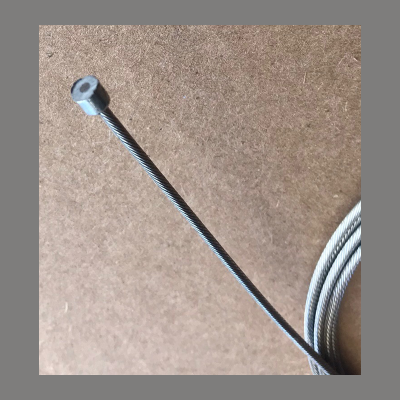
A. Now make a trip to the local bicycle shop and purchase one or two Road Sport Brake cables with SRAM/Shimano heads. Don't worry, the bicycle shop will know what you are looking for. I used a JAGWIRE Slick Stainless Steal cable because of it's cable stiffness. You may be tempted to use a derailleur cable because of the small anchor as shown on the right, but I don't recommend it. The brake cable is much stiffer which is important since the cable needs to be pulled/and pushed.
Philosophically, I only replace parts I absolutely must. Since one of my cables was OK, I decided to keep it in service. You, may want to replace both so they will be shiny. If you want, you can also replace cable housings for a few dollars more. Cable housings come in all kinds of colors these days including the original black. Since my housings were serviceable, I reused them.
Here is the anchor type I used.
B. Now you are going to adapt the cable anchor. The SRAM/Shimano anchor is lightbulb shaped and too big for the ball bearing/anchor plate sub-assembly. Use a really sharp pair of hardened diagonal or linesman pliers to remove the upper portion of the light bulb leaving only the barrel. I'm a fan of Channel Lock electricians tools since the discount type aren't nearly as hard and sharp.

Clean up the adapted anchor with a grinder or file.
CLEAN, REASSEMBLE, LUBRICATE AND INSTALL
A. Clean everything with the solvent of your choice. I used brake cleaner.
B. Thread your cables through the plate per the photo in 2D and then reassemble ball bearing/plate sub-assembly in the cage. Put a small amount o white litthium grease in the cage for a smooth operation.
C. Coat the bare cables with a light dusting of silicon lubricant (or some such) and thread them through the cable housings. Cut them about three inches longer than the housing.
D. Installation is the reverse of REMOVAL.
E. Enjoy smooth, cold starts!
NOTES Some people recommend soldering the ends of the cables to keep them from fraying, but i thought that was a little iffy with stainless steel so I just wrapped them with tape. I think bicycle shops sell little thingies to prevent cable fray, but I hadn't thought to buy them.
Make sure that when you reinstall the cables to the choke levers, their is some slack when the choke is fully pushed in.