
Published 2018
Flasher Can Conversion for use with LED's
Post by Jdflyer » 04 Feb 2018 04:57 pm
I found myself in need of having to drive Rusty the other evening, during rush hour (something that I always avoid) and found myself feeling particularly vulnerable. Usually the uniqueness of the vehicle helps bring it to peoples attention, but during rush hour I had many people start to brake behind me significantly after I started my own braking. I decided to make the switch to brighter LEDs to help people notice when I apply the brake lights. Conversely the turn signals no longer would flash after the conversion due to the lower amperage that they use.
The LED flasher cans have been used by others, but I didn't want to go through the process of fabricating new brackets for them or spending more on the ones they provide.
This is a quick tutorial on how I converted my old flasher cans to allow them to be used with LED lights so both the hazards and turn signals work.
Supplies Needed
- LED Flasher, CEC EF32RLNP (Amazon)
- 4 1157 JDM ASTAR Extremely Bright Brilliant Red (Amazon)
- 2 1157 LUYED Super Bright Amber (Amazon)
- 1.25" PVC pipe (Home Depot)
- 0.5" PVC pipe coupler (Home Depot)
- 1.5" Heat Shrink Tubing (Fry's Electronics)
- Conductive Silver Epoxy (Expensive) (Fry's Electronics)OR
- 18-22gauge Spade Terminal [AND]
- 1/8" Heat Shrink Tubing (Fry's Electronics)
Tools Needed
- 1/4" flat screwdriver
- Brass Drift
- Heat gun
- 3/32 Drill bit
- Wire Crimper, Wire Cutter
Procedure
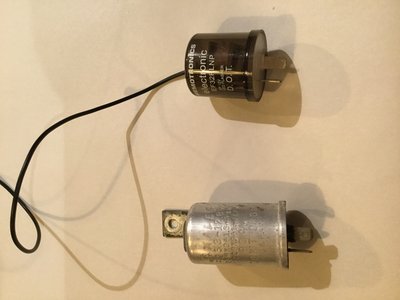
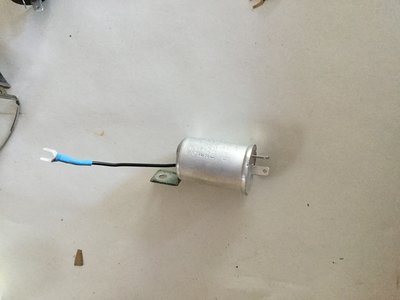
Disassemble original flasher using Screw driver to push back three crimped areas of the can. Remove innards and discard. Insert brass drift into can and use it to enlarge opening just a bit to fit new flasher components. Clip wire terminal off new flasher to half of its original length. Using Screwdriver insert blade into edge of new flasher to separate the plastic case from the base and open up new flasher.
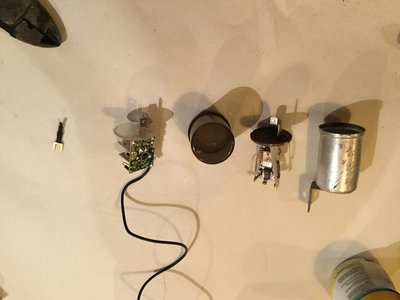
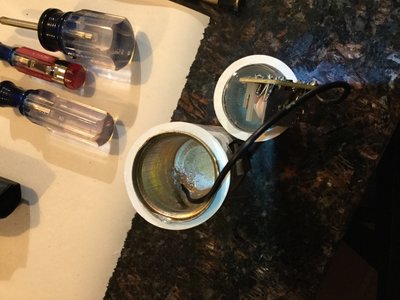
Put 1.5" heat shrink around PVC coupler and shrink to shape. PVC coupler is used as a mold to approximate internal diameter of the original flasher can. Test fit heat shrink in flasher can and adjust as necessary Strip end of lose wire from new flasher. Thread wire through the shrunken heat shrink and using the Conductive Silver Epoxy attach to the bottom of the inside of the can. (Note cure time at room temp is 96 hours)
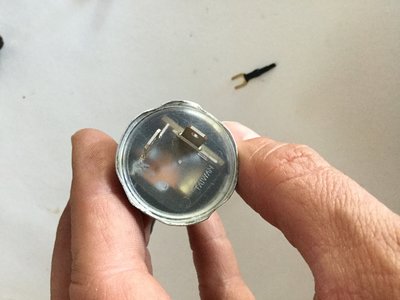
Reassemble new can and re-bend the aluminum to retain new innards.
Verify there is no conductivity between the flasher can and the X and L terminals of the flasher. (This is why the heat shrink was later installed and not shown in the pictures)
Alternatively you can drill a 3/32 hole in the top of the original can thread the wire through and add a spade to the top instead of using the conductive epoxy.
Hope this helps someone! 1970 SPL 311-29311 Phoenix, AZ Top