
Published 2007 Updated 2018
HOW TO REPLACE A REAR MAIN SEAL 1600/Stroker
by Gary Yasaki
Reprinted with the author's permission for all to read
I recently had to replace the rear main seal while in the process of building a stroker. I ordered a set of seals from Dean at Datsun Parts but when it came time to install them I was sure there was some mistake because of the crazy size. I called Dean and he talked me through the process so this is what he instructed me along with what I discovered that worked out even better.
- Soak the seals in motor oil for 24 hours. I would recommend going through an assembly with the bearing shells and all of the caps torqued down but without the rear seal to make sure everything spins freely prior to the seal install.
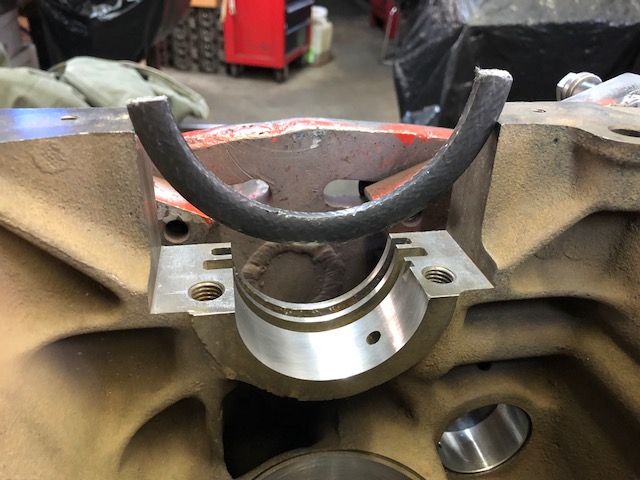
- I progressively pushed the seal in by hand using a large socket. The seal ends will extend way beyond the block and rear cap mating surface so trim them with a razor blade so 1/64” extends above the surface. When I did the rear bearing cap I used a carpenter’s quick clamp with hard rubber jaws to help push the seal in place.
- Make sure the bearings are in the #1 and #5 block and caps, lube the seals and bearing surfaces and progressively torque down the #1 and number 5 caps to spec. Don’t install the two short rectangular seals. My crank was locked solid because the rear seal was so tight.
- Remove the caps, pull the crank and examine the seal. Mine had mushroomed out and created a nice wide sealing surface. I took a razor blade and cleaned up any extra that was smashed onto the bearing cap mating surfaces.
- I wasn’t sure how to get more clearance so overnight I came up with the idea of using .005 brass shim stock and cutting it with a utility knife into strips the width of the journal and length to the circumference of the bearing. A utility knife and straight edge will give you a strip that is not distorted like hand shears. I curved it around the journal with no overlap and used transparent tape to hold the ends to each other. I initially did this with one .005 shim strip but ended up doubling it up to two .005s so the journal is now .020 over (top and bottom .010). Stagger the seams. I would use two .005 strips because I think it is easier to bend around the journal that way as opposed to one .010.
- Reassemble the crank and two bearing caps and torque to spec again. Take it apart one more time, remove the shims and check the seal to clean up any excess.
- Do the final assembly with generous break in lube and obviously use all of the bearing caps this time. Dean recommended using Permatex #80019 on the two rectangular straight gaskets that go along the sides of the rear bearing cap. I also used a bit of the sealer across the mating surface so there was a continuous line of seals and sealant. He mentioned not getting too much in the channel because if air is trapped the straight seal won’t stay down and will pop up from the air bubble below. My crank now moved with some medium effort and is fairly tight but I’m going with that as I’m afraid it would seep oil if the clearance were greater. I’m hoping it loosens up a bit more as it runs in. Dean said it’s a pain the the butt and he’s right so good luck.
Gary Yasaki