Page 1 of 4
Spriso's 1966 Datsun Roadster Project
Posted: Mon Nov 12, 2007 7:19 pm
by spriso
After years of it sitting forgotten in the corner of the shop, I am finally making progress on my roadster!
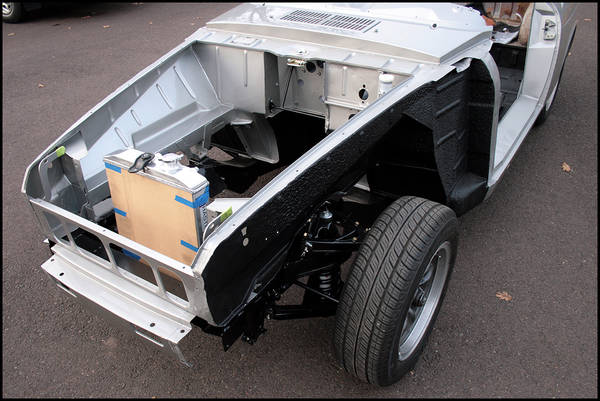
Over the last few weeks I modified the frame for a SR20DE swap, had it powder coated, and reassembled it with all new parts and hardware.
I then painted the underside of the body with a paintbrush (not near as much fun as it sounds!) and put the body onto the frame last weekend.
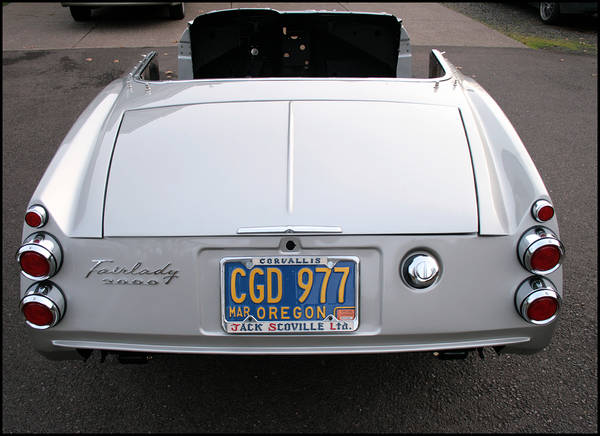
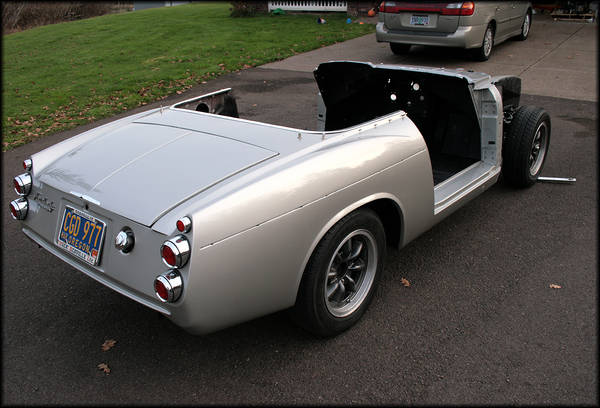
These shots are from yesterday when I rolled it out of the garage for the first timeâ€â€pretty cool stuff.
Sadly, this project is going on the backburner for a little while we work on James’ SR20DET project, but it is staying in the main garage so I can work on it in the evenings if I choose...
Here are a few photos:
Of course, I will update this thread as we go along...
Happy roadstering!
Michael Spreadbury
spriso motorsports
Posted: Mon Nov 26, 2007 10:27 am
by spriso
We got a little more work done on the silver car over the weekend.
I built new brake and clutch hard lines, installed new master cylinders, a new heater valve and cable, and got all the items in the firewall recess sorted out before the engine was installed.
After sitting for years without an engine and transmission, the S15 SR20DE engine and 5-speed transmission were finally installed back into the car again.
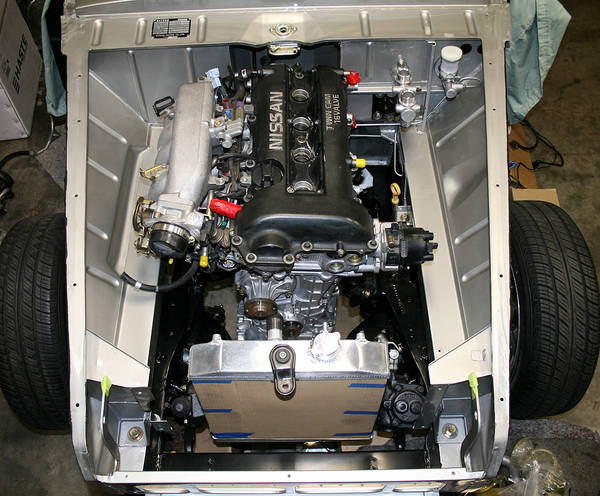
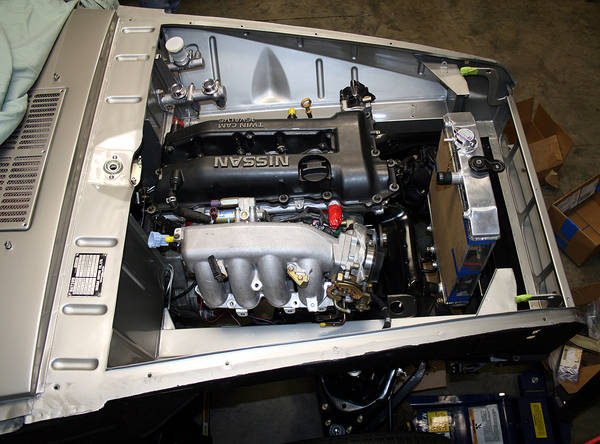
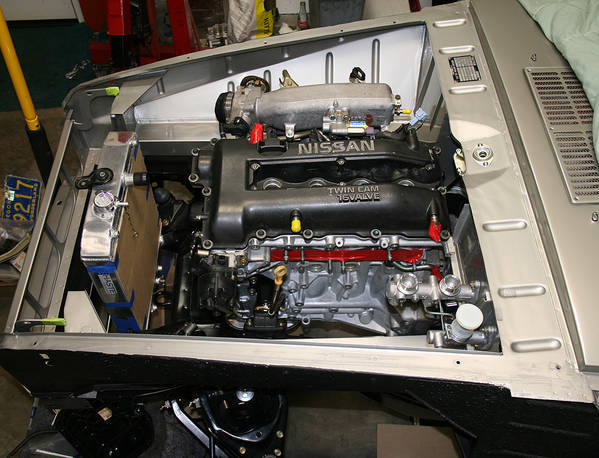
I still need to paint (or powder coat) the valve cover, clean up the intake plenum, etc. but this is a good start! Everything is looking really good, now there is just 123,400,208 things left to do!

Have a great week everyone!
Michael Spreadbury
spriso motorsports
RE:66 Project
Posted: Mon Nov 26, 2007 11:39 am
by S Allen
Looking very good Michael. Some day I will get back to my '65 SR20 project. Too many things to do and not enough time or money to do all of them at once.
Steve
Posted: Mon Nov 26, 2007 1:26 pm
by Skyman
Very clean. I'm impressed.

What did you use on the underbody, and the sides that will be covered by the fenders? It looks great. I used a 3M rubberized undercoating product on mine. Looks similar.
Kyle
Posted: Mon Nov 26, 2007 8:53 pm
by datsunrides
I agree, very nice work. Looks like you spent some time "shaving" brackets and such underhood. Gives it a clean look.
Mark
Posted: Tue Nov 27, 2007 1:43 am
by spriso
I agree, very nice work. Looks like you spent some time "shaving" brackets and such underhood. Gives it a clean look.
Many thanks for the comments!
We work really hard at getting the engine compartments really clean-- they are so busy in original form. Re-building the brake lines is probably the biggest change that we make and it really cleans up the way that the engine compartment looks. Hiding the wiring, and really thinking about how things are routed and placed for a clean and functional look is also very important.
Very clean. I'm impressed. Wink What did you use on the underbody, and the sides that will be covered by the fenders?
This car had zero rust and the undercoat was in very good condition, so I just refreshed the underside of the car with a couple quarts of Rustoleum-- a nasty job, but is sure looks good now.
Michael
spriso motorsports
Posted: Tue Nov 27, 2007 4:49 pm
by alp
what radiator are you using? pricing? and would that be a radiator to use for a KA24de swap also? thanks Alp
Posted: Tue Nov 27, 2007 5:04 pm
by spriso
what radiator are you using? pricing?
The radiator is a Honda Civic application. This particular one is made by Haste Engineering:
http://www.hasteusa.com
It is a 3-row, and will handle the cooling needs of the SR without any question. The only thing that I am not happy about is the size of the radiator hoses as the Honda Civic uses a 1" hose, and the SR uses a 1 3/8" hose. As I really don't like stepped hoses, I may cut the necks out of this radiator and weld in some custom 1 3/8" versions to keep the hose sizes the same.
Not an ideal situation.
The Fluidyne Honda Civic radiator uses a 1 1/4" hose and works perfectly with the SR swaps.
I wanted something with a little more capacity, but I am not sure that the extra work to change the radiator necks will be worth it.
Keep in mind, I don't need to change the necks at all, it is just something that bothers me...
would that be a radiator to use for a KA24de swap also?
I have NO idea on the KA question-- I have never put one in a roadster, so I don't know what their cooling needs are.
As I recall, Lou Smaldino's KA24DE roadster does use a Civic radiator however...
Michael
spriso motorsports
Posted: Wed Nov 28, 2007 4:16 pm
by ppeters914
spriso wrote:I agree, very nice work. Looks like you spent some time "shaving" brackets and such underhood. Gives it a clean look.
Many thanks for the comments!
We work really hard at getting the engine compartments really clean-- they are so busy in original form. Re-building the brake lines is probably the biggest change that we make and it really cleans up the way that the engine compartment looks. Hiding the wiring, and really thinking about how things are routed and placed for a clean and functional look is also very important.
Ah-ha! So that's it. If you think about it, take before and after clean-up pics. new brakes lines, etc. Any chance you could list the actual mods including hiding the wires, what stuff is removed/modified/etc? Completely understandable if you prefer to keep it a trade secret.

Again, gorgeous.
Posted: Mon Dec 10, 2007 1:22 am
by Alvin
Wow I didn't notice you upated with progress!
All engine bays should look like this!
Are you using an OEM exhaust manifold or custom?
Fantastic as usual Michael...it might even be
too clean
Re: Spriso's 1966 Datsun Roadster Project
Posted: Mon Jul 07, 2008 2:55 pm
by spriso
It lives!
After being apart for four years (!) my 1966 Datsun 1600 hit the road again for the first time last night!
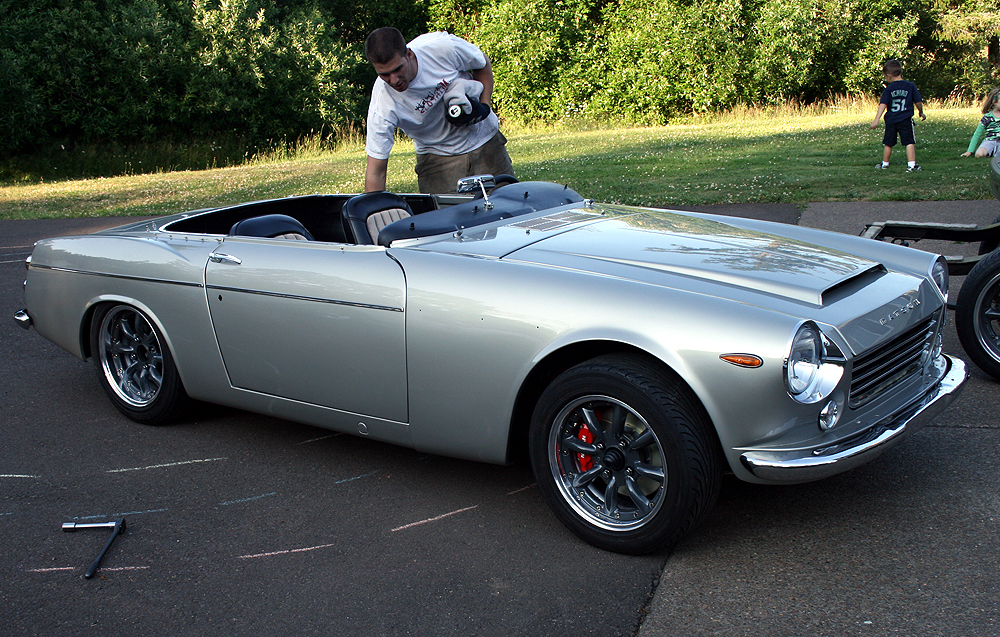
There are still about 1,530,223 things left to do before Friday (we are driving down to Shasta Friday afternoon), but it is one huge step closer!
Many thanks to Eric Straw, Mike Braaten, Dave Jolliff, Diamond Dave Barwick, and my very patient wife Keri for helping get this thing together during the last few weeks!
For those going to Shasta, see you then, and of course I will post photos here once the car is all the way back together...
Michael
spriso motorsports
Re: Spriso's 1966 Datsun Roadster Project
Posted: Mon Jul 07, 2008 3:41 pm
by LI Roadster
spriso wrote:It lives!
After being apart for four years (!) my 1966 Datsun 1600 hit the road again for the first time last night!
There are still about 1,530,223 things left to do before Friday (we are driving down to Shasta Friday afternoon), but it is one huge step closer!
Many thanks to Eric Straw, Mike Braaten, Dave Jolliff, Diamond Dave Barwick, and my very patient wife Keri for helping get this thing together during the last few weeks!
For those going to Shasta, see you then, and of course I will post photos here once the car is all the way back together...
Michael
spriso motorsports
stunning restoration... thanks for sharing
Re: Spriso's 1966 Datsun Roadster Project
Posted: Mon Jul 07, 2008 4:01 pm
by Alvin
not fair...I want those wheels!!!
Are those re-finished seats? Looks sharp!
I will have my extra battery/memory stick to take a zillion pictures so get 'er done for Shasta!
Re: Spriso's 1966 Datsun Roadster Project
Posted: Mon Jul 07, 2008 8:19 pm
by itsa68
Sigh...........
Re: Spriso's 1966 Datsun Roadster Project
Posted: Tue Jul 08, 2008 10:03 am
by spriso
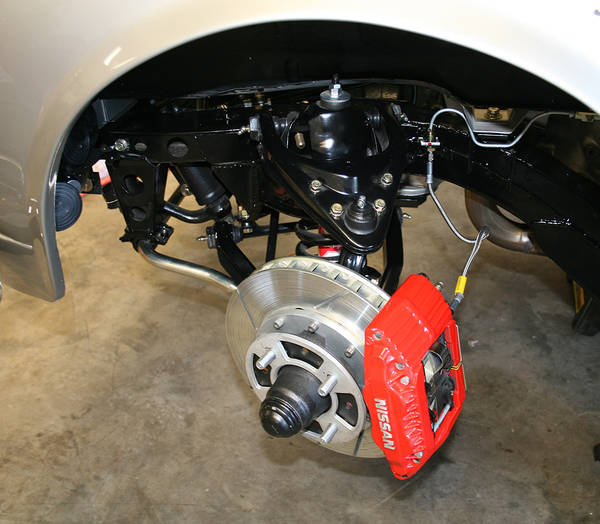
The frame has been fully powder coated semi-gloss black (a chassis black) and all new fasteners and suspension components were used throughout. A few more detail shots for those who are interested:
Brakes:
300ZX Twin-turbo aluminum 4-piston calipers, custom Coleman 11" x 30mm race rotors, custom rotor hats and caliper mounts:
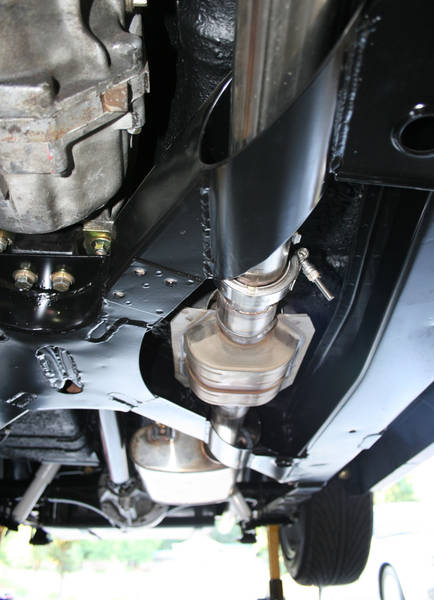
Exhaust:
2 1/4" stainless exhaust using mandrel bends and fully TIG welded. Here is a shot of the downpipe:

The exhaust flows into a stainless flex pipe through the frame and connects to a V-band clamp then into a catalytic converter which sits in the x-frame. Everything is nice and clean (and green) out the tail pipe!
The exhaust flows into a full stainless 3-chamber muffler and up and over the axle:
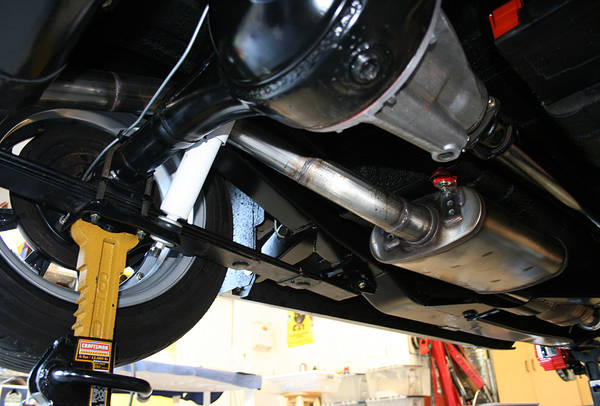
The exhaust note is nice and mellow, and I am very pleased with it. Again, kudos to Dave J. and Eric for their fine work in this department...
More detailed shots to come!
Michael