SR20DE Hybrid How To-- S13 SR20DE into a 1969 2000 Roadster

Discuss engine swap details here!

Moderators: notoptoy, S Allen, Solex68

User avatar
spriso
Vendor
Posts: 1571
Joined: Wed Jun 04, 2003 9:20 am
Location: Oregon
Contact:

SR20DE Hybrid How To-- S13 SR20DE into a 1969 2000 Roadster

Post by spriso »

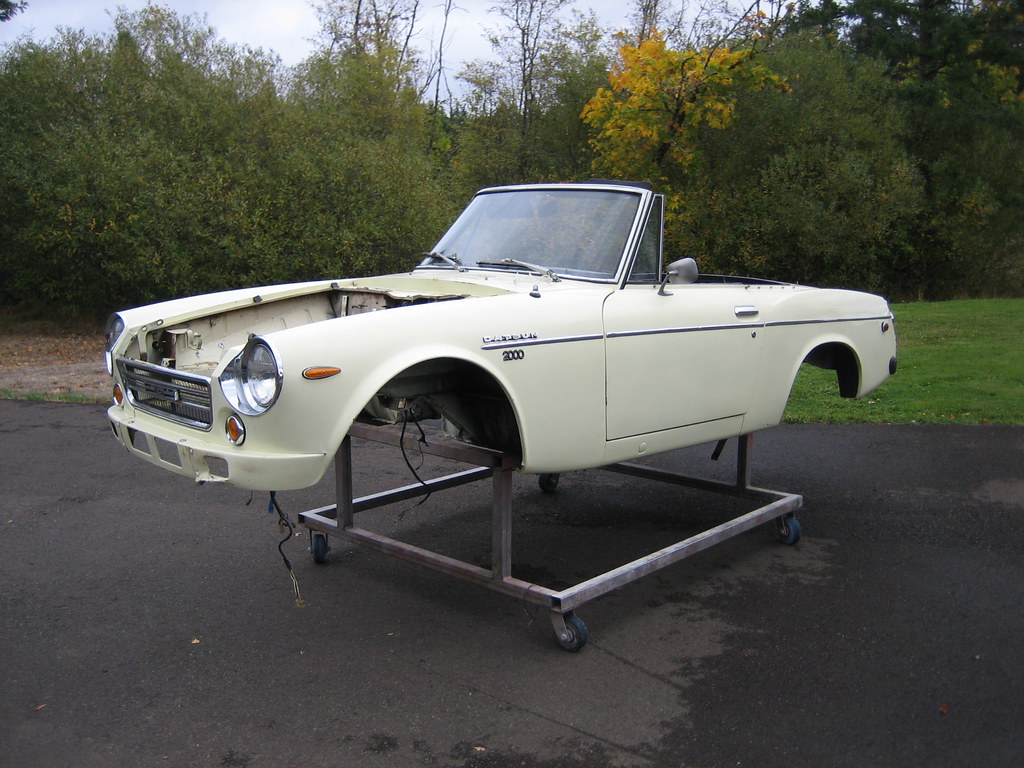
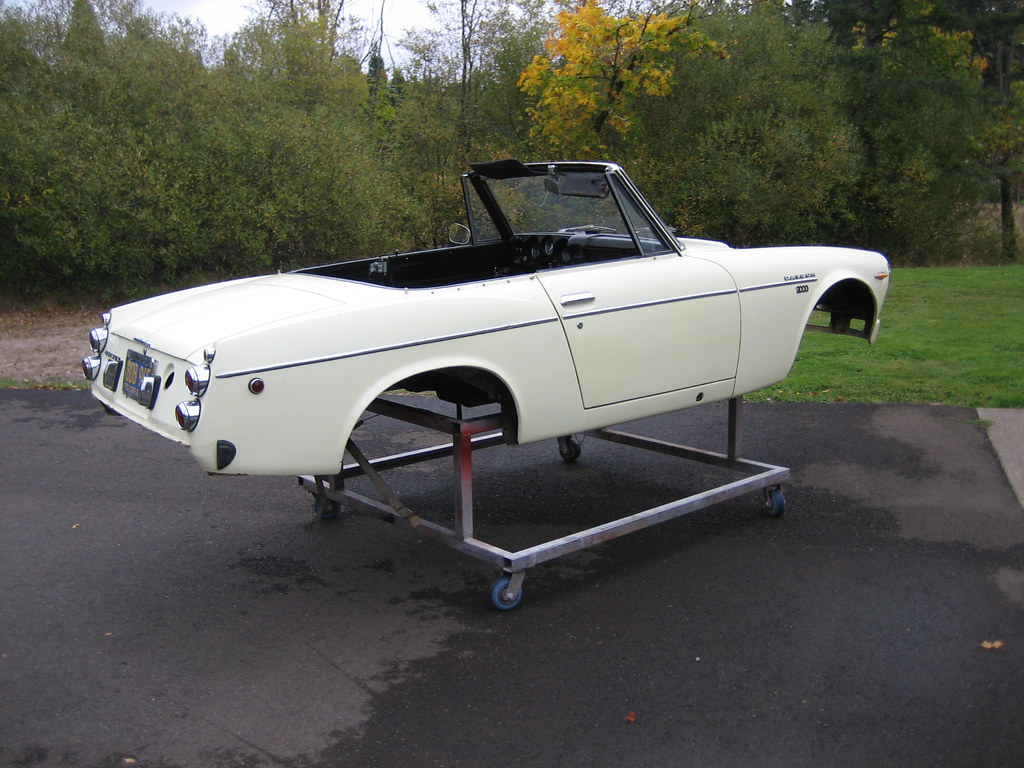
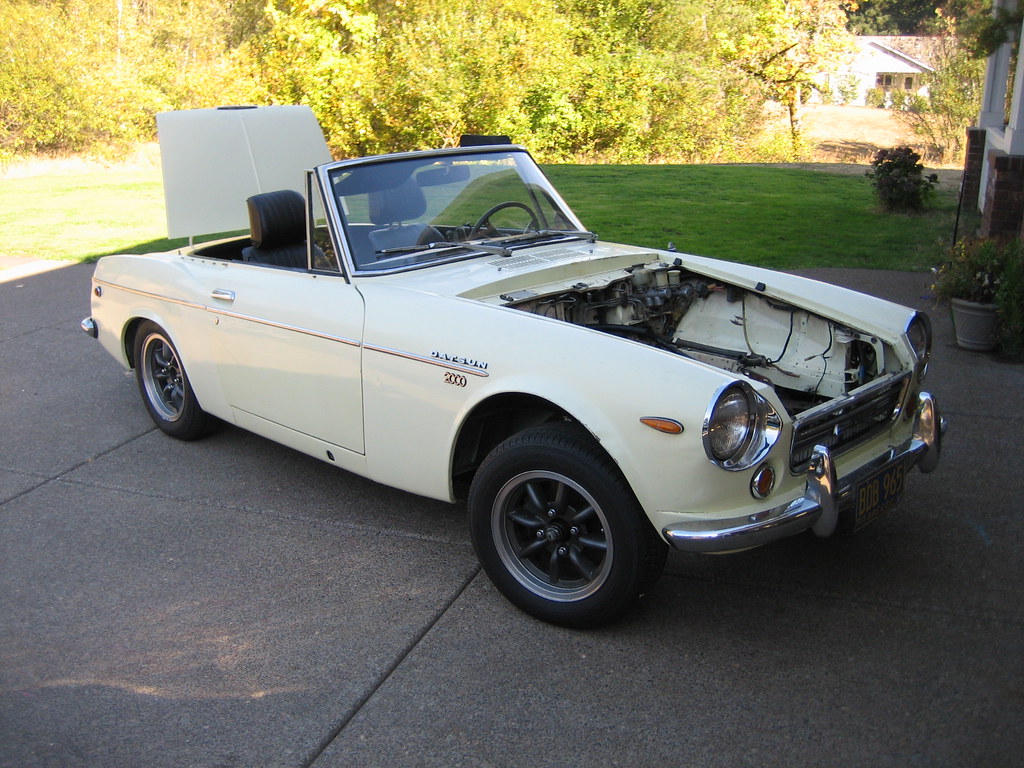
This is Bob. Bob is a 1969 2000 Roadster that I have had in my collection for a few years, waiting for the right time to do a quick SR20DE swap, and finally Bob's time has come.

Image

Bob and I met about 5-years ago. After a lovely day on the Oregon coast, Bob decided to chuck his U20 timing chain and took out most of the engine in the process, leaving the previous owner and his wife stranded along side the highway. Enough was enough, and Bob was put on the chopping block. :cry:

Bob has been very patient waiting his turn to have a little SR20 love done to his aging chassis, and on this outstanding Indian summer weekend, Bob finally is going to get the heart transplant that he has been waiting for.

So, since there have been many requests for articles about putting SR20s into roadster chassis, I have decided that we are going to document every step of the SR20 swap, and we will use this project as a guide for future SR swappers.

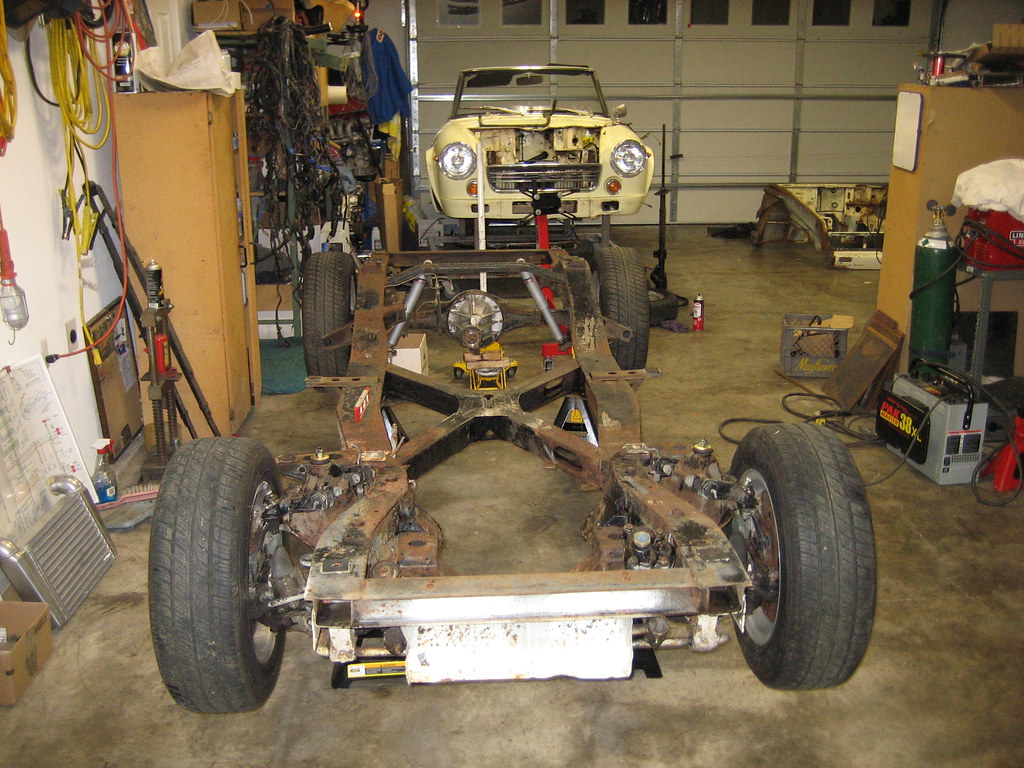
I will update this thread every day that I work on the car. This is going to be a simple conversion, but I have still decided to remove the body from the frame to make things a little easier for me while I do the necessary modifications to Bob's frame to fit the SR into his chassis.

Image


So, sit back, follow along, and feel free to ask questions this is what this forum is all about.

More tomorrow,

Michael Spreadbury
Spriso Motorsports
Last edited by spriso on Sat Dec 31, 2016 1:50 am, edited 2 times in total.
Spriso Motorsports
http://www.spriso.com
Instagram https://instagram.com/spriso/
SR20 Powered Roadsters
Engine swap kits Available! See my website!
User avatar
mgslayer
Roadster Fanatic
Posts: 206
Joined: Tue Oct 19, 2004 9:13 pm
Location: Taneytown Maryland

Post by mgslayer »

Michael

While I hope to never HAVE to get rid of my U20, I've already made my mind up that I will probably swap out if I ever have to rather than rebuild.
But for now she's running like a banshee.:twisted:
Any pics, advise, litle tid bits that only come up while doing the swap would be great.
Thanks
Mark
Mark
Taneytown MD
1968 SRL311
dscott@shouri

Post by dscott@shouri »

I like Bob's shoes. Dimensions please?
User avatar
spriso
Vendor
Posts: 1571
Joined: Wed Jun 04, 2003 9:20 am
Location: Oregon
Contact:

Post by spriso »

I like Bob's shoes. Dimensions please?
Bob's shoes came on my Datsun Bluebird Coupe when I imported it from Japan a few years ago. They are a 14x6, 15mm offset, and are made by MAGROAD (and are a Watanabe knock off).

They are very light, and fit the chassis very nicely...

Michael
Spriso Motorsports
http://www.spriso.com
Instagram https://instagram.com/spriso/
SR20 Powered Roadsters
Engine swap kits Available! See my website!
User avatar
spriso
Vendor
Posts: 1571
Joined: Wed Jun 04, 2003 9:20 am
Location: Oregon
Contact:

Post by spriso »

Have you heard the old proverb Q: "How do you eat an elephant? A: One bite at a time!"? This is the kind of attitude that you will need to have to tackle a project of this size and complexity. Many people get overwhelmed at the size and scope of a project like this, but if taken one step at a time, by being disciplined to stay on task, and by utilizing lots of check lists, this project is something that anyone with reasonable mechanical skills can handle. The rewards of an SR powered roadster are WORTH THE EFFORT!

A Word of Caution

Working on cars is inherently dangerous; there are no end of possible dangers to yourself, your car, and your work space.

Welding, grinding, and other fabrication work on an automobile brings many fire hazards. Be hyper-aware of gas lines, flammable interior materials, old grease, body felt, all of which can start a fire from spark from your welder or grinder.

Keep a couple fire extinguishers nearby, and whenever possible, have a helper on fire watch while fabricating. Always use appropriate hearing and eye protection when working on your roadster.

Recommended Tools

The right tools will make all the difference in completing this swap, but if you don't have everything on this list it won't be a show stopper. I have seen this swap done with an 110V wire feed welder and an angle grinder.

Welder: A welder is a must for this project. An 110V MIG with a tank of argon shielding gas will do the job, but as with all welders, more power is preferred. If you have a 220V MIG machine, even better.

Plasma Cutter: A plasma cutter is an indispensable tool for this conversion. A plasma cutter makes quick and accurate cuts into steel. Plasma cutters are available in both 110V and 220V voltage, with the 220V machine being able to cut thicker material. A good quality 110V plasma cutter will handle any jobs on this conversion. Plasma cutters also require clean and dry compressed air, so an air compressor is necessary to operate one. Many welding shops will rent plasma cutters if you don't know someone who has one.

(Alternative to a Plasma Cutter: Sawzall: If you can't find a plasma cutter, many of your cuts can be done with a saw such as a Sawzall. The cuts that you can't make with a Sawzall can be handled with a 4" grinder with a good cutting disk.)

More recommended tools:

Grinder: The grinder is another must-have tool for this project. Get yourself a variety of cutting disks, grinding disks, and flapper sanding wheels.

Wire Wheel: A wire wheel used in conjunction with your angle grinder will quickly remove paint and surface rust and get you down to clean metal - this is a must have!
  • Angle Indicator: An angle indicator will help you set the correct engine angle.

    Magnetic Level: To check that the frame and the bottom of the oil pan are sitting level.

    Engine Hoist: To lift the engine and transmission in and out of the frame.

    Scribe: To mark the frame for cutting.

    Sharpie Markers: To mark the frame and materials.

    Jack Stands: Four (4) heavy duty jack stands to support the frame to a safe and comfortable working height.
Preparing the Frame

The first thing to do is to prepare your roadster frame for the new SR. This will involve removing the existing radiator, engine, transmission, driveshaft, and exhaust system. You want the already-too-small engine compartment to be free of as many items as possible. Now is an excellent time to pressure wash and clean the frame before doing any fabrication work. You want your work surfaces to be as clean as possible, this not only makes things a lot nicer for fabrication work, and it also prevents you from becoming a giant grease ball by the time the project is done.

One of the first things that I do when I start working on a roadster is rounding off all the sharp edges on the frame and body. The stock roadster frame will quickly fillet you with all of its sharp edges. A few minutes spent at the start of this project will save you many cuts and bruises down the road.
Image

Should I Remove the Body From the Frame?

This is a great time to make the decision to keep the body on the frame, or remove it for ease of fabrication. The first few SR swaps that I did into roadsters, I left the body on the frame. This was nice to use as a reference point to know where the firewall and sides of the engine compartment frame rails were, but it also made doing the modifications to the X-member and the other spots on the frame much more difficult.

Now when we do this conversion, we remove the body from the frame, and put it onto a body cart to keep it safe from damage, and to allow much better clearance to the frame. Now doing the modifications on the X-member for the transmission mount, speed sensor, and opening up the exhaust holes is much easier than before. We also have the benefit of having a front half of a recently scrapped roadster (aka "Buck") to bolt onto the frame for firewall, radiator core support, or frame rail reference. Since roadsters generally have the same engine compartment dimensions (such as firewall placement) this is a great tool for modifying the frame.

Frame Modifications

Assuming that we have decided to remove the body from the frame, we can start doing the modifications to the frame to fit the SR into the engine compartment.

Frame Setup: Mount the stripped and cleaned frame on a set of heavy duty jack stands. I like to work with the frame about 24� off of the ground, but find a suitable working height that feels comfortable to you.

After the frame is sitting on the jack stands, shim it as necessary to get it as level and square as possible. Use your magnetized level to check that the frame is level in more than one place. Give the frame a wiggle test to make sure that it is stable, and will not fall if something was bumped into it. You will be working at some unusual angles when doing the frame modifications, and it is very important that the frame is sitting solidly on the jack stands!

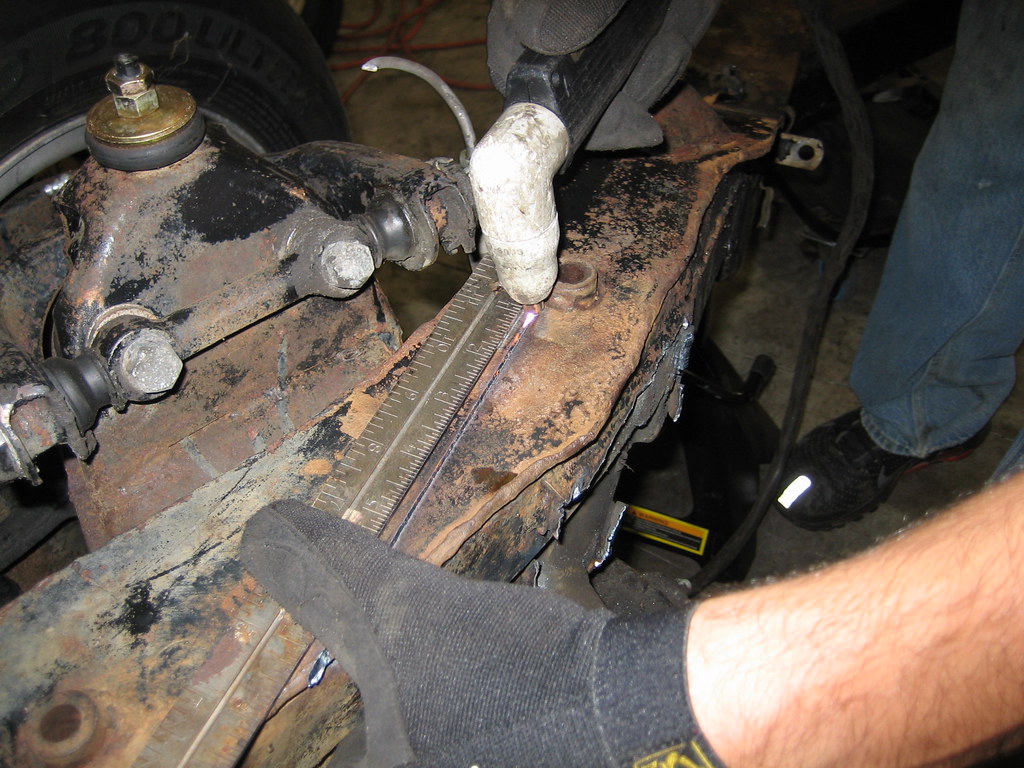
Once the frame is setup, scribe the center line on the front cross member and the X-member. This line will be very important, so be sure to use a good scribe and mark the frame carefully as we will reference this line many times during the conversion.

The front cross member can be difficult to mark, but I find that it is easiest to measure between the rectangular mounts (see photo) and to scribe a center line. The approximate dimension from side to side is (6 1/4").
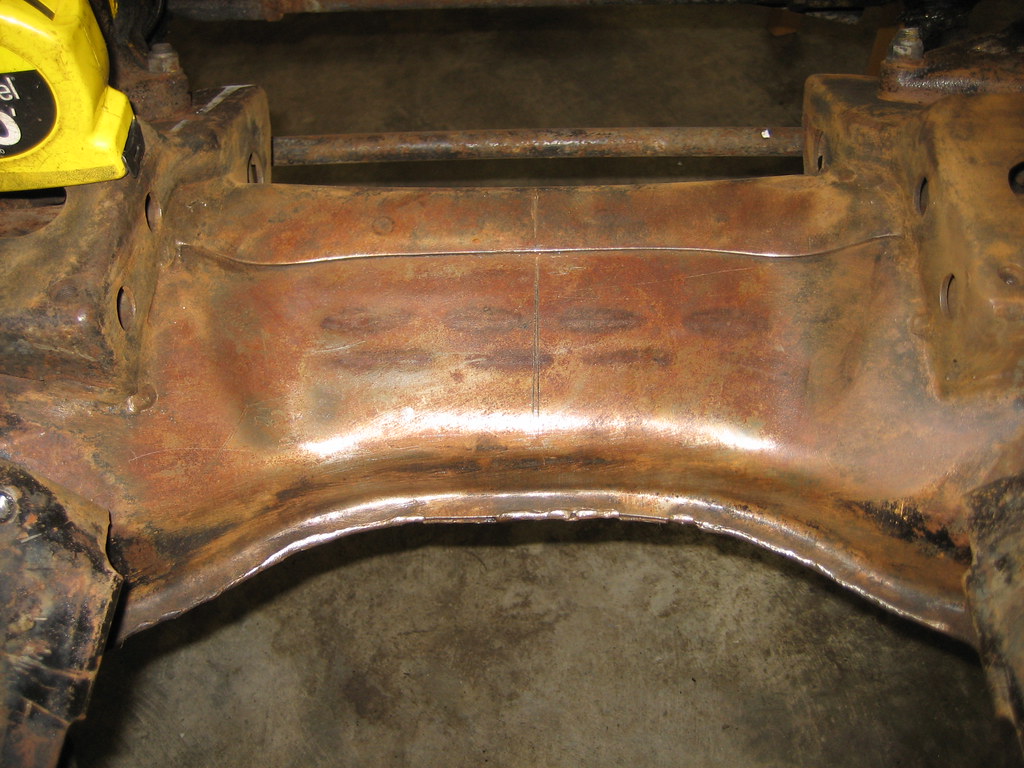
Image

Once the engine and transmission are out of the car, and the entire frame has been degreased and cleaned, it is time to start removing the stock roadster brackets.
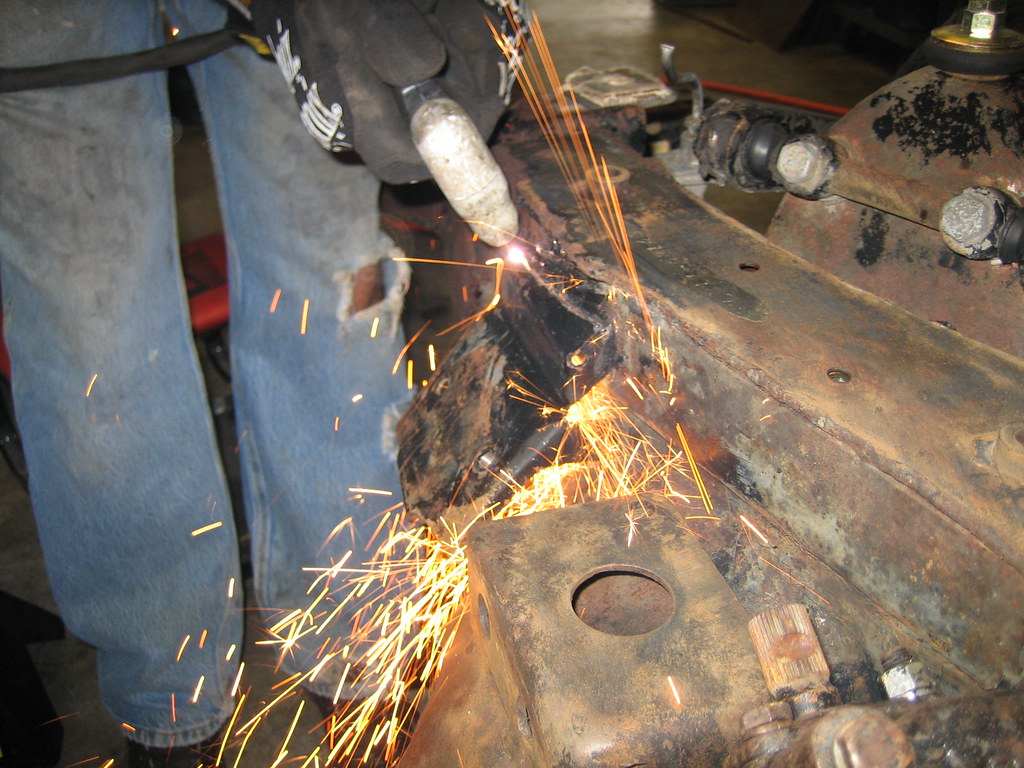
Image

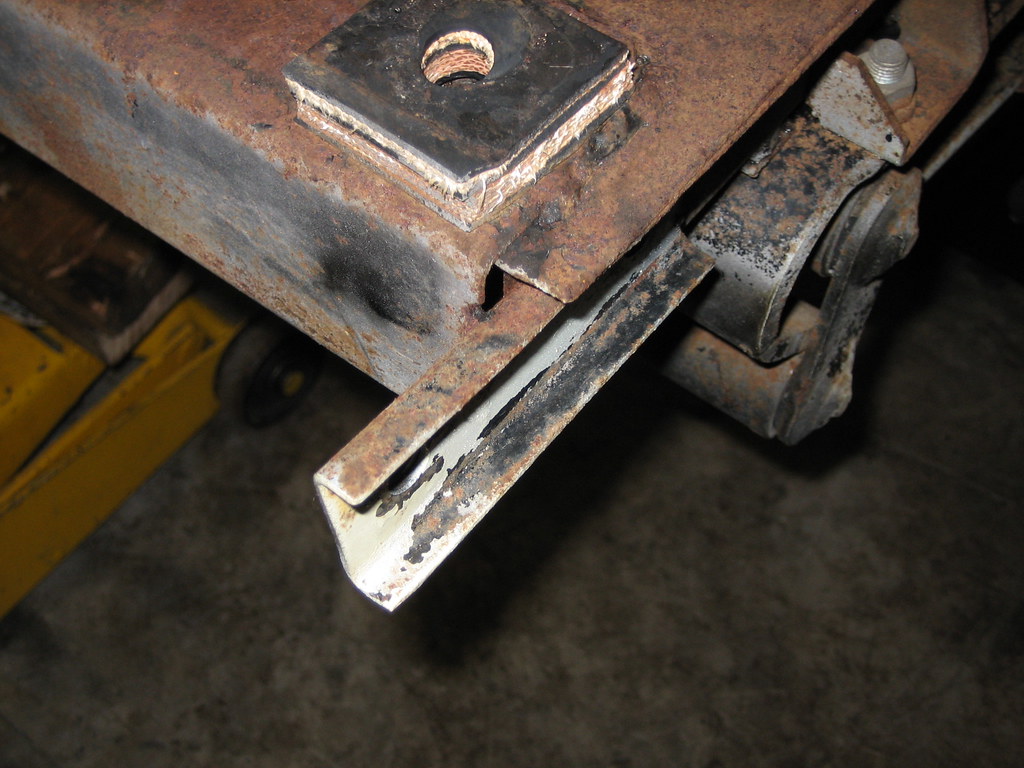
Engine Mounts: Remove both stock motor mounts and grind flush. (This motor mount has been cut with the plasma cutter and is going to be broken off the frame with a hammer)
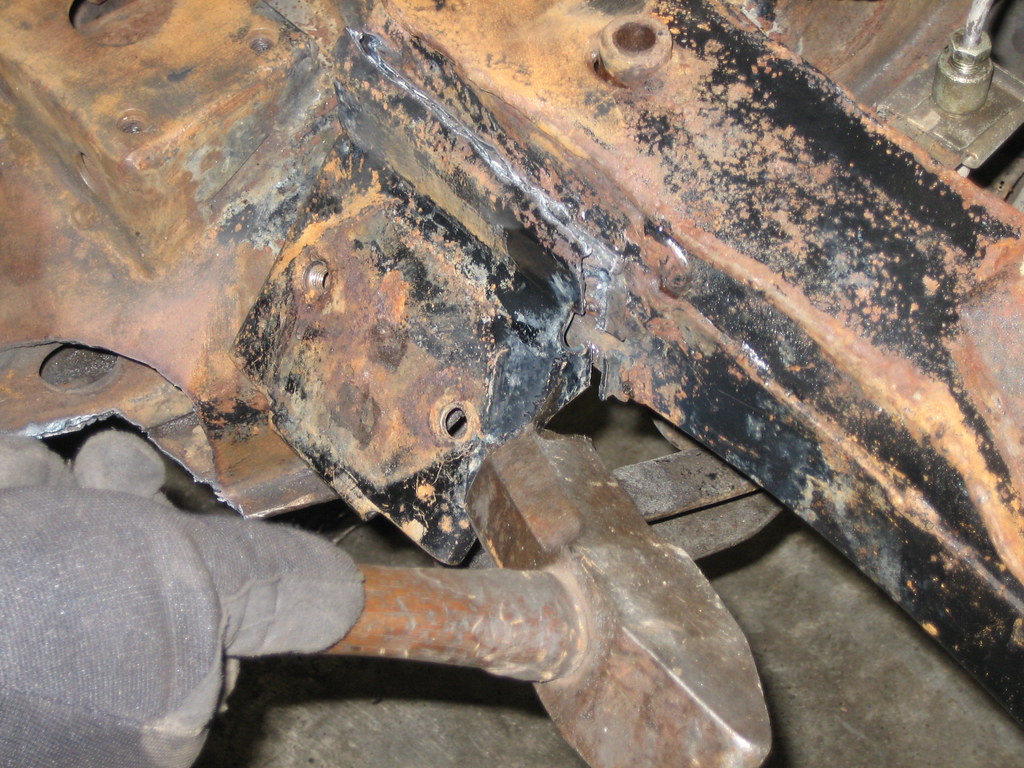
Image

Ok there is lots more, but that is all for tonight, I will update more tomorrow with more photos, more descriptions, and will show the engine and transmission sitting in the frame-- stay tuned!

Michael Spreadbury
Spriso Motorsports
Last edited by spriso on Sat Dec 31, 2016 2:04 am, edited 3 times in total.
Spriso Motorsports
http://www.spriso.com
Instagram https://instagram.com/spriso/
SR20 Powered Roadsters
Engine swap kits Available! See my website!
User avatar
Dave
Turbo Powered
Posts: 657
Joined: Fri Aug 01, 2003 12:24 am
Location: In the refrigerator, to the left of the mayonnaise, behind the pickles and beer.

Post by Dave »

Michael, your continuing service to the community is incredible. A complete start to finish documentary on an SR20 swap is going to be a real asset for folks who are considering the conversion. Combined with TR's write-up on the DET install, this will get the turbo guys 99% of the way there too.

I probably get 2 to 3 e-mails a month from folks asking "hey, can you give me some tips on the SR swap? I'm considering one myself." I'm sure you get 10 times that number. I always steer folks to this site but have to say "start reading, the info is there but it's scattered." Linking them to a single thread will really be cool!

Hey Steve, any chance of making this thread a sticky?
Dave Kaplan

68 2000 Roadster - Now with GT2560R power!
SR20-DET: 223 rwhp, 222 lb-ft.

http://www.cardomain.com/ride/698904
User avatar
spriso
Vendor
Posts: 1571
Joined: Wed Jun 04, 2003 9:20 am
Location: Oregon
Contact:

Post by spriso »

I don't have too much time tonight to write an in-depth update, but I will post a few photos of today's progress!

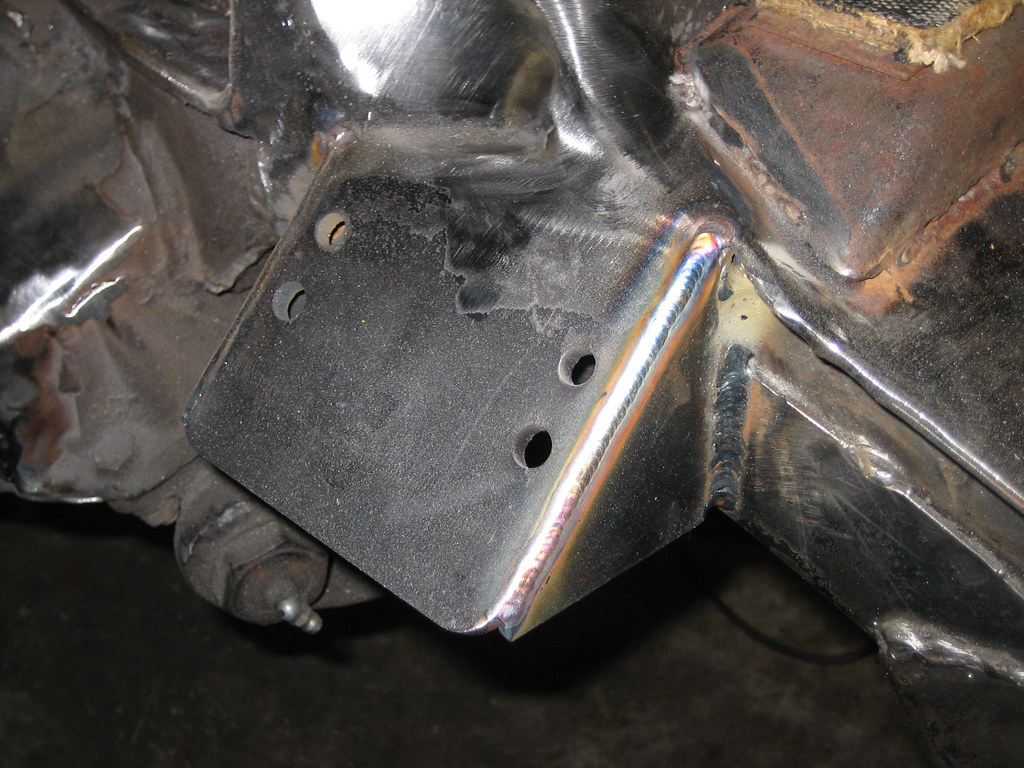
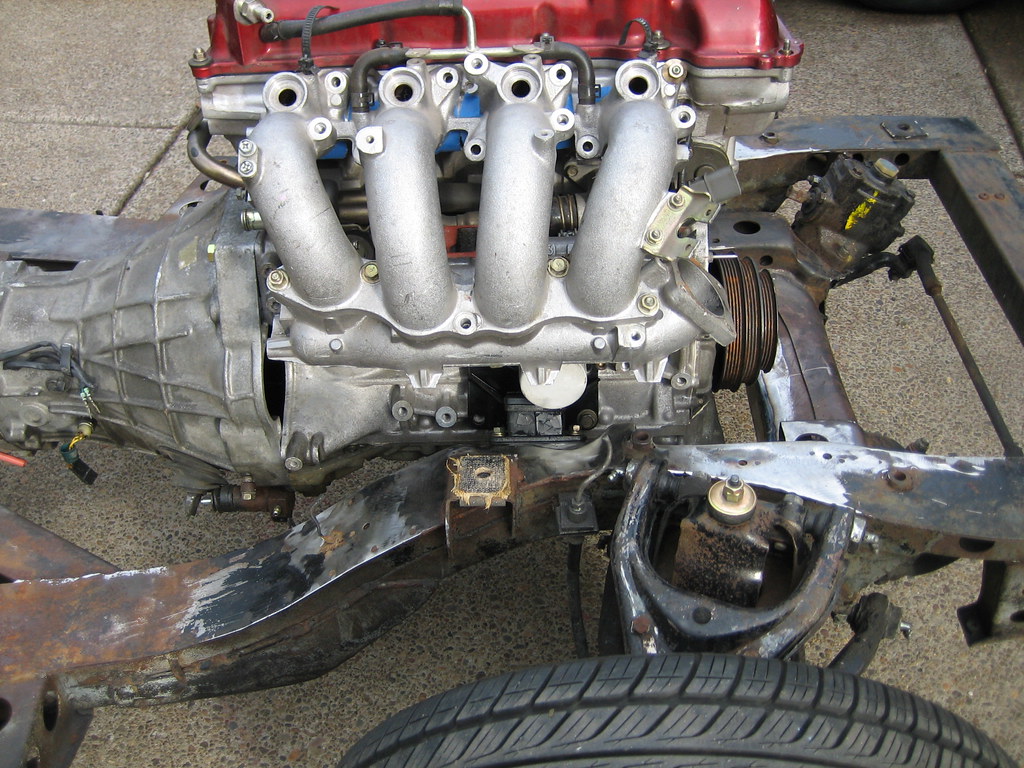
TIG welded motor mount bases (welded to the frame):

Image

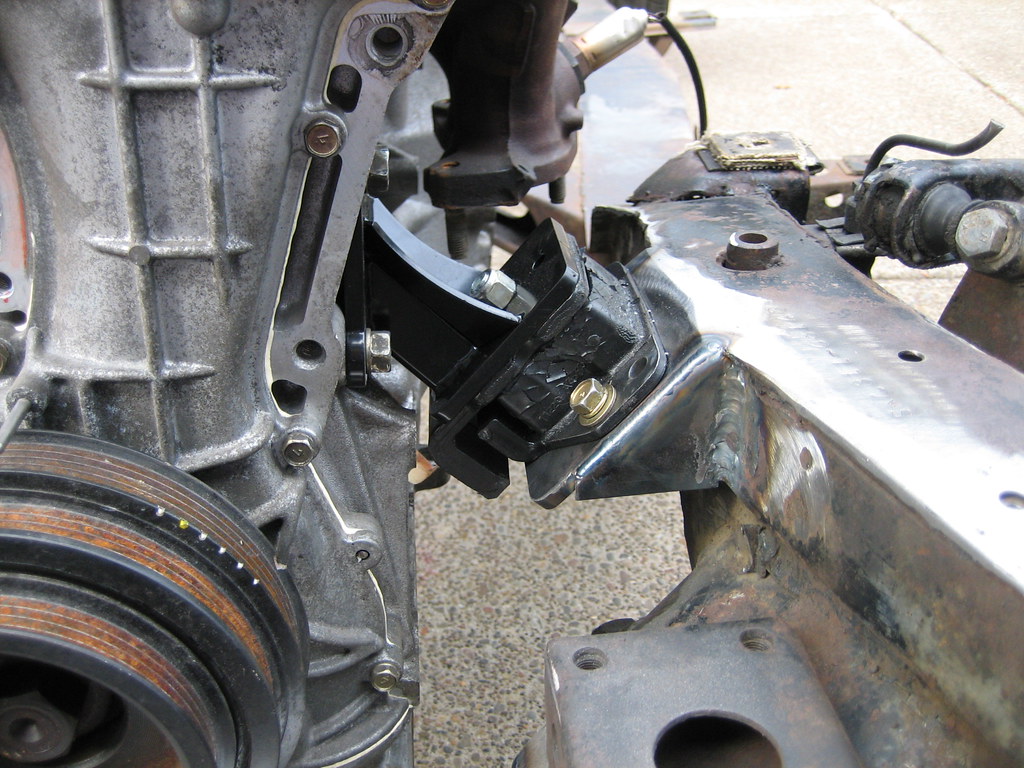
Driver's side motor mount (using the Spriso Motorsports SR20 Motor Mount Kit http://spriso.com/our-products/sr20-motor-mounts/):

Image

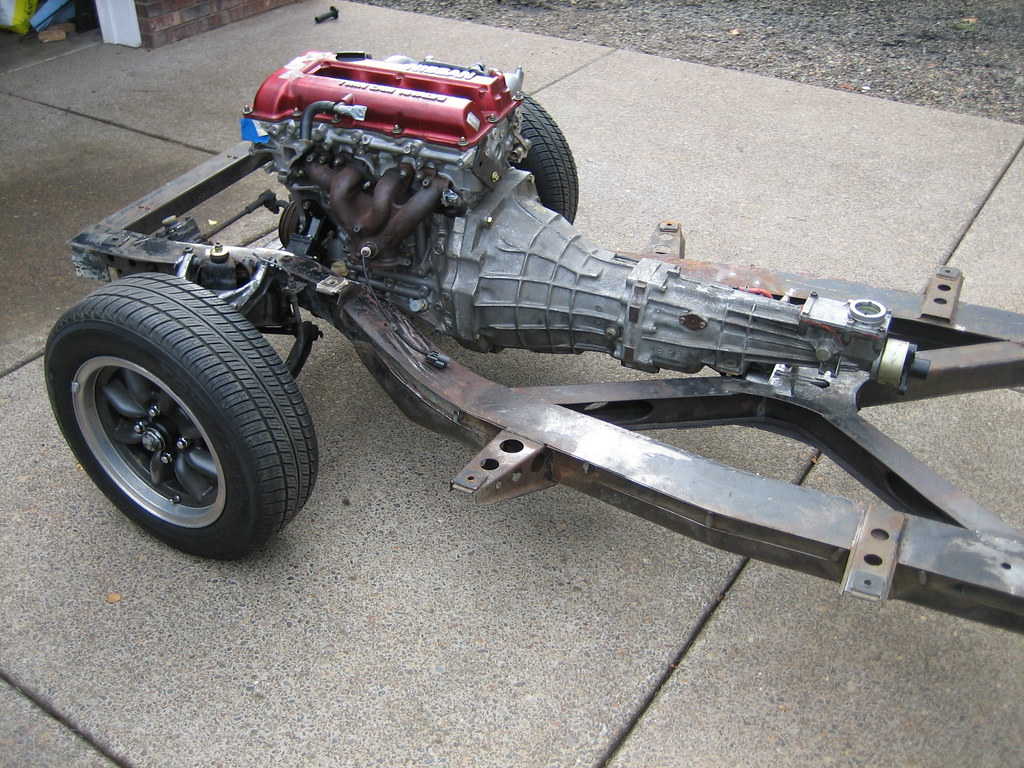
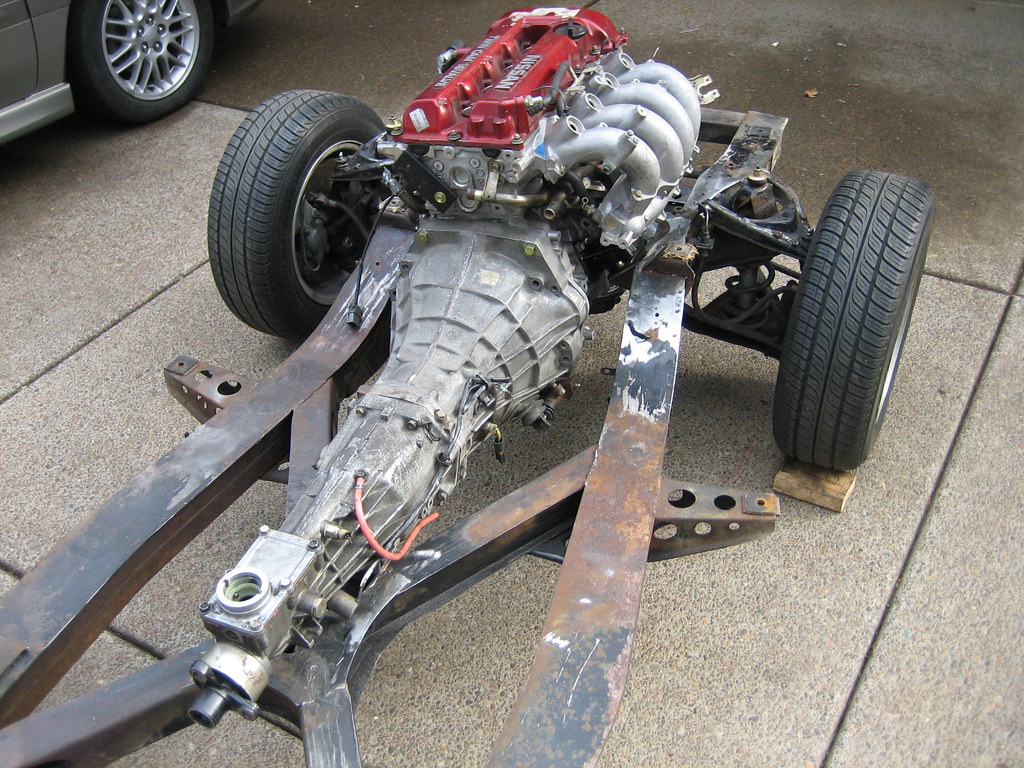
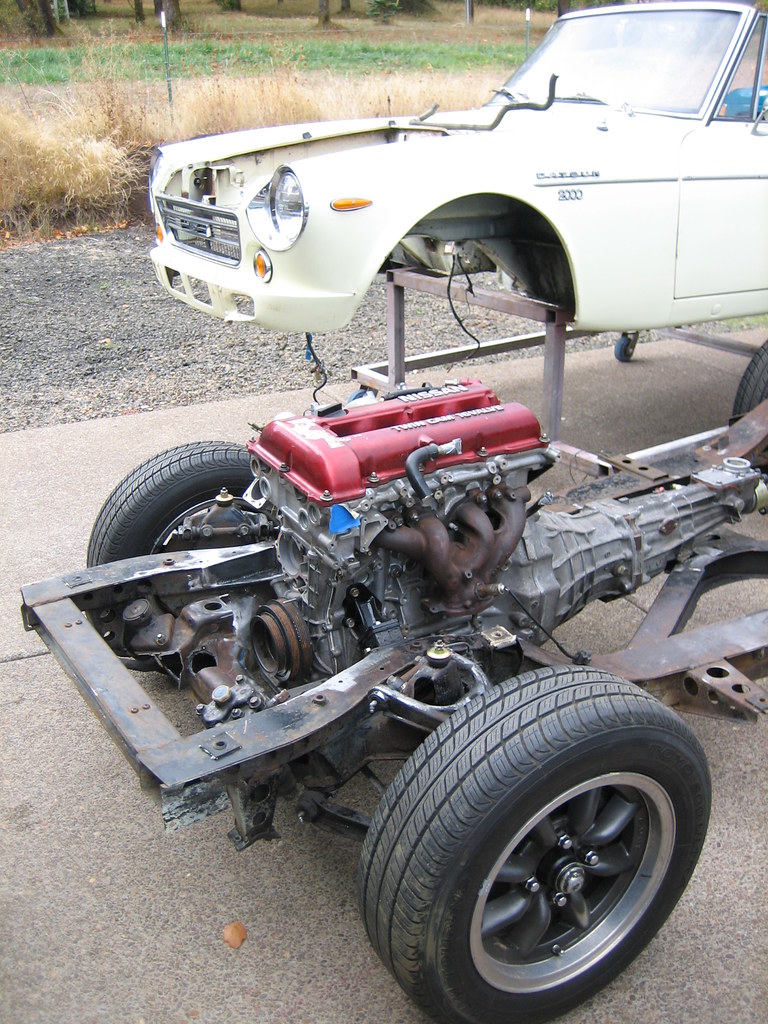
Here is the engine and transmission mounted in the frame and rolled outside:

Image

Image

Image

Bob rolled over to check out the progress, I think I can see a smile:

Image

Bob on the cart (nice and easy to move around):

Image

Image

That is all for tonight, I will work on a write up and captions for all the motor mounts, and other modifications during the week and post it here.

Michael Spreadbury
Spriso Motorsports
Last edited by spriso on Sat Dec 31, 2016 2:12 am, edited 2 times in total.
Spriso Motorsports
http://www.spriso.com
Instagram https://instagram.com/spriso/
SR20 Powered Roadsters
Engine swap kits Available! See my website!
67 1/2 1600

Post by 67 1/2 1600 »

Image
User avatar
itsa68
Roadsteraholic
Posts: 823
Joined: Sun Apr 18, 2004 11:24 am
Location: Winnipeg, Manitoba,Canada
Model: 1500/1600
Year: High Windshield-68-70

Post by itsa68 »

Nice beads........
If I could only tig weld like that! :)

Add one tig welder to my wish list.

Ray B.
Thats not a R16 death rattle....its a dried leaf hitting my heater blower fan.
1968 SPL311 non-smog
User avatar
ppeters914
Roadster Fanatic-Site Supporter
Posts: 3075
Joined: Mon Jun 28, 2004 5:51 pm
Location: Lake Forest Park, WA (just north of Seattle)
Model: 1500/1600
Year: Low Windshield-64-67.5

Post by ppeters914 »

Yeah, Ray, those beads sure are pretty, however, have ya priced TIG welders? :shock: Then there's the learning curve.

I need welding done on the roadster, 411 and 914. Been thinking of taking welding classes and buying a Lincoln SP135 Plus MIG unit....or just suck it up and pay someone. :?
Pete
-------------------------------------
'67 1600 - frame off started in 2014. Now I know why roadster projects take so long. What a stupid idea. :smt021
'66 1600 - parts car
'66 WPL411 ***SOLD***
A couple of Porsches, a RAV4 Hybrid, and a motorcycle
User avatar
dbrick
Roadster Fanatic-Site Supporter
Posts: 10084
Joined: Thu Sep 09, 2004 11:05 pm
Location: Kenilworth, New Jersey

Post by dbrick »

What, if anything, was done to the crossmember for pully clearance? I see a bright spot, but that just might be clean metal, something I'm unfamiliar with on my cars.

Dave Brisco

Take my advice, I'm not using it"

66 2000 The Bobster
64 1500 in pieces for sale
1980 Fiat X1/9
2009 Volvo C-70
08 Expedition EL, STUPID huge but comfy
1962 Thompson Sea Lancer, possible money pit
User avatar
spriso
Vendor
Posts: 1571
Joined: Wed Jun 04, 2003 9:20 am
Location: Oregon
Contact:

Post by spriso »

What, if anything, was done to the crossmember for pully clearance?
I have detailed photos that show the modifications that were done to the front crossmember that will be uploaded and captioned in this thread.

I have been hit with a wicked head cold this week, so nearly nothing has been done. :(
Been thinking of taking welding classes and buying a Lincoln SP135 Plus MIG unit....
I *highly* recommened this welder! I have one, and it is a perfect garage model. It will weld everything that you would need to modify on a roadster frame, is easy to use, and is not too big to store.

More this weekend...

Michael
Spriso Motorsports
http://www.spriso.com
Instagram https://instagram.com/spriso/
SR20 Powered Roadsters
Engine swap kits Available! See my website!
67 1/2 1600

Post by 67 1/2 1600 »

A couple questions, as my friend is thinking about a SR in his car as well. Will a Stock rear end be able to take the beating from the SR? He is planning for DD, but not far just close commuting, doesnt travel very far.

Thanks.
User avatar
spriso
Vendor
Posts: 1571
Joined: Wed Jun 04, 2003 9:20 am
Location: Oregon
Contact:

Post by spriso »

Alternator Notch

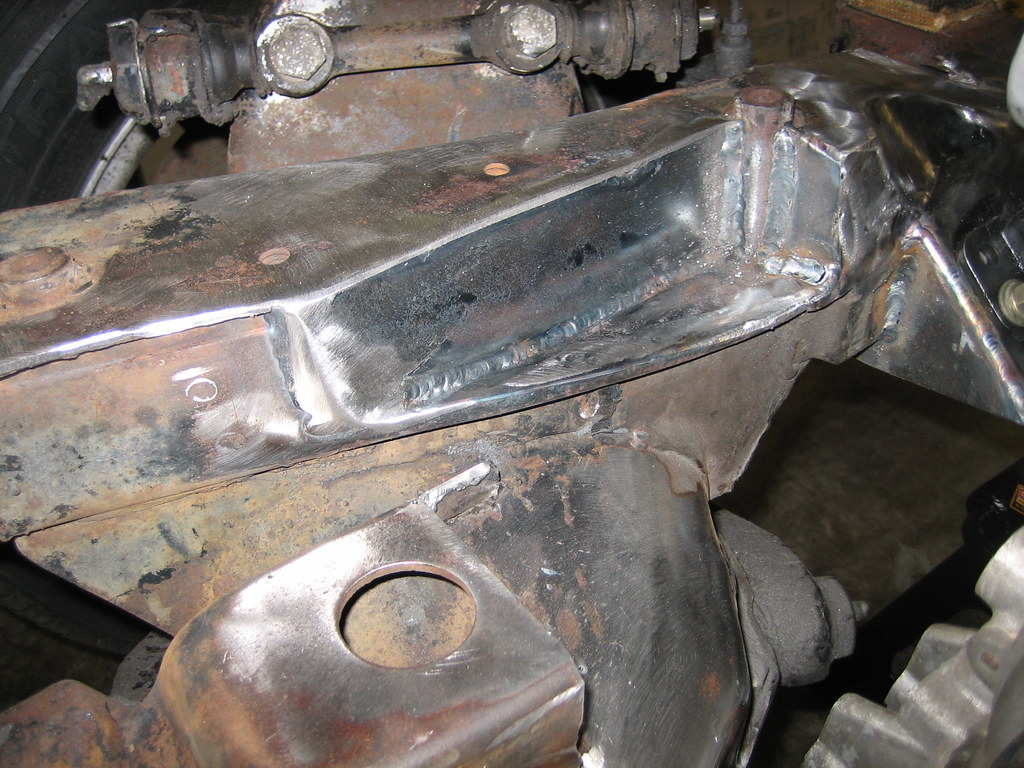
Image

My intention was to post the frame modification photos in order, along with an explanation of what each photo illustrates, but I guess we can jump ahead and discuss what we are looking at here.

First off, this notch is completely optional, and does NOT have to be done at all on the SR swap into the roadster. That being said, I found that the extra clearance to the frame allowed me to install a Subaru Justy alternator using my specially designed alternator mount.

Mark expressed concern that this modification is not safe. Well, looking at one photo, I probably would think the same thing but lets take a closer look at that area of the frame and what is actually happening here.

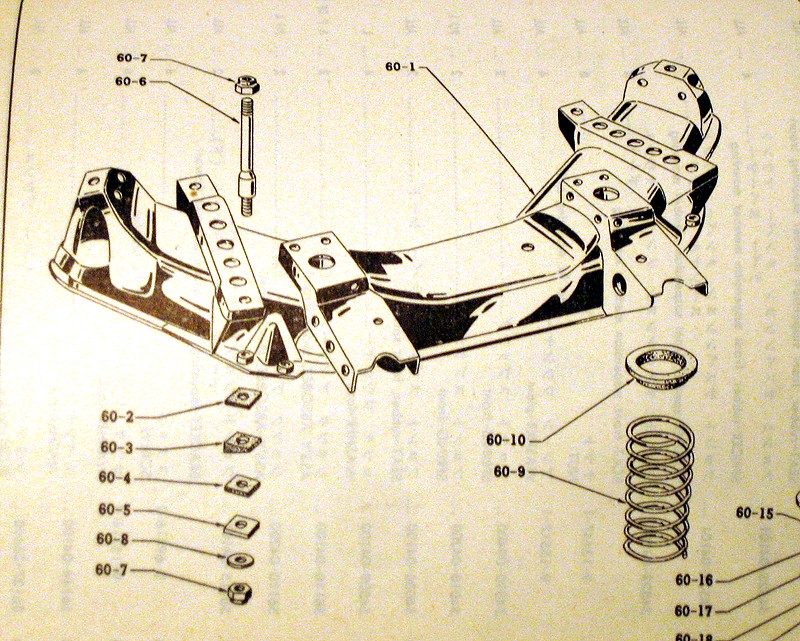
The notch is located forward of the 312 bolt-in crossmember tube on the passenger side of the frame rail. Remember, the roadster frame is not a specially designed frame for the 311, it was used in the 310/312 series cars and trucks as well! In the earlier cars, the crossmember (what your suspension bolts to) was bolted into the car using the four tubes that you can see in the roadster frame.

Image

Later, Nissan welded the crossmember to the frame, probably to take one less step from the assembly process, and to add a little rigidity to the frame.

The frame rail (which runs from the front of the car to the rear of the car) is designed in a U shape, and is capped by a flat piece of steel. I partially remove the cap, and the left side of the frame rail is cut to just above the floor of the U section. The floor is actually a double layer of material and ends just aft of the cut. (You can just see where it ends and it is not welded to the rest of the frame rail!)

The top cap is a piece .080 material (about 13 gauge i.e. thin!), and the sidewall where it is a double thickness and measures 0.16 (which is about 8 gauge.) I finish grind the lower layer to get it smooth, and then use my welder to cap both sections of frame rail.

I then use a piece of 3/16 or ¼ material and fully weld the back section back in, capping the front edge of the frame rail, tying in the top of the frame rail cap, and welding it to the crossmember bolt-in tube.

Image

All of this is overkill of course, for the first time the frame rail is nearly fully boxed (Nissan left the frame rail open to the air at the end!)

So, why is this modification actually safe? First off, your front suspension bolts to the crossmember, not the frame rails! Nissan welded the crossmember to the frame rails, in fact, they did not even fully weld check out the stitch welds where the crossmember meets the frame. Nissan did a good job running gussets to the front and rear of the crossmember where it meets the frame to spread out the load even more against the double layered floor of the frame rail.

This frame modification is no different than any typical street rodder frame modification. The Datsun roadster frame is entirely overbuilt and could be lighter and simpler than it is, but Nissan reused their design in as many places as possible, which is why their cars were as successful and common as they were.

This modification is not rocket science! There are at least 15 SR converted cars out there that have this modification done in this area, and we have not had one problem with any of them.

The trick is to add like or thicker material, and fully weld the area. You don't even need to do a notch as large as the one that I have illustrated I just like having the extra room so there is NO chance that the alternator would ever hit the frame.

And again, to reiterate, if this modification still concerns you, don't do it! Find another place to mount the alternator! This notch just makes fitting the Justy alternator easy with my kit http://spriso.com/our-products/subaru-j ... stall-kit/

As for the insurance question, yes, my insurance agent has seen all the modifications to my frame, and has even driven several of my cars. They have no issues with any of it

If anyone has questions, please don't hesitate to ask, that is what this forum is all about!

When I am totally over this cold, I will be detailing each one of my cuts and modifications and we can discuss them extensively!

All I ask is that we don't skip too far ahead (I had other things to do tonight!)

Michael
Spriso Motorsports
Last edited by spriso on Sat Dec 31, 2016 2:20 am, edited 2 times in total.
Spriso Motorsports
http://www.spriso.com
Instagram https://instagram.com/spriso/
SR20 Powered Roadsters
Engine swap kits Available! See my website!
User avatar
spriso
Vendor
Posts: 1571
Joined: Wed Jun 04, 2003 9:20 am
Location: Oregon
Contact:

Post by spriso »

Will a Stock rear end be able to take the beating from the SR?
Yes, a stock rear end will take normal use from a SR just fine.

If you start abusing it, then I don't think that it will last all that long!

All of our cars are using stock Datsun rear ends, though we have a few alternate rear end projects in the works for some of our customers who are a little harder on the equipment!

Michael
Spriso Motorsports
http://www.spriso.com
Instagram https://instagram.com/spriso/
SR20 Powered Roadsters
Engine swap kits Available! See my website!
Post Reply