OOPS.
I missed it......
so much for skimming the details........LOL
Engine and Dash Wire Harness Rebuild Project 68' 1600
Moderators: notoptoy, S Allen, Solex68
-
fj20spl311
- Roadsteraholic
- Posts: 5009
- Joined: Mon Nov 28, 2005 3:54 pm
- Location: San Diego, Ca
Re: Engine and Dash Wire Harness Rebuild Project 68' 1600
Phil
67.5 SRL311-00148 Blue (FJ cruiser VOODOO Blue)
67.5 SPL311 FJ20E teal SDS EFI
69 SRL311 SOLD
19 Raptor SCAB
67.5 SRL311-00148 Blue (FJ cruiser VOODOO Blue)
67.5 SPL311 FJ20E teal SDS EFI
69 SRL311 SOLD
19 Raptor SCAB
-
ct06033
- Roadster Fanatic
- Posts: 156
- Joined: Mon Jul 06, 2015 12:10 am
- Location: Denver, CO
- Model: 1500/1600
- Year: High Windshield-68-70
Re: Engine and Dash Wire Harness Rebuild Project 68' 1600
No problem, glad you included the link. These updates are a bit long winded but hopefully will be useful to reference for someone. The problem I've been having are half of the companies referenced in other threads are from so long ago, they are either out of business or a guy who was doing this out of his home and may be hard to find or MIA from the forum (no offense Curtis!!) Im also trying to include little details like not using adhesive electrical tape, or what jacket material for wires we should use. Its the little things that make a project like this successful.fj20spl311 wrote:OOPS.
I missed it......
so much for skimming the details........LOL
2016 Audi TTS
2005 Honda S2000
1968 Datsun 1600
2005 Honda S2000
1968 Datsun 1600
-
fj20spl311
- Roadsteraholic
- Posts: 5009
- Joined: Mon Nov 28, 2005 3:54 pm
- Location: San Diego, Ca
Re: Engine and Dash Wire Harness Rebuild Project 68' 1600
I rewired my 69 with an EZ wiring 20 mini, and Just ordered EZ Wiring 21 Standard Color Wiring Harness Kit that I intend to use to rewire my 67.5.
I have a rebuilt set of gauges coming from Jon - caraddict and I am reconditioning a 67.5 dash with stock size holes.....Out with the Auto meter gauges.
So many decisions....
http://www.ezwiring.com/store/viewcateg ... ?groupid=0
I have a rebuilt set of gauges coming from Jon - caraddict and I am reconditioning a 67.5 dash with stock size holes.....Out with the Auto meter gauges.
So many decisions....
http://www.ezwiring.com/store/viewcateg ... ?groupid=0
Phil
67.5 SRL311-00148 Blue (FJ cruiser VOODOO Blue)
67.5 SPL311 FJ20E teal SDS EFI
69 SRL311 SOLD
19 Raptor SCAB
67.5 SRL311-00148 Blue (FJ cruiser VOODOO Blue)
67.5 SPL311 FJ20E teal SDS EFI
69 SRL311 SOLD
19 Raptor SCAB
-
ct06033
- Roadster Fanatic
- Posts: 156
- Joined: Mon Jul 06, 2015 12:10 am
- Location: Denver, CO
- Model: 1500/1600
- Year: High Windshield-68-70
Re: Engine and Dash Wire Harness Rebuild Project 68' 1600
One last trip to Amazon!
braided metal Ground strap (ACDelco 18")
The PO decided two 14ga wires from the engine to chassis was enough. I dont think its adequate nor do I like the look so off it comes and replaced with these. 18" is good for the passenger side. It may be a bit long for the drivers but we will see. ACDelco makes them in many sizes and they look pretty clean and high quality
Heat shrink wire wrap (black, adhesive lined)
Because I got the wrong ones last order. The Adhesive lining makes them more weather resistant. The other ones I bought in many colors which I can still use to tag wires where needed.
Waterproof in line 30A fuse holder
This will go in line on the Alternator wire since I will be keeping the Ammeter. For whatever reason, i like it.
Xscorpion Voltmeter battery terminal
This is also where many builds differ from each other. I am keeping the Ammeter but I also want a voltmeter. I also dont want to modify my dash or have anything hanging down. I found, and decided to go with a digital voltmeter battery terminal.
Raptor R5BTN Pro Battery Terminal
These terminals again, are a bit controversial as I like the idea of being able to add in additional lines if needed but understand this isnt a requirement for most. They also look really cool.
The next post will be all about wire!
2016 Audi TTS
2005 Honda S2000
1968 Datsun 1600
2005 Honda S2000
1968 Datsun 1600
-
ct06033
- Roadster Fanatic
- Posts: 156
- Joined: Mon Jul 06, 2015 12:10 am
- Location: Denver, CO
- Model: 1500/1600
- Year: High Windshield-68-70
Re: Engine and Dash Wire Harness Rebuild Project 68' 1600
Tell me about it! I never would have thought finding something as simple as battery terminals would be so hard.fj20spl311 wrote:I rewired my 69 with an EZ wiring 20 mini, and Just ordered EZ Wiring 21 Standard Color Wiring Harness Kit that I intend to use to rewire my 67.5.
I have a rebuilt set of gauges coming from Jon - caraddict and I am reconditioning a 67.5 dash with stock size holes.....Out with the Auto meter gauges.
So many decisions....
http://www.ezwiring.com/store/viewcateg ... ?groupid=0
2016 Audi TTS
2005 Honda S2000
1968 Datsun 1600
2005 Honda S2000
1968 Datsun 1600
-
fj20spl311
- Roadsteraholic
- Posts: 5009
- Joined: Mon Nov 28, 2005 3:54 pm
- Location: San Diego, Ca
Re: Engine and Dash Wire Harness Rebuild Project 68' 1600
I am lucky in that department.......I use marine grade stuff.....A little pricy but what's your time worth.
Phil
67.5 SRL311-00148 Blue (FJ cruiser VOODOO Blue)
67.5 SPL311 FJ20E teal SDS EFI
69 SRL311 SOLD
19 Raptor SCAB
67.5 SRL311-00148 Blue (FJ cruiser VOODOO Blue)
67.5 SPL311 FJ20E teal SDS EFI
69 SRL311 SOLD
19 Raptor SCAB
-
ct06033
- Roadster Fanatic
- Posts: 156
- Joined: Mon Jul 06, 2015 12:10 am
- Location: Denver, CO
- Model: 1500/1600
- Year: High Windshield-68-70
Re: Engine and Dash Wire Harness Rebuild Project 68' 1600
Okay, it is time to talk a bit about wires. So, there is a lot of standardization in the automotive industry around wires. Without going too deep into all the standards, here is a link that lists the main categories of primary wire. Generally, each classification refers to a jacket material and a wall thickness.
http://www.automotivewire.info/automoti ... rywire.htm
Theres also many different types of sleve materials with PVC and Cross-linked polyethylene (XLPE) being the most common.
The main difference between the two materials is XLPE can withstand much higher temperatures and degrades less over time whereas PVC gets hard and britle especially when exposed to heat.
riwires.com uses a PVC jacket which is perfectly fine and is OEM quality and still used in modern cars.
I decided to go with XLPE wire which has a longer operating life and found a vendor that sells in 5, 10, 25, and 50 feet at a time. Expect to spend an extra $.15 to $.25 extra a foot but it was worth it in my opinion. This harness will outlast me.
http://4rcustomswire.com/
They have every color I needed to match the stock diagram in 16 and 18 gauge. Solid colors are available in all sizes.
Most colors I bought 5 and 10 foot lengths and a few longer runs I purchased 25ft. I probably could have saved some If I measured each run exactly but I knew I wouldnt be following the stock harness exactly so I want some extra for these modifications. Also, mistakes.
Total spend: $350
2016 Audi TTS
2005 Honda S2000
1968 Datsun 1600
2005 Honda S2000
1968 Datsun 1600
-
ct06033
- Roadster Fanatic
- Posts: 156
- Joined: Mon Jul 06, 2015 12:10 am
- Location: Denver, CO
- Model: 1500/1600
- Year: High Windshield-68-70
Re: Engine and Dash Wire Harness Rebuild Project 68' 1600
Okay, so everything came in! I have been a bit slow to make progress as I had to get a few odds and ends and have been playing around with some of the materials.
First, a few glamor shots of the parts.

Parts

All the wire in the world. Big props to 4rcustomswire.com ordered everything on a saturday and it arrived Wednesday with free shipping.

I may have mentioned it in a parts post, but I ordered some LEDs so the dash will be brighter at night. They look a bit tall, so I am a bit worried about clearance. I suppose we will see once everything is back together.
My first task was creating the starter harness and alternator hookup. I ended up making the alternator hookups a harness for two reasons. 1, all of these wires are different materials than those that will be in the harness, and 2, I am building in some flexibility to move to a right hand mount without needing any other modifications.

It was very hard to get the wrap tight which was surprising. Also, you need to wrap from the ends in so there are less loose ends. I will document more of this later on as it is pretty hard to explain without photos.

A quick shot of the old starter harness next to the new one.
So a new one for me, i have not joined multiple wires together before. My first learning was to invest in a good soldering iron. The one I had was 15w and couldnt heat the wire well. A quick run to the store for a 40w one did the trick. My first attempts ended up in thicker solder points a bit bulky due to using electrical tape. The later joints are much cleaner. I may need to redo the first ones.

First try

Later try
Another long post, hope you guys are enjoying the process. If anyone has any questions I can answer while arms deep in these harnesses, ill be more than happy to try to answer them.
More updates to come!
First, a few glamor shots of the parts.
Parts
All the wire in the world. Big props to 4rcustomswire.com ordered everything on a saturday and it arrived Wednesday with free shipping.
I may have mentioned it in a parts post, but I ordered some LEDs so the dash will be brighter at night. They look a bit tall, so I am a bit worried about clearance. I suppose we will see once everything is back together.
My first task was creating the starter harness and alternator hookup. I ended up making the alternator hookups a harness for two reasons. 1, all of these wires are different materials than those that will be in the harness, and 2, I am building in some flexibility to move to a right hand mount without needing any other modifications.
It was very hard to get the wrap tight which was surprising. Also, you need to wrap from the ends in so there are less loose ends. I will document more of this later on as it is pretty hard to explain without photos.
A quick shot of the old starter harness next to the new one.
So a new one for me, i have not joined multiple wires together before. My first learning was to invest in a good soldering iron. The one I had was 15w and couldnt heat the wire well. A quick run to the store for a 40w one did the trick. My first attempts ended up in thicker solder points a bit bulky due to using electrical tape. The later joints are much cleaner. I may need to redo the first ones.
First try
Later try
Another long post, hope you guys are enjoying the process. If anyone has any questions I can answer while arms deep in these harnesses, ill be more than happy to try to answer them.
More updates to come!
2016 Audi TTS
2005 Honda S2000
1968 Datsun 1600
2005 Honda S2000
1968 Datsun 1600
-
AltxF4
- Roadster Fanatic
- Posts: 79
- Joined: Fri Sep 16, 2016 1:35 am
Re: Engine and Dash Wire Harness Rebuild Project 68' 1600
Nice! Looks like you are doing everything right!
Today I have been working on getting a 71 super beetles wiring in order. Not replacing much other than connections, but man I don't get how people could think you can plug any wire into any free location!
Today I have been working on getting a 71 super beetles wiring in order. Not replacing much other than connections, but man I don't get how people could think you can plug any wire into any free location!
-
ct06033
- Roadster Fanatic
- Posts: 156
- Joined: Mon Jul 06, 2015 12:10 am
- Location: Denver, CO
- Model: 1500/1600
- Year: High Windshield-68-70
Re: Engine and Dash Wire Harness Rebuild Project 68' 1600
So it has been a bit since my last update. I do not have pictures yet, but I am almost done with the dash harness.
My method for each circuit is thus:
Pick a wire to work on. I started with the main power and ground then moved on to following the wires on the diagram and checking them off when each is completed. This was easiest to keep track of what has and hasnt been done yet.
Once I picked a wire, I traced the line on the diagram and found all of the branches. Line this up against the old harness, there were a few inconsistancies for me.
Pick the longest run and measure the wire against the old harness. Insert branches at measured intervals along the wire and LEAVE SLOP ROOM EVERYWHERE. Always measure twice before soldering. For some runs, it was easier to measure and cut a spare wire and use that to measure the distance. Make sure exit points are in the proper place; the actual solder points do not matter as much as the exit points. For bonus points, you can make note of alignment for which direction the Y comes off the main branch. Otherwise, you may need to double the wire back to reach the exit point.
Once you are sure of the location, take a straight blade (i used a safety blade scraper) and make two breaks in the insulation about 1/2" apart, slice the middle section and you can unwrap just that part of the insulation. Dont press too hard or you risk cutting into the metal leads. Strip about an inch off the connecting wire, wrap, and solder. This ended up in the cleanest joints. The example picture is actually three ends joined together but the result is the same if not a bit messier.

A messier joint, but gets the idea across.
When soldering, lay the joint on the tip of the iron and melt some solder inbetween, once you see it flow into the joint, you know it is hot enough to finish the joint from the top. This seems to speed everythign up from waiting for the wire to get hot enough which also seems to melt the PVC jackets of the old wire.
Cut a piece of heat shrink tube so it over laps the joint by about 1/4" on each side. Slide it on (plan this out if you have multiple joints on one line) and apply heat.
Repeat.
Once I made every circuit, I Laid out each line on top of each other along side the old harness for reference and aligning the exit points. I used twist ties to keep everything in place until it was time for electrical tape. Also take this time to count and match up wires with the old harness. I found out I missed a circuit and it would have sucked to find out further along the process.
Once Every line is laid out and accounted for, you can then bundle everything up with electrical tape. I mainly focused on taping around the exit points as those need to be the most exact. Even measuring twice, once everything was together, i found a few places where things did not line up exactly. This is where the slop came in and saved me.
After everything is bundled, you can even off the ends and trim everything to the proper length.
After this, its just crimping ends and building plugs. Ive had to cut open the case on the old harness just to tell what color some wires are. Age is not kind to lighter colors.
Wrapping is next.
My method for each circuit is thus:
Pick a wire to work on. I started with the main power and ground then moved on to following the wires on the diagram and checking them off when each is completed. This was easiest to keep track of what has and hasnt been done yet.
Once I picked a wire, I traced the line on the diagram and found all of the branches. Line this up against the old harness, there were a few inconsistancies for me.
Pick the longest run and measure the wire against the old harness. Insert branches at measured intervals along the wire and LEAVE SLOP ROOM EVERYWHERE. Always measure twice before soldering. For some runs, it was easier to measure and cut a spare wire and use that to measure the distance. Make sure exit points are in the proper place; the actual solder points do not matter as much as the exit points. For bonus points, you can make note of alignment for which direction the Y comes off the main branch. Otherwise, you may need to double the wire back to reach the exit point.
Once you are sure of the location, take a straight blade (i used a safety blade scraper) and make two breaks in the insulation about 1/2" apart, slice the middle section and you can unwrap just that part of the insulation. Dont press too hard or you risk cutting into the metal leads. Strip about an inch off the connecting wire, wrap, and solder. This ended up in the cleanest joints. The example picture is actually three ends joined together but the result is the same if not a bit messier.
A messier joint, but gets the idea across.
When soldering, lay the joint on the tip of the iron and melt some solder inbetween, once you see it flow into the joint, you know it is hot enough to finish the joint from the top. This seems to speed everythign up from waiting for the wire to get hot enough which also seems to melt the PVC jackets of the old wire.
Cut a piece of heat shrink tube so it over laps the joint by about 1/4" on each side. Slide it on (plan this out if you have multiple joints on one line) and apply heat.
Repeat.
Once I made every circuit, I Laid out each line on top of each other along side the old harness for reference and aligning the exit points. I used twist ties to keep everything in place until it was time for electrical tape. Also take this time to count and match up wires with the old harness. I found out I missed a circuit and it would have sucked to find out further along the process.
Once Every line is laid out and accounted for, you can then bundle everything up with electrical tape. I mainly focused on taping around the exit points as those need to be the most exact. Even measuring twice, once everything was together, i found a few places where things did not line up exactly. This is where the slop came in and saved me.
After everything is bundled, you can even off the ends and trim everything to the proper length.
After this, its just crimping ends and building plugs. Ive had to cut open the case on the old harness just to tell what color some wires are. Age is not kind to lighter colors.
Wrapping is next.
Last edited by ct06033 on Tue Nov 15, 2016 3:02 am, edited 2 times in total.
2016 Audi TTS
2005 Honda S2000
1968 Datsun 1600
2005 Honda S2000
1968 Datsun 1600
-
ct06033
- Roadster Fanatic
- Posts: 156
- Joined: Mon Jul 06, 2015 12:10 am
- Location: Denver, CO
- Model: 1500/1600
- Year: High Windshield-68-70
Re: Engine and Dash Wire Harness Rebuild Project 68' 1600
While I was able to salvage and reuse the light sockets, I have heard that it is hard to repair them or find replacements. As the wire is the weakest link, I thought a quick tutorial on replacing is in order. I ended up replacing wire on the original in-line fuse holder to the hazard flasher. While this is a little different from the lights, the concept is the same and I will note the differences.

once you remove the socket itself, the wire terminates in a crown that the positive terminal on the bulb presses against. The difference between this and the light socket is a plastic insulator that keeps the crown from shorting on the socket. You will have to be careful as I assume that insulator is not very heat resistant but it can be done if you are quick.
Come to find out, the crown is nothing but a heaping blob of solder. place the crown on the tip of the solder gun until it all melts and gently free the old wire.


insert the new wire into the hole about 1/8" and crimp the end flat.


Cover this with new solder until a nice new crown is formed. Slide on the rest of the hardware and you are done!


once you remove the socket itself, the wire terminates in a crown that the positive terminal on the bulb presses against. The difference between this and the light socket is a plastic insulator that keeps the crown from shorting on the socket. You will have to be careful as I assume that insulator is not very heat resistant but it can be done if you are quick.
Come to find out, the crown is nothing but a heaping blob of solder. place the crown on the tip of the solder gun until it all melts and gently free the old wire.
insert the new wire into the hole about 1/8" and crimp the end flat.
Cover this with new solder until a nice new crown is formed. Slide on the rest of the hardware and you are done!
2016 Audi TTS
2005 Honda S2000
1968 Datsun 1600
2005 Honda S2000
1968 Datsun 1600
-
ct06033
- Roadster Fanatic
- Posts: 156
- Joined: Mon Jul 06, 2015 12:10 am
- Location: Denver, CO
- Model: 1500/1600
- Year: High Windshield-68-70
Re: Engine and Dash Wire Harness Rebuild Project 68' 1600
So I haven't updated in a while... life and winter (both cold and shorter days) have been keeping me from this. Firstly, Some glamour pictures of the completed harness:

Engine harness with starter harness and a few other wires. Pretty happy with how this one turned out.

Close up of fuse box and Relay box. Overall, it turned out okay but as you can see, the two black wires are just a tad long.

Complete dash harness.
I know I said I would post a wire wrapping tutorial but I think it can be explained in words. First, Tightly wrap the cables with electrical tape about a foot apart. Pay particular attention to the foot of the branches so you minimize the exposed part of the harness. When wrapping, make at least one full wrap around the wires, then angle the tape at 45 degrees to the wire and make your way down the wire making sure to overlap at least half the width of the tape on each pass. Keep in mind your ends, as they unravel easily. I started with the arms, working from the ends to the main bundle of wires and wrapping this main bundle a few times. Wrap the bundle from one end to the other paying close attention to the branches as they can be difficult to make sure the tape overlaps on all sides. I used a bit of electrical tape to wrap the end of the tape so it will not unravel.
Last weekend, I put the engine harness in. Everything was perfectly aligned and went in well. I still cant help the nagging feeling that I crossed the wrong wires or something but having quadruple checked all the wires and testing for continuity, there isn't much more I can do to alleviate the feeling other than to test it.
The Dash harness went... less smooth. After wrangling it into place, Overall length is perfect although the relay box did not line up with the firewall as well as Id hoped. This also meant the arm that enters the engine bay on the passenger side was several inches short. After much thought and kicking myself, Ive decided to re-do the offending branch. This will also give me a chance to re-wrap the harness since i'm not particularly happy with the outcome, fix one or two ugly parts and I am going to solder all of the crimp connections. one or two of them popped out while man-handling the harness into place. Id prefer to prevent that from happening again, or worse yet, having it happen some time in the future when I am on the road.
Otherwise, everything else fits and distances are correct. the LEDs even fit the light holes in the gauges albeit a bit tightly and require some wiggling to insert fully.
This weekend will be removing the harness and rebuilding.
Engine harness with starter harness and a few other wires. Pretty happy with how this one turned out.
Close up of fuse box and Relay box. Overall, it turned out okay but as you can see, the two black wires are just a tad long.
Complete dash harness.
I know I said I would post a wire wrapping tutorial but I think it can be explained in words. First, Tightly wrap the cables with electrical tape about a foot apart. Pay particular attention to the foot of the branches so you minimize the exposed part of the harness. When wrapping, make at least one full wrap around the wires, then angle the tape at 45 degrees to the wire and make your way down the wire making sure to overlap at least half the width of the tape on each pass. Keep in mind your ends, as they unravel easily. I started with the arms, working from the ends to the main bundle of wires and wrapping this main bundle a few times. Wrap the bundle from one end to the other paying close attention to the branches as they can be difficult to make sure the tape overlaps on all sides. I used a bit of electrical tape to wrap the end of the tape so it will not unravel.
Last weekend, I put the engine harness in. Everything was perfectly aligned and went in well. I still cant help the nagging feeling that I crossed the wrong wires or something but having quadruple checked all the wires and testing for continuity, there isn't much more I can do to alleviate the feeling other than to test it.
The Dash harness went... less smooth. After wrangling it into place, Overall length is perfect although the relay box did not line up with the firewall as well as Id hoped. This also meant the arm that enters the engine bay on the passenger side was several inches short. After much thought and kicking myself, Ive decided to re-do the offending branch. This will also give me a chance to re-wrap the harness since i'm not particularly happy with the outcome, fix one or two ugly parts and I am going to solder all of the crimp connections. one or two of them popped out while man-handling the harness into place. Id prefer to prevent that from happening again, or worse yet, having it happen some time in the future when I am on the road.
Otherwise, everything else fits and distances are correct. the LEDs even fit the light holes in the gauges albeit a bit tightly and require some wiggling to insert fully.
This weekend will be removing the harness and rebuilding.
2016 Audi TTS
2005 Honda S2000
1968 Datsun 1600
2005 Honda S2000
1968 Datsun 1600
-
spags1986

- Roadster Fanatic
- Posts: 368
- Joined: Fri Oct 07, 2016 10:31 am
- Location: Azusa California
Re: Engine and Dash Wire Harness Rebuild Project 68' 1600
Wow! Great job, what a project.
1967.5 2000 (In Frame off restoration)
1966 1600
1969 2000
1966 1600
1969 2000
-
ct06033
- Roadster Fanatic
- Posts: 156
- Joined: Mon Jul 06, 2015 12:10 am
- Location: Denver, CO
- Model: 1500/1600
- Year: High Windshield-68-70
Re: Engine and Dash Wire Harness Rebuild Project 68' 1600
Okay, so I was able to lengthen the the passenger side of the arm about 6 inches and now it is the perfect length to reach into the engine bay. Re-wrapped the harness, soldered all of the crimps and replaced all of the spade connections which were merely crimped on with marine spades that have waterproof heat shrink sleeves which should provide some added durability and longevity to those connections. Back in, hooked the main power up (ignition, amp meter, bat/alt) and did a test crank of the engine and... nothing. After some cursing and contemplation while staring at my potential wasted work, i realized I never hooked the positive battery terminal to the starter. Doh!
Hooking that up and the job it takes to get to it, hook everything back up, turn the key and... Houston, we have ignition! and headlines... what? they're on.. always on... some quick thought and I realized I hooked power to the wrong connection on the relay. quick wire swap fixed that and on to hooking up the rest.
Some things of note. The S/Brake light hole is too shallow for the LED. Im using the original bulb until I can order a shallower LED replacement. The other bulbs went in fine although I still need to do the ones for the Tach as they are a PIA to put back in. I also seem to have messed up the order of wires for the heater so it goes off/low/high/med. oops. running, dash, hazard, brake lights work perfectly but i ran into an issue.
So, hazard lights work great, fronts, rears, indicators all flash brightly and consistently. However, the turn signals are another story. Right turn front is really dull and indicator flashes intermittently; rear works. Left turn works sometimes, indicator doesn't flash at all. changing the blower speed seems to make the indicators flash. studying the diagrams, I know the lights and blower share the ground point by the radiator reservoir. I think this is where the cross talk is happening and may also explain the power drain. I haven't yet had a chance to test this theory but any input on this is welcome.
Another oddity, after turning off the hazards or turn signal, the flasher continues clicking 2 or 3 times even though the lights are off. After reading the reviews for the flasher, i found out it is a... feature? on this particular make. Weird, but livable.
All in all, im really happy with the new harness and glad I did it but it was definitely a learning process and not for the faint of heart. Would I do this project again? I actually think I would. There is definitely something zen about putting one of these together.
2016 Audi TTS
2005 Honda S2000
1968 Datsun 1600
2005 Honda S2000
1968 Datsun 1600
-
Duchess68
- Forum Newb
- Posts: 1
- Joined: Wed Feb 01, 2017 12:34 am
Re: Engine and Dash Wire Harness Rebuild Project 68' 1600
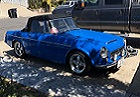
Wow... that has given me some serious inspiration. I started disconnecting cables one day, and ruined my beautiful little Duchess... I definitely want to get her back in the road this year.
You do not have the required permissions to view the files attached to this post.
65 Buick Riviera aka El Monstro
68 Datsun Roadster 1600 aka Duchess
07 Ford Expedition aka Marshmallow
68 Datsun Roadster 1600 aka Duchess
07 Ford Expedition aka Marshmallow