Seat Upholstery installation
Posted: Mon Jul 18, 2016 11:53 am
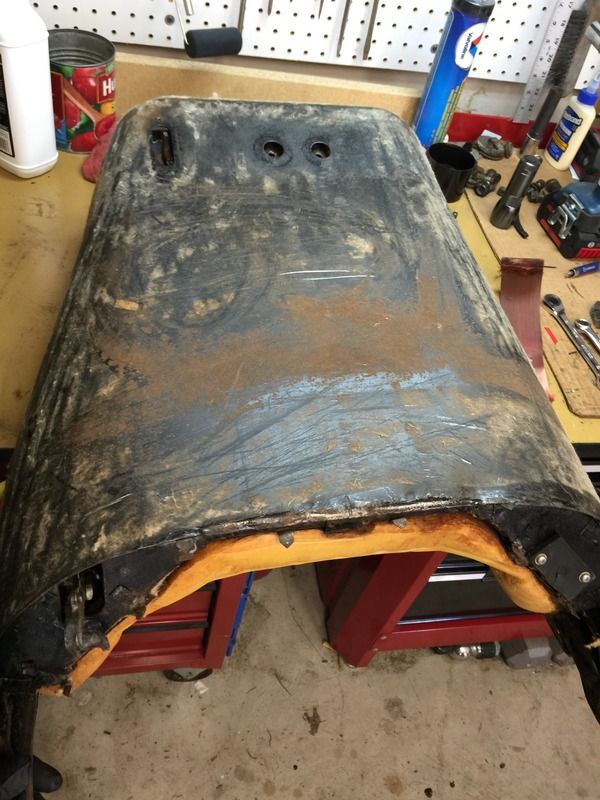
The seats in the '68 were in need of new covers. The old "custom" fabric was rotten and splitting.
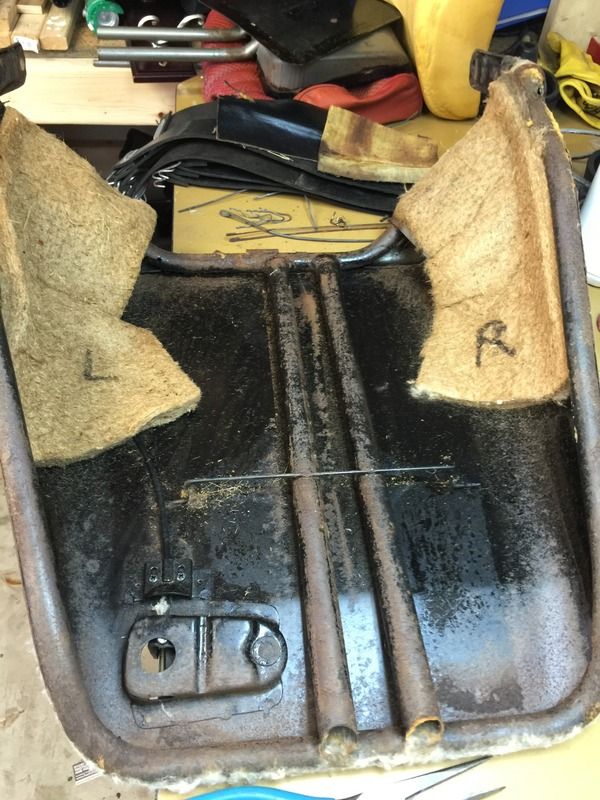
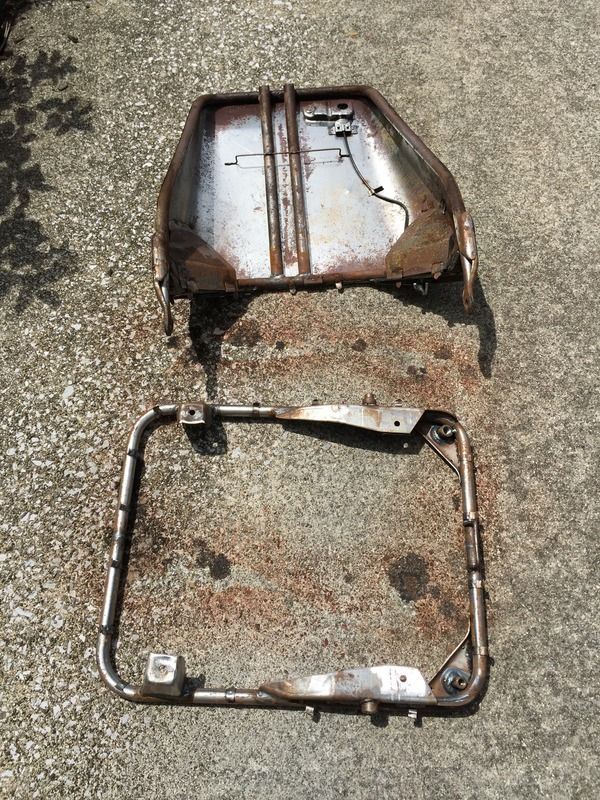
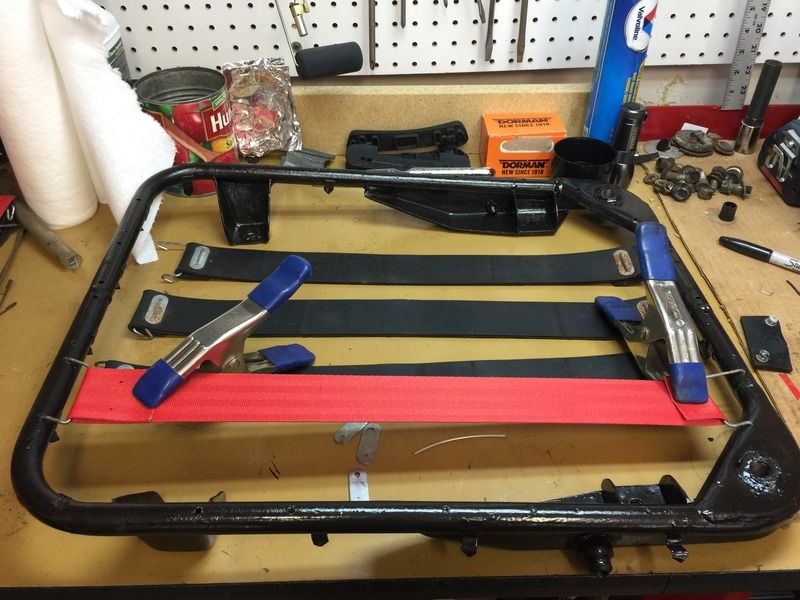
I stripped the seats to the frames and had the frames sandblasted. I disassembled the rubber band assemblies and soaked the clips and staples in a rust dissolver.
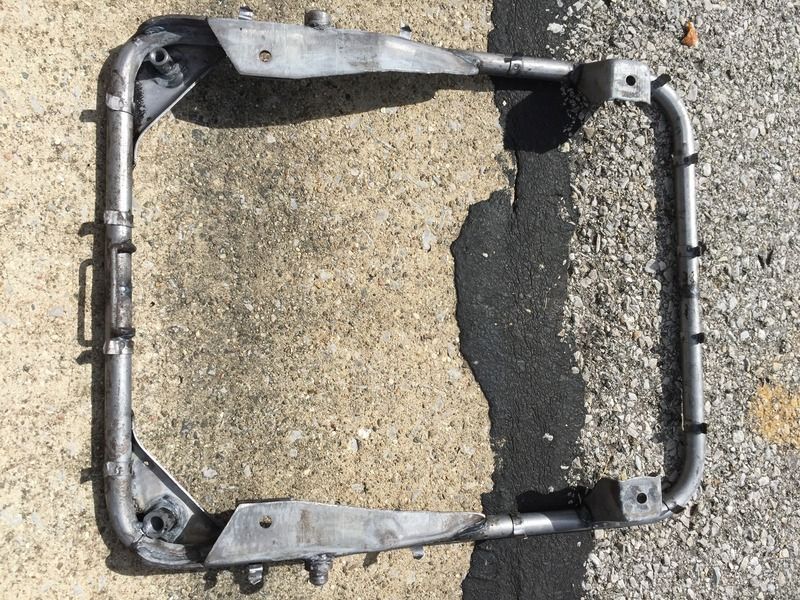
Two coats of etching primer on all. Frames and bolts painted satin black, clips and staples painted gloss aluminum. I was lucky with these frames, all the finger poking metal tabs were still on the frame so didn't have to replace or rethink the upholstery attachment method.
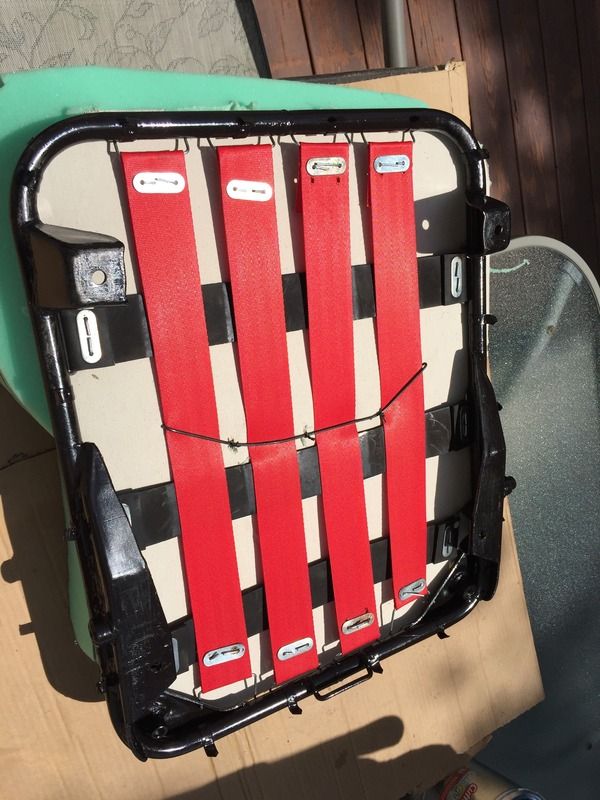
Built up the straps with new strapping and the refreshed hardware. I cut new burlap (two layers) from a couple of coffee bean sacks I got at the local craft store).
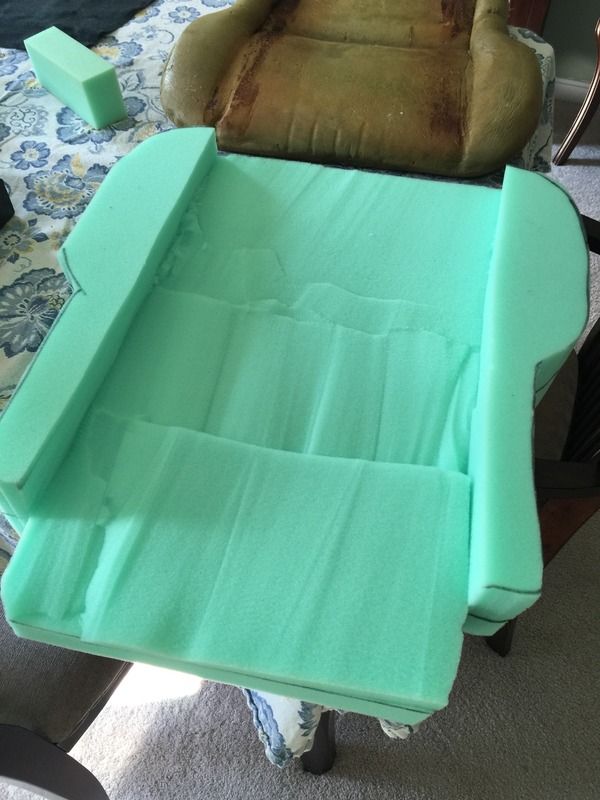
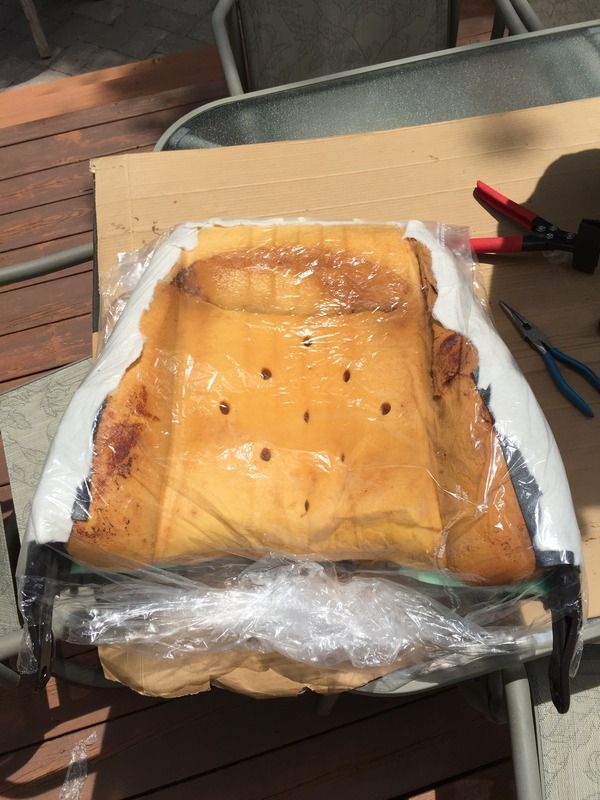
The foam wasn't too bad so I was able to reuse it. I added some scrim backed 1/4" foam to the bolsers. I added some 1/2" hi density foam to the center of the seat bottoms (the butt dent).
I bought the stock replacement covers (made by Distinctive Industries as I'm sure all the replacement covers are).
The covers arrived with no instruction or hints about installation. I guess the manufacturer assumes the installer knows what he's doing. Seems odd for a product that pops up on most any Google search for Datsun Roadster Upholstery.
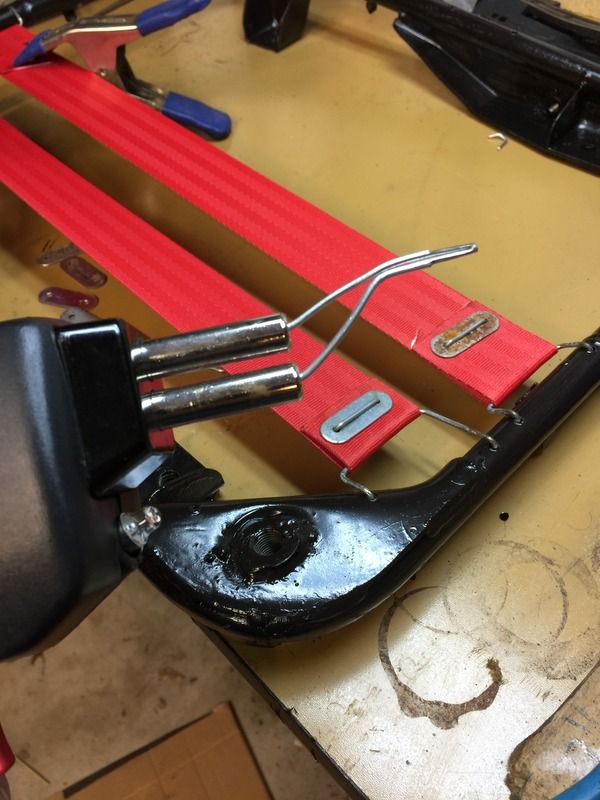
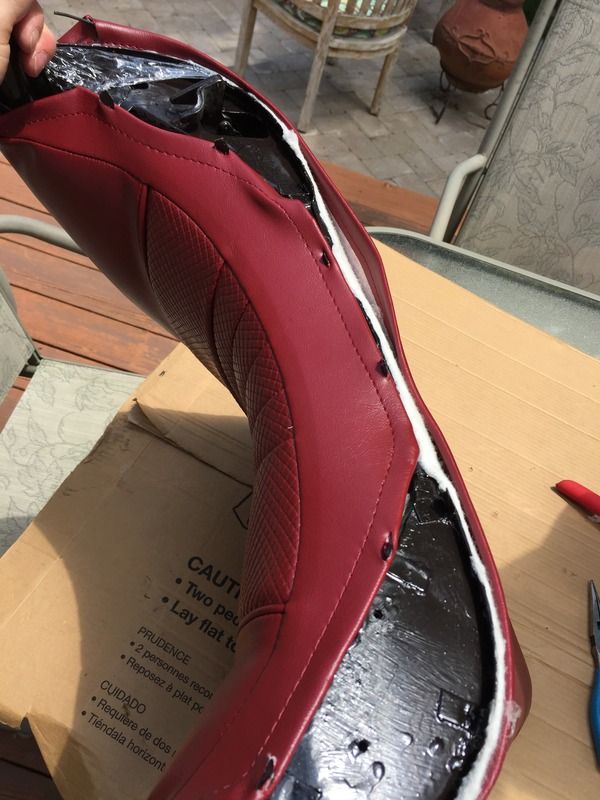
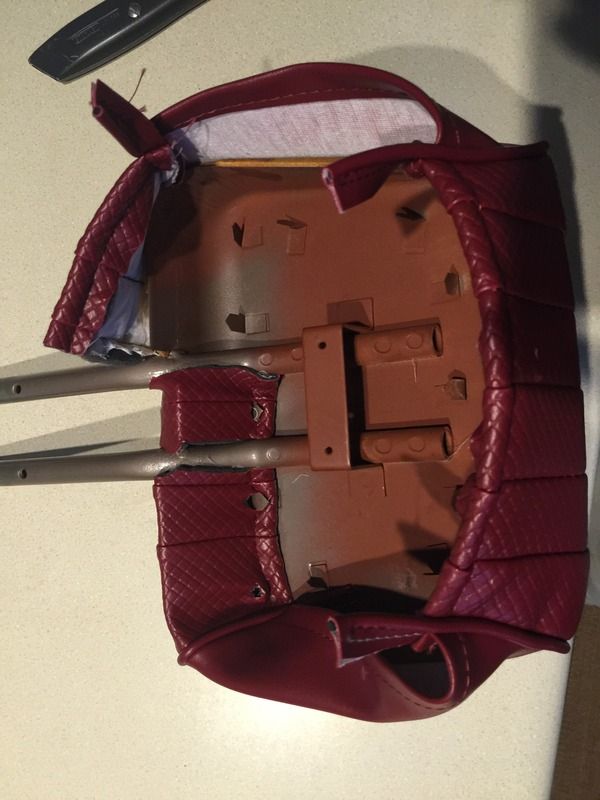
The covers are well made but very snug. All the bottom edges are tucked inside and sewn making about a 3/8" loop under the edge of the cover.
My original thought was to slit thru that double thickness of material, push the slit over the frame prongs and bend 'em down. That's the way the old covers were attached on both cars so seemed "factory".
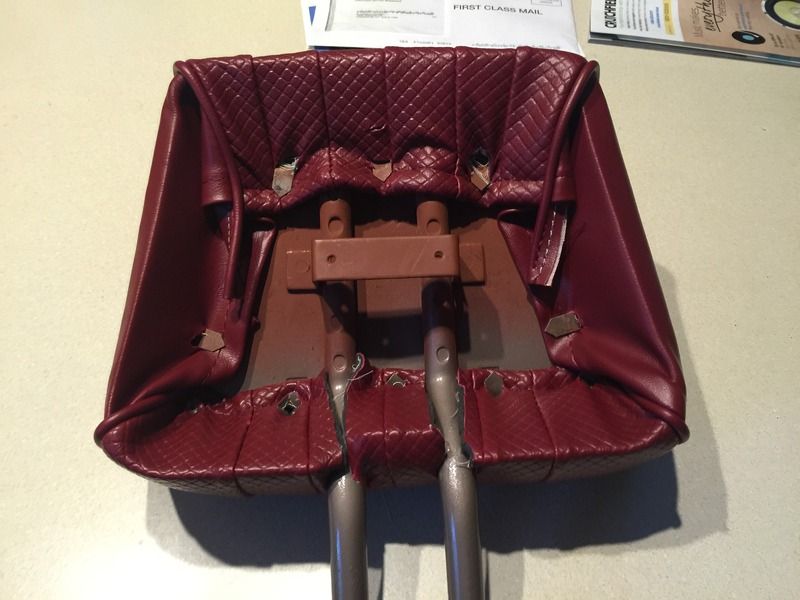
It takes a lot of pulling to get the covers in place and stretched around to where I could get the prongs pushed into the covers. I was concerned about strength and the gap between prongs making the cover shift or pull so I bought in an expert (my wife). After some discussion, we decided to first thread a 1/16" music wire thru the "loop" at the bottom of the cover. Then we did the slit/prog thing on the backside of the wire. This music wire is very "springy" and will bend around a large radius at the bottom of the seat but resists kinking. You can buy 36" lengths at most any hobby or hardware store.
Adding the wire meant that the cover pulls uniformly along the entire length of the wire and makes a very secure connection once the wire is hooked over the prong. It also makes the job of pulilng the cover into place easier because you can grip the wire in the cover easier and more uniformly than simply pulling on the cover material. Most of the domestic cars and pickups of the 60's thru 80's used this sort of method. The bottom of the seat had a wire trapped in the bottom seam. That wire was hog ringed to the seat frame to attach the upholstery.
I notched the closed end of a trash bag (to make it easier to tear) and slipped it over the frame/foam before I pulled the cover over the seat. The plastic bag is very slick and helps the cover slide over the foam padding. One the cover is in place and few fastening points are done, it's pretty easy to pull the plastic out (remember those notches??).
The job would also be easier if the covers were left in the sun but it's been cloudy here for a couple weeks so I didn't want to wait for sunshine.
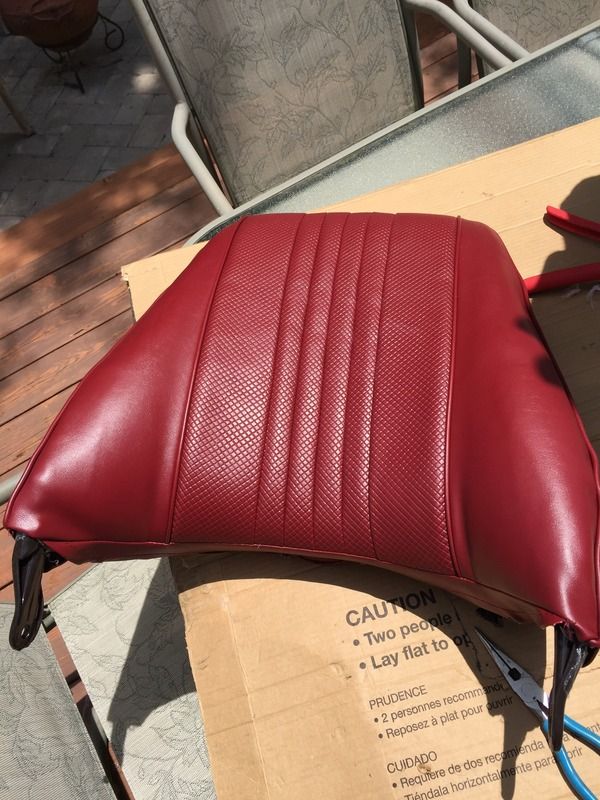
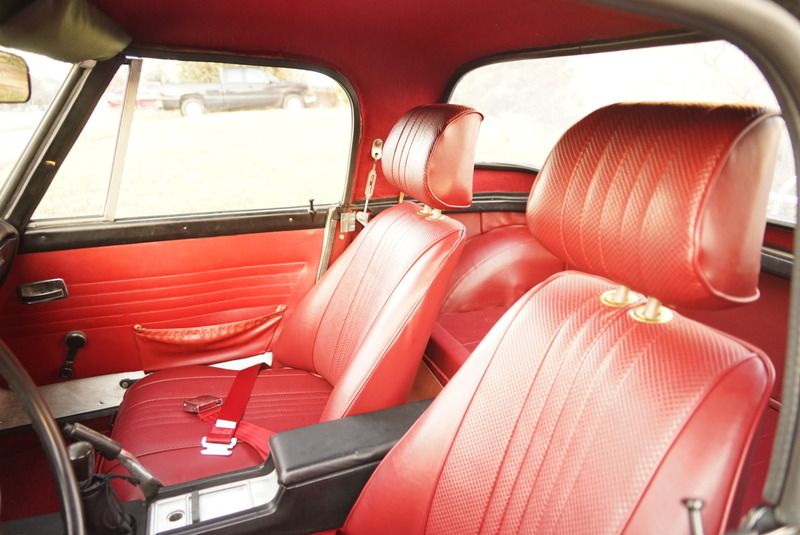
We're pleased wih the way the seats came out. They look as good as the custom upholstery in the '69.
It's not a tough job, takes some time and patience but seems a job most anyone could so. If you decide to tackle the project, try the wire trick, it'll help a lot.
Dan
I stripped the seats to the frames and had the frames sandblasted. I disassembled the rubber band assemblies and soaked the clips and staples in a rust dissolver.
Two coats of etching primer on all. Frames and bolts painted satin black, clips and staples painted gloss aluminum. I was lucky with these frames, all the finger poking metal tabs were still on the frame so didn't have to replace or rethink the upholstery attachment method.
Built up the straps with new strapping and the refreshed hardware. I cut new burlap (two layers) from a couple of coffee bean sacks I got at the local craft store).
The foam wasn't too bad so I was able to reuse it. I added some scrim backed 1/4" foam to the bolsers. I added some 1/2" hi density foam to the center of the seat bottoms (the butt dent).
I bought the stock replacement covers (made by Distinctive Industries as I'm sure all the replacement covers are).
The covers arrived with no instruction or hints about installation. I guess the manufacturer assumes the installer knows what he's doing. Seems odd for a product that pops up on most any Google search for Datsun Roadster Upholstery.
The covers are well made but very snug. All the bottom edges are tucked inside and sewn making about a 3/8" loop under the edge of the cover.
My original thought was to slit thru that double thickness of material, push the slit over the frame prongs and bend 'em down. That's the way the old covers were attached on both cars so seemed "factory".
It takes a lot of pulling to get the covers in place and stretched around to where I could get the prongs pushed into the covers. I was concerned about strength and the gap between prongs making the cover shift or pull so I bought in an expert (my wife). After some discussion, we decided to first thread a 1/16" music wire thru the "loop" at the bottom of the cover. Then we did the slit/prog thing on the backside of the wire. This music wire is very "springy" and will bend around a large radius at the bottom of the seat but resists kinking. You can buy 36" lengths at most any hobby or hardware store.
Adding the wire meant that the cover pulls uniformly along the entire length of the wire and makes a very secure connection once the wire is hooked over the prong. It also makes the job of pulilng the cover into place easier because you can grip the wire in the cover easier and more uniformly than simply pulling on the cover material. Most of the domestic cars and pickups of the 60's thru 80's used this sort of method. The bottom of the seat had a wire trapped in the bottom seam. That wire was hog ringed to the seat frame to attach the upholstery.
I notched the closed end of a trash bag (to make it easier to tear) and slipped it over the frame/foam before I pulled the cover over the seat. The plastic bag is very slick and helps the cover slide over the foam padding. One the cover is in place and few fastening points are done, it's pretty easy to pull the plastic out (remember those notches??).
The job would also be easier if the covers were left in the sun but it's been cloudy here for a couple weeks so I didn't want to wait for sunshine.
We're pleased wih the way the seats came out. They look as good as the custom upholstery in the '69.
It's not a tough job, takes some time and patience but seems a job most anyone could so. If you decide to tackle the project, try the wire trick, it'll help a lot.
Dan