Roadster L6

Here can put pictures and write-ups about your roadster or other vehicles.

Moderators: notoptoy, S Allen, Solex68

mlwebb
Roadster Fanatic
Posts: 136
Joined: Sat Dec 06, 2014 3:52 am
Location: Eugene, Oregon
Contact:

Roadster L6

Post by mlwebb »

Hi folks,
I think its time for a build thread - I just got the body put back on the frame - I am rather slow, so I didn't want to start a thread and have it sit there for months. So to catch up a little: (click for larger photos)

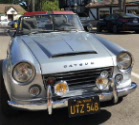
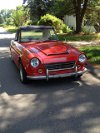
My name is Michael, I live in Eugene, Oregon, and bought my 67 1600 roadster 20 years ago, for $1250. It had no top, was missing various bright bits, and a few holes in the floorboard. I drove it for a year or so, then started taking it entirely apart. The engine turned out to have a couple stacked head gaskets on it, and was beyond help, so I started looking for something else to put in it. The body had a dent every six inches, etc.

Much as I like a nicely restored roadster with all the shiny bits and period look - that is not this car, nor am I the right person for such work - I like to alter things (: - so bear with me, and my apologies to those safeguarding roadster history. In no way would I argue that this swap makes sense, it is a car purely for my amusement - and I like the feel and sound of it on an Oregon country road.

Eventually I got it painted and back together with a 260z block, 240z head and an old datsun 4 speed. (radiator and battery in the trunk)I drove it for a few years, it was rather quick, and nicely balanced but various unfinished bits, odd gremlins, and other life issues intervened(mostly female), and it sat, rather neglected, until a snow laden carport fell on it, breaking the windshield, wings, and putting a dent in the back fender (the roll bar took the rest). So I decided it was time to go back through it, get more of the details right, and get it back on the road. The following chronicles that effort. After pulling the engine and body, finding a new windshield and frame, and sending the (remaining) shiny bits off to be rechromed, I started looking for a 5 speed...
May, 2014
http://www.mlwebb.com/datsun_roadster/start-P5310068.JPG

I figured I should have a second brake circuit, and saw an alfa at my shop neighbors dyno that had a beautiful brake bias/dual mc setup and decided to do something similar. I got a set of Tilton pedals and modified the firewall to suit, welding in an 1/8 sheet and a little sub-frame to support the pedals:
mock up:
http://www.mlwebb.com/roadster/images/P1254234r.JPG
The pedal ratio is much better than stock, which I hope should help brake pedal effort.
firewall:
http://www.mlwebb.com/roadster/images/P3014246r.JPG
with paint and mc's (Tilton 75's):
http://www.mlwebb.com/datsun_roadster/tilton_161432.jpg

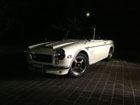
Speaking of paint, I took some time on the body, fixing dings, and spots I wasn't happy with. I had never liked the door gaps on my car, wide even for a roadster, so I spent some weeks welding 1/8" welding rod around 3 sides of each door, a process that might have been easier if I was a better welder. Not sure where the photos of that are, seem to have misplaced a folder. The paint I did this last fall, spraying a couple coats of Southern Polyurethane’s white epoxy primer (great primer), followed by a couple coats of pure white. Then an intercoat, and two more with silver and white pearl, then 3 coats of clear coat. I have a few runs from the last coat of clear to sand out (it was getting too chilly to paint, just made it before it got cold), but other than that happy with the paint. Still need to buff it out, but figure that is a nice spring days job (:

http://www.mlwebb.com/datsun_roadster/paint-1-20151011_193648.jpg
http://www.mlwebb.com/datsun_roadster/paint-2-20151017_125853.jpg

About the hood. Later pics will make sense of the shape - I made it during the first round, by cutting most of the sheetmetal out of the hood, laying a piece of wire mesh with copper wires attached to it over the top and shaping it over the engine, the valve cover and front SU carb providing the shape. Then I filled and shaped it, made a female fiberglass mold, removed all my mesh and wire so I just had the outside edge and hinge of the original hood, which I fiberglassed into the mold. 18 years later it's still solid, so I guess it worked.

Meanwhile, I ran across Xnke on Ratsun, who was offering to convert JDM Nissan S15 six speed transmissions to fit L series engines, and thought "hell yes". I bought a six speed in N. Carolina, had it shipped to him, and sent him a front bellhousing from a l-series four speed. The only remaining hurdle was the speedometer - s15 six speeds have the speedo in the differential, but some have a place for it in the housing, just not the speedo gear. Xnke needed an internal speedo gear from an old datsun four speed, he called all over the country, only to have his last two leads dry up. Apparently the right metal gear was not to be found - until, in a moment of brillance, I thought to look in the old four speed I had gotten for free, used in the first edition, and just pulled out. I pulled the four speed apart, found the gear, sent it to him -voila! I did need to buy a speedo pinion, but that felt cheap after not having to rig a new sort of speedometer.

So next were frame mods to fit the six speed:
http://www.mlwebb.com/datsun_roadster/framecut-P4250022.JPG

Between the length of the L6 and the tranny, there wasn't much left of the frame crossing, and I wanted it to set as low as possible, so cut the center out trough.

http://www.mlwebb.com/datsun_roadster/trannymt-3-P1010027.JPG

I cut a section of 6" rectangular tube (1/8), and then reversed the top angles, so there is a seam midway up each side of the U, welded to the frame parts and lengthwise. Plug welds in the bottom of the U tie it to the reaming and existing bottom. The recess is for the tranny tailshaft counterweight.
The rectangular section on top in the next photo goes under the front of the 'U', connecting the front two X legs, there is a similar one under the back, to provide a little "section" depth.
http://www.mlwebb.com/datsun_roadster/trannymnt-2-P1010025.JPG
Here is a test fit picture, showing the rear cross piece reinforcing:
http://www.mlwebb.com/datsun_roadster/tranny-20150426_175529.jpg

Meanwhile, the old flywheel just looked sad, and very heavy (28lbs, probably from a 4 cylinder) - a shiny new Fidanza Aluminum flywheel at less than half the weight, and a new Exedy Clutch were easily rationalized. (rationalization is an important skill for a roadster owner - in theory I should be able to remove two tranny mount bolts from under the car, remove the hood, 4 motor mount bolts, disconnect numerous wire and hoses, and pull the engine and tranny - but I am not wanting to anytime soon (:

http://www.mlwebb.com/datsun_roadster/flywheel-P4150015r.JPG
http://www.mlwebb.com/datsun_roadster/flywheel-clutch-P1010028.JPG

The engine has about 5,000 miles on it - it's a 260z block, bored, with a 240 head, Schneider 270/280 .460 lift cam, springs, LD28 waterpump, higher volume oil pump, etc. I am saving my quarters for a 123ignition distributor (set mech and vac advance curves on a laptop or phone, f1 style spark balancing, very nice, but $$$) I got new headers, modified them to suit and added two a/f sensor ports, then had them ceramic coated.
The (round top) SU carbs are off getting their throttle shafts rebushed. More on them later. I got the engine cleaned up, reworked my homemade throttle linkage/balance tube a bit, and tapped(1/4"npt) into the water jackets of cylinders 5 and 6, plumbed via aeroquip hose to the thermostat housing and hose to radiator, respectively. There are some cooling threads on Hybridz that describe the rationale and details.

http://www.mlwebb.com/roadster/images/engine-20160109_221009.jpg

It's getting late, to be continued shortly

Michael
67 1600 > 2600
User avatar
spl310
Roadster Guru
Posts: 13241
Joined: Sun Dec 29, 2002 10:38 pm
Location: In front of this keyboard... in Jacksonville, Florida!

Re: Roadster L6

Post by spl310 »

Very cool! Too bad that you didn't have weber or Mikuni carbs to avoid the hood clearance bump
"Wow, a Roadster!" Stuart Little

1967.5 2000
1967.5 2000
1964 1500
1964 1500
1967.5 1600
1968 chassis
2006 Acura MDX
2013 Volkswagen Jetta TDI wagon
1995 F350 Powerstroke!
More...
Toptech360
Roadsteraholic
Posts: 661
Joined: Mon Oct 28, 2013 1:59 pm
Location: Bellingham, Washington

Re: Roadster L6

Post by Toptech360 »

Awesome fabrication skills. Very nice attention to detail too. Definitely keep on adding to your build thread here.
Dan
1964 Datsun SPL310. The Datsun
1997 Toyota Tacoma LX 4wd. The Truck
2009 Subaru Forester XT.
2017 Toyota AWD Swagger Wagon.
mlwebb
Roadster Fanatic
Posts: 136
Joined: Sat Dec 06, 2014 3:52 am
Location: Eugene, Oregon
Contact:

Re: Roadster L6

Post by mlwebb »

I went through the front end and replaced rubber, did the mklotz70(ratsun) -bluehandsinc Altima vented rotor, volvo/girling caliper mod, with ebc yellowstuff pads. Used AN3 banjo end stainless hoses from Pegasus Racing with 10mm banjo bolts to the caliper. Ran all new brake lines in Fedhill Cunifer (copper/nickle alloy) using single flare 37degree an fittings (tube nuts). At the rear I used some premade 3/8-24 Nicop lines, clipping the ends and flaring them for the junction on the axle.
http://www.mlwebb.com/datsun_roadster/fcaliper_202054.jpg
http://www.311s.org/phpBB3/download/file.php?id=19981&mode=view
I ran the line from the front brakes across behind the front crossmember.
http://www.mlwebb.com/datsun_roadster/fr-brakes-20151103_202411.jpg

I had modified the front spring perches (the center was rusty) with new plates for t-bar mount shocks, and then recently replaced the front springs with Mike Youngs comp springs - but it still looked like it was sitting high (much as I could tell with the body off), so I modified the perches again, dropping the whole triangle. The white in the bottom of the perch is uhmwpe.
http://www.mlwebb.com/roadster/images/a-arm20150822_135143.jpg
http://www.mlwebb.com/roadster/images/springperch.jpg

Next up was the rear suspension. My rear springs had been re-arched, with a helper spring added, years ago and were rather heavy. I got new flex-form springs and made some lowering blocks out of aluminum bar, slightly easing the leading edges.
http://www.mlwebb.com/datsun_roadster/lowering-blocks-20150912_160732.jpg
http://www.mlwebb.com/datsun_roadster/leaf-spring-20150912_181547.jpg
The rectangular tube with holes is the panhard bar mount, more below.

I also got interested in replacing the rear shackles with leaf spring sliders. After looking at the commercially available ones, I liked some features of each, but they were slightly wide - so I bought the greasable shafts and made my own boxes and slides (the last photo, with body on, indicates I may need to reverse the shafts, so the zirt is on the inside, as I am hard up on the fender well inside lip). The passenger side slider sits outboard of frame a little more than the driver side, as my roadster received a bump in the right rear some time before I got it (possibly why it was missing bumpers), so that back corner bolt is still a little off (I took care of most of it the first go-around). I spent some time with strings and a level locating the rear end - the springs toe in to the front.
I thought the UHMWPE sliders would be quieter than steel bearings, and also lined the insides of the boxes with some .062 self adhesive UHMWPE.
The nuts holding them on are high strength flanged lock nuts (slightly oval)- As I wasn't sure of location front to rear, I initially set them up to bolt on with u-bolts, hear is a mockup with the old springs, and once I got the new springs and knew where they went (further back and further out ), I welded them to the frame.
http://www.mlwebb.com/roadster/images/leaf-spring-slider-datsun-roadster-0018.JPG
http://www.mlwebb.com/datsun_roadster/leaf-spring-slider2-20160201_143228.jpg

I had read a few places that the emergency brake on a roadster was in the way of adding a panhard bar, but looking at it I figured that moving the emergency brake pivot back an 1 1/4" would allow room for one, so I welded an extension on the bracket, and will probably need a longer cable when I hook it up. I looked around for tidbits of info on likely loads transferred by the bar in cars the size of the roadster, multiplied by three for safety factor, and decided that the bar, rod ends and supporting structure did not have to look like they came from under a Detroit car.
The u-bolt bottom plate/shock mount (upside down in this pic) looked like a good place to get as long a rod as possible.
http://www.mlwebb.com/roadster/images/panhard-mt-20150428_194028.jpg
This pic before I replaced the brake line. It may not look like it, but I think it all has plenty of clearance and range of motion, particularly with a well located axle- apart from the rub strip on the panhard frame support.
http://www.mlwebb.com/roadster/images/panhard-20151028_210147.jpg

Which brings me to the torsion bar -or lack of one on my 67. Since I added some reinforcing to the underside of the frame X (to make up for cutting most of it out), I had a place to put a front mount. The differential mount bolts on, and has a u-bolt that pins it to a recess in the front of the differential to take pressure off the pumpkin bolts, and take the rotation force. The rear mount hangs 2" below the bottom of the differential, and the torsion/traction bar is very close to the same length as the driveshaft.
http://www.311s.org/phpBB3/download/file.php?id=20084&mode=view
http://www.311s.org/phpBB3/download/file.php?id=20082&mode=view

Next up was exhaust. In my experience large exhausts on l-engines have an annoying tendency to backfire at odd times, that, and curiosity led to the current solution. I got a new header (the old one leaked), a Remflex gasket to make sure this one doesn't, and ditched the final Y connector.
I added a couple mild steel mandrel bent elbows to get the exhaust below the frame, and a couple a/f guage sensor ports. I got all the exhaust mandrel bends from Columbia River Mandrel Bending. The two 2" pipes attach to flex joints and transition to 1.75" tube, and two 20"X 3 1/2" Porter Steelpack mufflers and run back to two Thrush resonators, and eventually, two SS tips (2 or 2.25 pencil), one above the other. I figured 1.75" was probably about max size for 3 cylinders per pipe, to keep it moving.
http://www.mlwebb.com/datsun_roadster/exhaust.jpg
I had all the exhaust pieces ceramic coated as well. Of course various brackets were required to support all this, hopefully rather firmly, as it is all a little tighter than ideal.
It is a little low, but so are a few other spots on the car. For now, ignore the stainless pipes in the frame holes (incl two I added), those are coolant lines, which I will get to later.

That's enough for tonight, one more ought to get up to date.
Michael
67 1600 > 2600
mlwebb
Roadster Fanatic
Posts: 136
Joined: Sat Dec 06, 2014 3:52 am
Location: Eugene, Oregon
Contact:

Re: Roadster L6

Post by mlwebb »

I am also making a new gas tank, theoretically a bit shy of 15 gallons, out of 10ga 5052 aluminum. My shop neighbor has a very nice tig, but he is busy with a couple fab jobs, so my gas tank is waiting patiently.
http://www.mlwebb.com/datsun_roadster/gas-tank_153111.jpg
http://www.mlwebb.com/datsun_roadster/gas-tank-2-20160201_132201.jpg

This weekend I got the body back on the frame, 20 months after pulling it off:
http://www.mlwebb.com/datsun_roadster/bodyup_133753.jpg
http://www.mlwebb.com/datsun_roadster/bodyup2_134714.jpg

http://www.mlwebb.com/datsun_roadster/enginebay-20160131_155753.jpg
http://www.mlwebb.com/datsun_roadster/enginebay2-20160131_162820.jpg

http://www.mlwebb.com/datsun_roadster/bodyon3_174945_001.jpg

These are tall older tires (195/70/14 and 215/60/14) on the Appliance mesh wheels that came with it, which are a comfortable 'road trip' tire, eventually I'll get some new 15 or 16" wheels and go wider on the rear (225 on 8" wheels should fit easily, maybe 245) Rather than flares, I tubbed the back fenders, moving them out. Overall I am very happy with the ride height - just pushing on a fender springs and jumping up and down on the floorboards it feels firm and dampened. Comparing tire clearance and the bump stop gaps, looks good, so now I can get it bolted down, hook up the brake and clutch lines, and start on the next list (: I also need to order some rubber, at least the wing and windshield stuff for now.
Michael
67 1600 > 2600
User avatar
Gregs672000
Roadster Fanatic-Site Supporter
Posts: 9427
Joined: Fri Aug 07, 2009 11:47 pm
Location: Tacoma, WA

Re: Roadster L6

Post by Gregs672000 »

Diggin it. The straight six is a nice reving and sounding engine... best part of a Z car to me. Nice work!
Greg Burrows
'67 2000 #588
Tacoma, WA
User avatar
roadstermike
Roadster Fanatic-Site Supporter
Posts: 428
Joined: Sat May 31, 2003 6:45 pm
Location: Orange County, CA

Re: Roadster L6

Post by roadstermike »

Great work so far! Is there a way that you could of lowered the front of the engine so you can use an unmodified hood? Im guessing not based on your fab skills, just curious. Looking forward to seeing more photos and updates.
Michael
67.5 2000 clone
User avatar
Alvin
Roadster Nut-Site Supporter
Posts: 8381
Joined: Tue Jan 23, 2007 7:01 pm

Re: Roadster L6

Post by Alvin »

this is nuts!
rear mounted radiator?

The hood is absolutely killing me but my hats off to some serious fabrication skills!
Somebody get this man some triple Mikuni's!
Alvin Gogineni
San Jose, CA
1967.5 SPL/SR20
1997 Acura Integra GS-R
2022 Chevy Bolt EUV
zcarblog.com
Instagram
YouTube
My SR20 Build Thread
User avatar
Mainer311
Roadsteraholic
Posts: 877
Joined: Sat Jun 30, 2012 10:30 pm
Location: Methuen, MA, USA

Re: Roadster L6

Post by Mainer311 »

This is so f'n cool.
Jordan
1968 SPL311-21773. Needs paint and some upholstery.
2012 Xterra Pro-4X, 4" lift on 34's, UCA's, pre-runner bumper. Member of the New England Xterra Off-road club.
1971 PL521, Dragon green. Stock L16 w/ 4 speed, lowered 3".
mlwebb
Roadster Fanatic
Posts: 136
Joined: Sat Dec 06, 2014 3:52 am
Location: Eugene, Oregon
Contact:

Re: Roadster L6

Post by mlwebb »

roadstermike wrote:so Is there a way that you could of lowered the front of the engine so you can use an unmodified hood?
No, the block+timing cover is darn close to the length from the firewall to front of the cross-member. I did put a dent in the front of it for some clearance for the oil pump. I debated a variety of design approaches, a taller hood scoop, for example, seemed a little cheesy, and didn't solve the front carb issue.

Appreciate the comments,
Michael

http://www.mlwebb.com/datsun_roadster/hood-20160131_160101.jpg
67 1600 > 2600
User avatar
spl310
Roadster Guru
Posts: 13241
Joined: Sun Dec 29, 2002 10:38 pm
Location: In front of this keyboard... in Jacksonville, Florida!

Re: Roadster L6

Post by spl310 »

A thunderbolt hood scoop could have covered it possibly
"Wow, a Roadster!" Stuart Little

1967.5 2000
1967.5 2000
1964 1500
1964 1500
1967.5 1600
1968 chassis
2006 Acura MDX
2013 Volkswagen Jetta TDI wagon
1995 F350 Powerstroke!
More...
JohnnyMac
Site Supporter
Posts: 334
Joined: Sun Feb 10, 2013 12:36 pm
Location: Redding, CA

Re: Roadster L6

Post by JohnnyMac »

I like the hood. Looks like something wants to get out.
John

SRL311-05287
User avatar
fj20spl311
Roadsteraholic
Posts: 5038
Joined: Mon Nov 28, 2005 3:54 pm
Location: San Diego, Ca

Re: Roadster L6

Post by fj20spl311 »

Dropping your front spring perches? I have seen some that the angle was changed - dropped more on the inside- to correct the twisting forces on the front spring.
Phil
67.5 SRL311-00148 Blue (FJ cruiser VOODOO Blue)
67.5 SPL311 FJ20E teal SDS EFI
69 SRL311 SOLD
19 Raptor SCAB
User avatar
rp975
Site Supporter
Posts: 258
Joined: Sun Jun 10, 2012 10:41 pm
Location: Newcastle

Re: Roadster L6

Post by rp975 »

Great fabrication, I love how you have done this, it should go very well and sound amazing!

Rob
1970 Roadster SRL311

1974 260Z VQ30det

1998 W210 E55 AMG
mlwebb
Roadster Fanatic
Posts: 136
Joined: Sat Dec 06, 2014 3:52 am
Location: Eugene, Oregon
Contact:

Re: Roadster L6 -seats

Post by mlwebb »

My seats were crap, so I decided to make some.
First, a drawing:

Image

I made a wood frame out of Appleply, an all hardwood plywood made locally, glued up with T-88 epoxy.

Image

Then I covered it with carbon fiber. Much of this will be covered by upholstery, I am more interested in strength, than the look.

Image

A couple coats of epoxy and it was on to the seat webbing. I liked the idea of webbing for those hard jolts - it is stretched pretty tight.

Image

Then I drilled some .063 aluminum sheet for the backs, and attached them with 1" 3M VHB tape, and 1" high quality screws. I debated painting or powder coating them, but think I am just going to wipe them down with Alodine. I am envisioning the aluminum back is mostly exposed, with the back upholstery hooking over the top and wings, and attached to the lower inside back above the 3 holes, with velcro. I am waiting on the postman for some confor foam sheets for the cushioning, to be continued.....

Image

Michael
67 1600 > 2600
Post Reply