IMHO I think the new Nardi wheel is the best modern take on the stock unit I've seen! Especially the larger, bumper car center/horn section. The wood Nardi wheel is also nice to look at but I never liked the feel while driving.Zedyone_Kenobi wrote:I love wooden wheels as well on cars that were meant to have them. I have the OEM wheel in my Z after I refinished it. It is beautiful. But I also know the 68 did not come with a wooden wheel, it was a beautiful textured black with metal and stitching on the vinyl. IT was a nice detailed piece. I think the thing you touch in the car should be a pleasure to your sense of touch and vision. I want it more original looking. I love the craftsmanship of a Nardi wheel, and hey I am Italian, so if I can throw some money back to the mother land why not!
Seriously, a Nardi is such a wonderful addition. The one I picked was the closest to the OEM wheel they had. I wish it were 1 inch bigger, but I am taking out a 365mm wheel for another 365mm wheel. I think it will look amazing against the new dash. Unfortunately it will take 4-5 weeks for it to arrive from the land of wine and pasta.
Dash cap installatoin
Moderators: notoptoy, S Allen, Solex68
-
Alvin

- Roadster Nut-Site Supporter
- Posts: 8286
- Joined: Tue Jan 23, 2007 7:01 pm
Re: Dash cap installatoin
Alvin Gogineni
San Jose, CA
1967.5 SPL/SR20
1997 Acura Integra GS-R
2022 Chevy Bolt EUV
zcarblog.com
Instagram
YouTube
My SR20 Build Thread
San Jose, CA
1967.5 SPL/SR20
1997 Acura Integra GS-R
2022 Chevy Bolt EUV
zcarblog.com
YouTube
My SR20 Build Thread
-
Zedyone_Kenobi

- Roadster Fanatic
- Posts: 197
- Joined: Thu Apr 03, 2014 8:27 am
- Location: League City, Texas
Re: Dash cap installatoin
I could not agree more. It is like a modern take on an old design. I cannot wait to see it on the car. I think more roadsters will be seen with this wheel soon if I am honest.
1971 240Z (94% done)
1968 2000 Roadster
-
andyroo
- Roadster Fanatic
- Posts: 244
- Joined: Wed Aug 07, 2013 12:06 pm
- Location: Baltimore, MD
Re: Dash cap installatoin
The 68-70 wheels are pretty ugly IMO. The low windshield cars did have a nice wheel which I think you're referring to.
I like your new and old wheels. I have a wood Mono Indy which I think looks great, but I'm also tempted to pick up a Momo prototipo because like you I think would match the interior better. Eventually I'll be swapping to a flat dash so I'll wait until then.
I like your new and old wheels. I have a wood Mono Indy which I think looks great, but I'm also tempted to pick up a Momo prototipo because like you I think would match the interior better. Eventually I'll be swapping to a flat dash so I'll wait until then.
1968 Datsun 1600
2005 MINI Cooper S
2005 MINI Cooper S
-
Zedyone_Kenobi
- Roadster Fanatic
- Posts: 197
- Joined: Thu Apr 03, 2014 8:27 am
- Location: League City, Texas
Re: Dash cap installatoin
I had no idea you could back date the dash.. VERY cool project!
1971 240Z (94% done)
1968 2000 Roadster
-
Zedyone_Kenobi
- Roadster Fanatic
- Posts: 197
- Joined: Thu Apr 03, 2014 8:27 am
- Location: League City, Texas
Re: Dash cap installatoin
did not get much work done to the roadster. I just cleaned some nuts and bolts and scrubbed some of those bakelite knobs to get them clean again. They really do come out nice with some elbow grease. Want to get a day were I can work on her even more. When my carpet gets in I will probably take a few days off to try to get her presentable again. I miss driving her and the days are getting warmer... so fixing that heater is going to be great.....yeah... 
1971 240Z (94% done)
1968 2000 Roadster
-
Zedyone_Kenobi
- Roadster Fanatic
- Posts: 197
- Joined: Thu Apr 03, 2014 8:27 am
- Location: League City, Texas
Re: Dash cap installatoin
GREAT news...
I got my carpet kit in from datsunparts.com.
I need to get them cleaned off and vacuumed as they are, um, hairy. But I have to say they seem to be a bit inferior to the ones that are coming out. The carpets coming out have vinyl bound edges, and these have surged edges. They do feel more fragile and I can see they will be more prone to shred, but the color is nice and consistent and will make an noticeable improvement especially on my transmission tunnel which is badly faded. The Jute padding is nice and cut very close to perfect. I think the overall fit and finish will be very close and I will do comparison to what I am taking out. I have no idea if what I am puling out is OEM or not. I doubt it as it looks too good to be 48 years old.
1971 240Z (94% done)
1968 2000 Roadster
-
fj20spl311
- Roadsteraholic
- Posts: 5009
- Joined: Mon Nov 28, 2005 3:54 pm
- Location: San Diego, Ca
Re: Dash cap installatoin
I am certain that vinyl edging is not "stock".....common method for an upholstery shop to finish the edging of carpet.
Phil
67.5 SRL311-00148 Blue (FJ cruiser VOODOO Blue)
67.5 SPL311 FJ20E teal SDS EFI
69 SRL311 SOLD
19 Raptor SCAB
67.5 SRL311-00148 Blue (FJ cruiser VOODOO Blue)
67.5 SPL311 FJ20E teal SDS EFI
69 SRL311 SOLD
19 Raptor SCAB
-
spl310

- Roadster Guru
- Posts: 13215
- Joined: Sun Dec 29, 2002 10:38 pm
- Location: In front of this keyboard... in Jacksonville, Florida!
Re: Dash cap installatoin
Vinyl edging was stock on the 1500s. Later cars were serge bound
"Wow, a Roadster!" Stuart Little
1967.5 2000
1967.5 2000
1964 1500
1964 1500
1967.5 1600
1968 chassis
2006 Acura MDX
2013 Volkswagen Jetta TDI wagon
1995 F350 Powerstroke!
More...
1967.5 2000
1967.5 2000
1964 1500
1964 1500
1967.5 1600
1968 chassis
2006 Acura MDX
2013 Volkswagen Jetta TDI wagon
1995 F350 Powerstroke!
More...
-
Zedyone_Kenobi
- Roadster Fanatic
- Posts: 197
- Joined: Thu Apr 03, 2014 8:27 am
- Location: League City, Texas
Re: Dash cap installatoin
WHAHOO.. great news.
The roadster got accepted into the Keel and Wheels car show in Houston next month! They do not even have a category for Japaense cars, as the Bugattis and Ferraris are everywhere. However, I emailed them a pic of my car and asked if I could show it and my Z and BOTH cars were accepted as display. I am beyond happy. But I sort of have to finish the roadster now... I have 6 weeks.
The roadster got accepted into the Keel and Wheels car show in Houston next month! They do not even have a category for Japaense cars, as the Bugattis and Ferraris are everywhere. However, I emailed them a pic of my car and asked if I could show it and my Z and BOTH cars were accepted as display. I am beyond happy. But I sort of have to finish the roadster now... I have 6 weeks.
1971 240Z (94% done)
1968 2000 Roadster
-
spl310
- Roadster Guru
- Posts: 13215
- Joined: Sun Dec 29, 2002 10:38 pm
- Location: In front of this keyboard... in Jacksonville, Florida!
Re: Dash cap installatoin
Woo Hoo!! Go represent!!
"Wow, a Roadster!" Stuart Little
1967.5 2000
1967.5 2000
1964 1500
1964 1500
1967.5 1600
1968 chassis
2006 Acura MDX
2013 Volkswagen Jetta TDI wagon
1995 F350 Powerstroke!
More...
1967.5 2000
1967.5 2000
1964 1500
1964 1500
1967.5 1600
1968 chassis
2006 Acura MDX
2013 Volkswagen Jetta TDI wagon
1995 F350 Powerstroke!
More...
-
notoptoy

- Vendor-Site Supporter
- Posts: 9677
- Joined: Fri Oct 02, 2009 2:55 pm
- Location: Winston-Salem, NC and Ocala, FL
- Contact:
Re: Dash cap installatoin
Congratulations, nothing like a forced deadline to make things happen!
"When all else fails, force prevails!" Ummm, we're gonna need a bigger hammer here.
67.5 SPL311 H20 w/5 speed
65 Impala Convertible
2017 C43 AMG
67.5 SPL311 H20 w/5 speed
65 Impala Convertible
2017 C43 AMG
-
bakerjf

- Site Supporter
- Posts: 1384
- Joined: Wed Sep 07, 2011 5:48 pm
-
Zedyone_Kenobi
- Roadster Fanatic
- Posts: 197
- Joined: Thu Apr 03, 2014 8:27 am
- Location: League City, Texas
Re: Dash cap installatoin
I think I am exhausted enough for today.. I replaced the vinyl on the passenger side, and put in the new kick plate. Cleaned everything up and then finally got around to putting sound deadener in the passenger side.
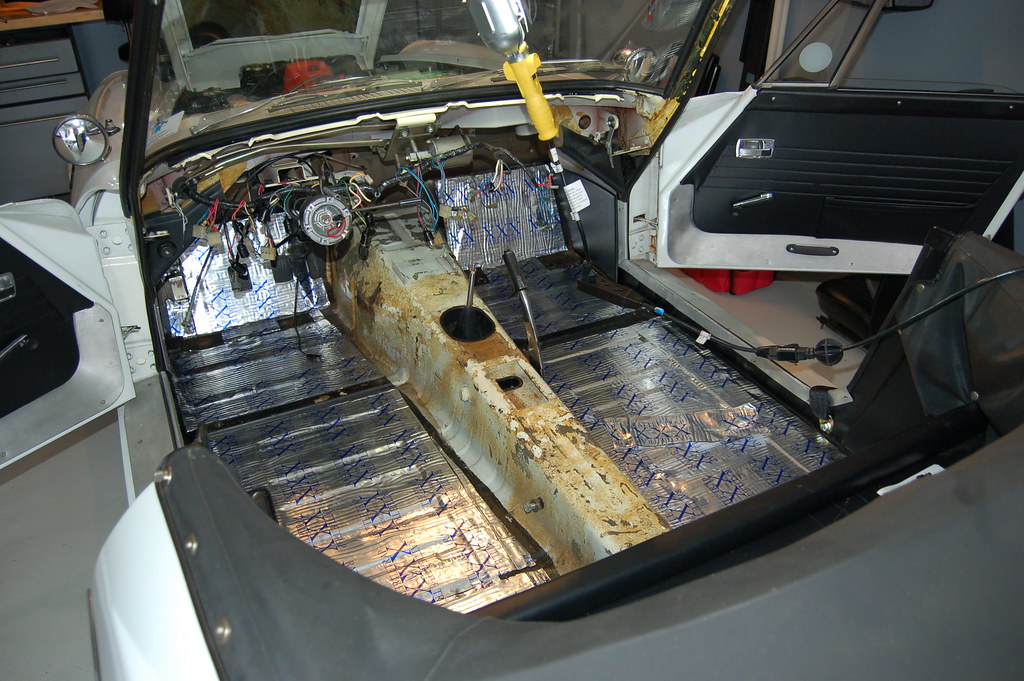
At this point I had to cut off the bolt that holds the heater core in place. It was rusted solid and would separate from the nut. Logic would seem either I cut the bolt or the new carpet to get it in. Well needless to say out came the hack saw. Now I have a dilemma I have solve pretty quickly as the heater core will need to go in pretty quickly. In fact after I run a few hoses and drain the coolant, it will be next up. I am thinking that the heater core is usually done with the engine transmission out as I see no way to get my arms past the transmission to get that bolt into place. So other methods will have to be found. If I could weld a nut plate on that would be sweet, but again access.
Moving on. Everything else today went very well actually. I put as much sound deadener on the transmission tunnel as I dared, and then began to proceed with the carpet install. The PO did not put jute back over the tunnel, so I will have to figure out if the added thickness will be an issue. I was happy that I got a whole new set of snaps for the carpet in the kit. I also went head and replaced the ones for the emergency lever boot cover.
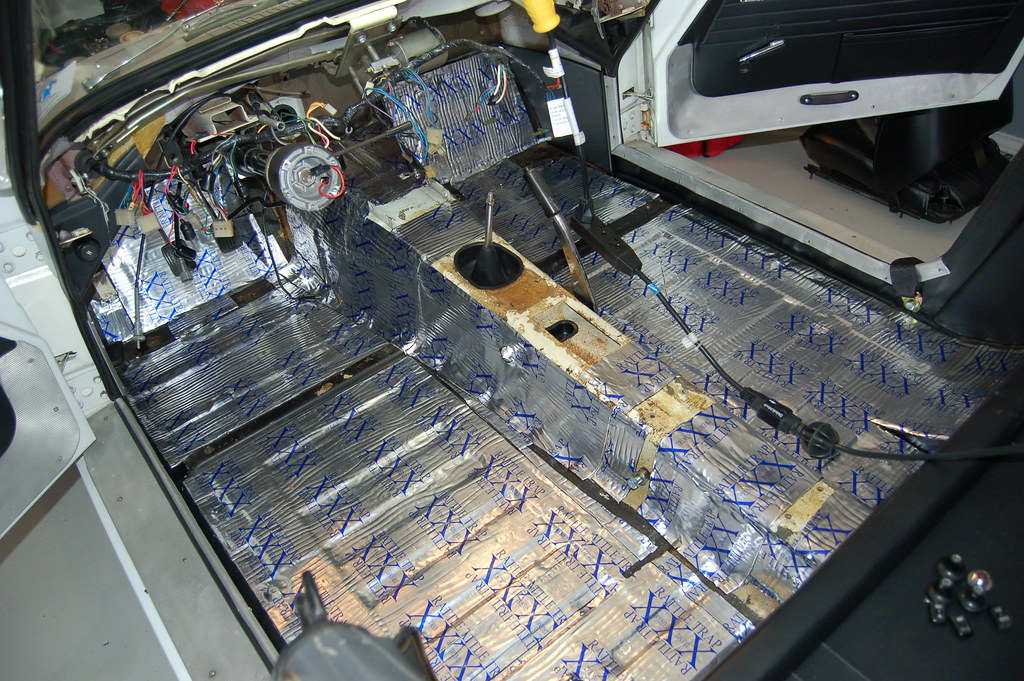
I laid out the new transmission tunnel carpet and compared it to the old...
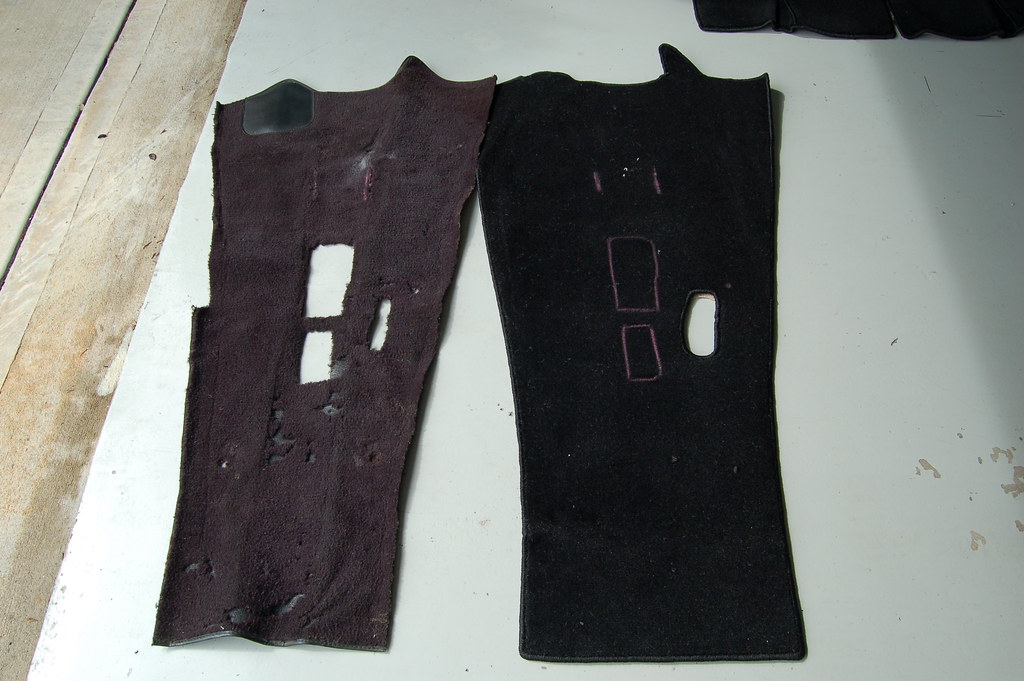
Used the old one to get my markings fairly close before I installed it. Probably saved a bunch of time.
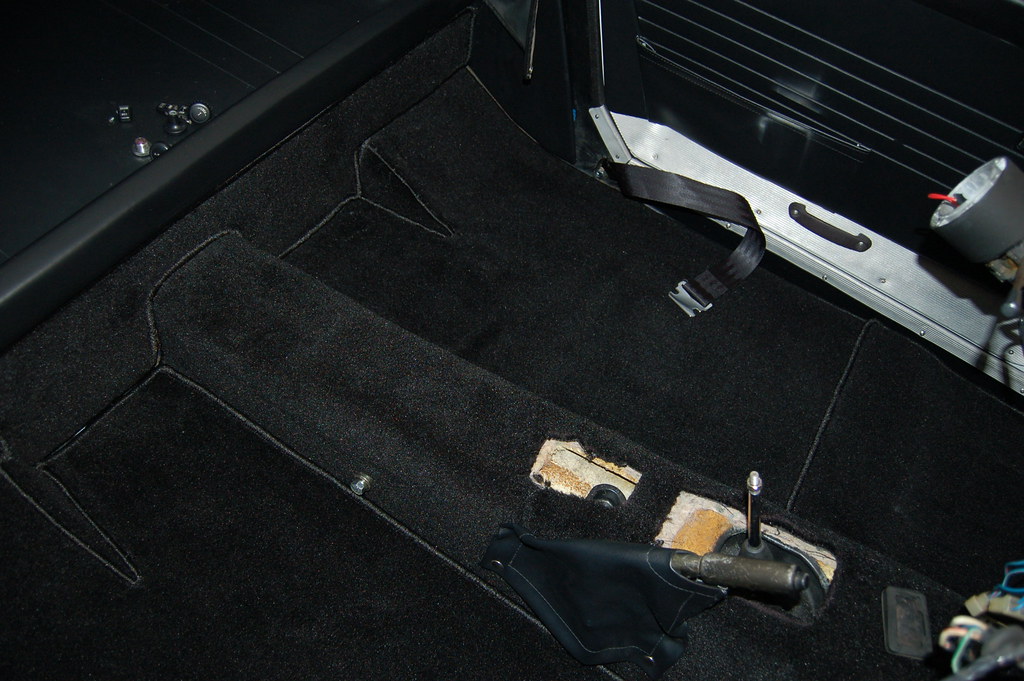
This is prior to attaching the rear section by the parcel tray.
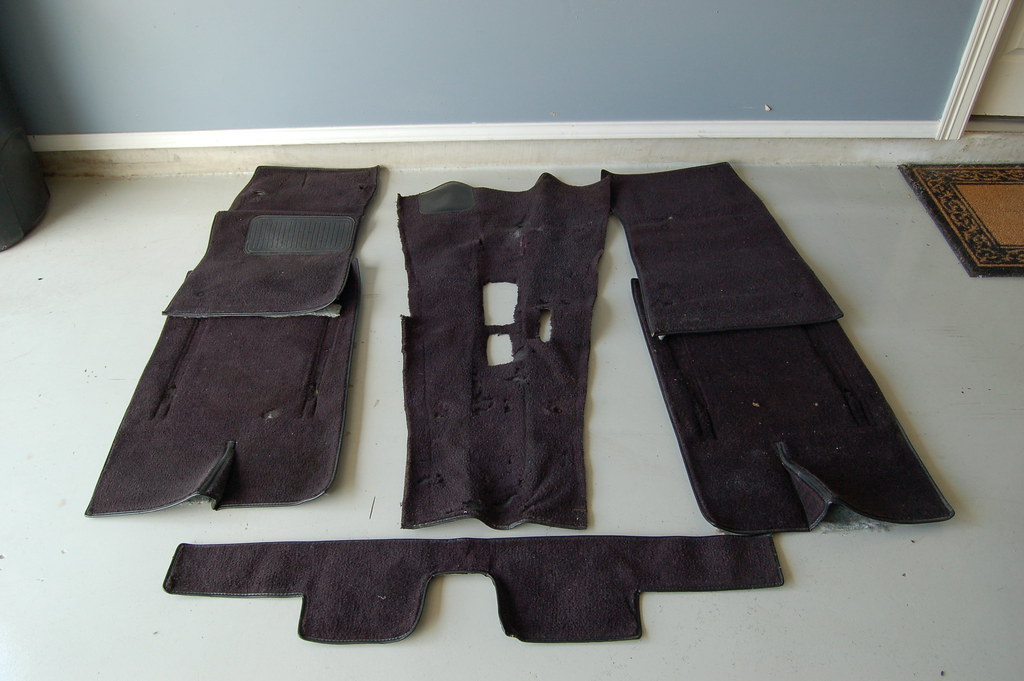
This is the complete old carpet kit I now have in a box, which has been requested by another member... it will be shipped quickly.
This older kit has a nice vinyl section next to the drivers foot. That is a nice touch. My current kit does not have that.
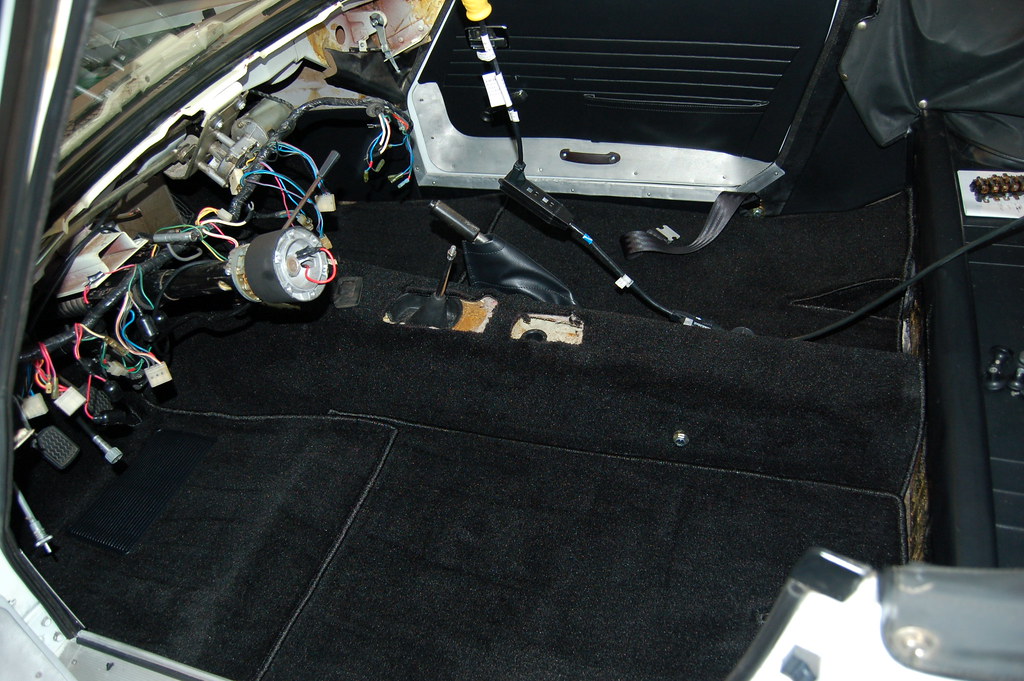
And the finished part... LOVE how this looks.
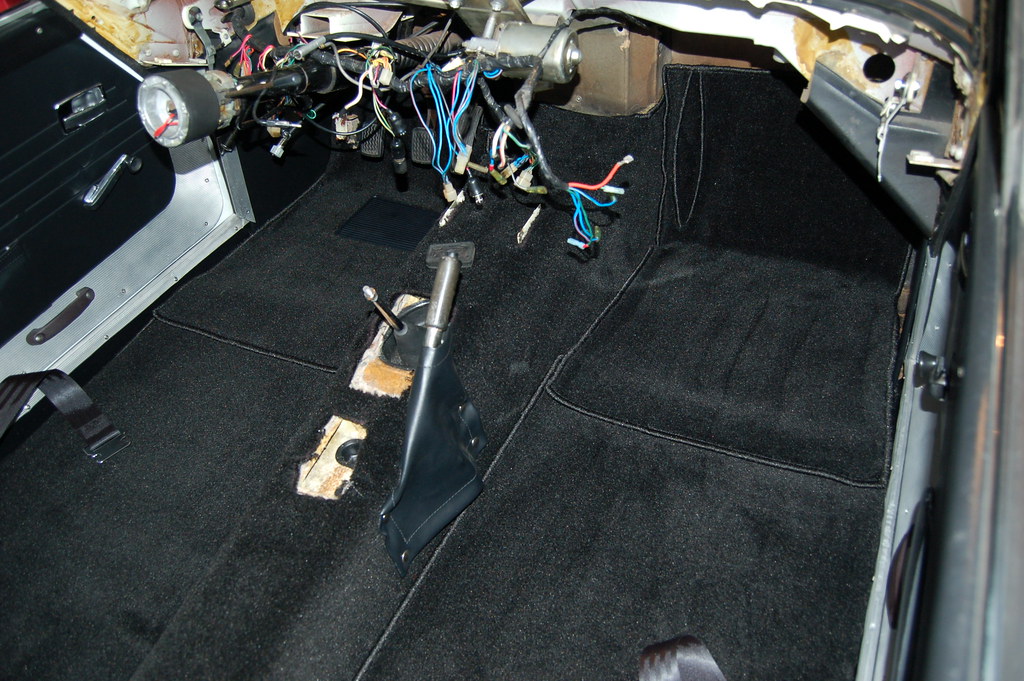
Not sure why this kit 'glistens' the way it does. Perhaps too much flash, but anyway, next up is putting the heater core in and connecting all the hoses to it.
By the way, where does the clear tube that runs from to the windshield squirters go inside the cabin. I found the tube, which is hard and I will replace, but where does it run?
At this point I had to cut off the bolt that holds the heater core in place. It was rusted solid and would separate from the nut. Logic would seem either I cut the bolt or the new carpet to get it in. Well needless to say out came the hack saw. Now I have a dilemma I have solve pretty quickly as the heater core will need to go in pretty quickly. In fact after I run a few hoses and drain the coolant, it will be next up. I am thinking that the heater core is usually done with the engine transmission out as I see no way to get my arms past the transmission to get that bolt into place. So other methods will have to be found. If I could weld a nut plate on that would be sweet, but again access.
Moving on. Everything else today went very well actually. I put as much sound deadener on the transmission tunnel as I dared, and then began to proceed with the carpet install. The PO did not put jute back over the tunnel, so I will have to figure out if the added thickness will be an issue. I was happy that I got a whole new set of snaps for the carpet in the kit. I also went head and replaced the ones for the emergency lever boot cover.
I laid out the new transmission tunnel carpet and compared it to the old...
Used the old one to get my markings fairly close before I installed it. Probably saved a bunch of time.
This is prior to attaching the rear section by the parcel tray.
This is the complete old carpet kit I now have in a box, which has been requested by another member... it will be shipped quickly.
This older kit has a nice vinyl section next to the drivers foot. That is a nice touch. My current kit does not have that.
And the finished part... LOVE how this looks.
Not sure why this kit 'glistens' the way it does. Perhaps too much flash, but anyway, next up is putting the heater core in and connecting all the hoses to it.
By the way, where does the clear tube that runs from to the windshield squirters go inside the cabin. I found the tube, which is hard and I will replace, but where does it run?
1971 240Z (94% done)
1968 2000 Roadster
-
bakerjf
- Site Supporter
- Posts: 1384
- Joined: Wed Sep 07, 2011 5:48 pm
Re: Dash cap installatoin
Great progress! I found the jute thickness on the tunnel can make getting the radio console back in a little bit of a pain.
J. Baker
Lafayette, CA
'69 2000 (Solex)
Lafayette, CA
'69 2000 (Solex)
-
Zedyone_Kenobi
- Roadster Fanatic
- Posts: 197
- Joined: Thu Apr 03, 2014 8:27 am
- Location: League City, Texas
Re: Dash cap installatoin
Do you recommend putting the dash in before the heater core or after
1971 240Z (94% done)
1968 2000 Roadster