Volvo Brake Upgrade Installation Problem / Question

Tech tips and how to's

Moderators: notoptoy, S Allen, Solex68

Post Reply
Dan Magliari

Volvo Brake Upgrade Installation Problem / Question

Post by Dan Magliari »

Hello all,

Well, even with the best plans, you sometimes get zapped. Has anyone whose done the Volvo Brake Upgrade encountered the following issue, as I’d like to ping the community before I muck around with my rotors any further.

Per the posting on the website, I went out and purchased the recommended hardware to upgrade my u20 roadster to the 4-piston brake set-up (Stopping is a good thing!). Good documentation, things went pretty much according to plan til I went to assemble the parts and I discovered that my rotors won’t rotate, as the rotors are still a bit too tall for the calipers, and they bind at the top of the rotor (?).

I did machine to rotors down to the advised diameter. I also used a drill press to make sure my ½� bolt holes on the calipers were straight & not off on a funky angle, so I hopefully haven’t messed up on this detail in drilling it out.

Bottom line, close, but the rotors outer most /leading edge are binding on the inner top of the calipers. This is impacting both rotors. Both calipers appear to not have any obvious casting defect, and the rotor radius measures correctly…? ? Hmmm.

Possible Solution: I appear to have ~1/8� of rotor beyond the top surface of the brake pad (implying I have ~1/8� of radius to work with), so it appears that I could still take ~1/4� off the diameter of the rotor before I effect the brake pad/contact braking area, but for obvious reasons I am taking baby steps here before I do anything further.

Question to the world…
1. Is anyone aware of anyone else encountering this issue with the diameter.
2. If I were to take the rotors down another ¼� off Diameter, as the brake pads are still fully within the rotor surface area, can you share any thoughts of concern why taking a bit more off the diameter might not be the right thing to do?.
3. Does anyone know what others have actually experienced for the ~distance between the top leading edge of the rotor & the inner most top of the caliper opening? (I assume I need some amount of space for thermal expansion of the rotor once it heats up (A modern/disk brake appears to have ~1/4� space BETWEEN the two surfaces)

Comments/concerns/recommendations greatly appreciated.

Thanks.

Dan

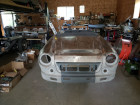
(P.S., just got the rebuilt u20 back, and boy does it look sweeet!!!!! BUT No engine before brakes! Looking forward to driving to Solvang to run with the crowd!).

Dan
:roll:
TR

Post by TR »

Dan,

I ran into the same problem, remeasured, recut and they have been working fine. You want to make sure that the disc is larger than the pad at any extreme of the pad, I have been told that having pad beyond the disc creates chatter problems (but I am not sure how much I believe that - I would be that it would break off). As long as you are .020 to .030 beyond the pad, leave the rest (~.180 if I remember) for expansion of the disc.

Good luck and better stopping.

Test them out many times before driving and with all brake stuff, you make the final call on what works for your car, your life is in your hands, not mine! End of legal disclaimer, TR
User avatar
S Allen
Site Admin
Posts: 4539
Joined: Thu Dec 05, 2002 4:57 pm
Location: Knoxville, IA(Lake Redrock)Emory, TX
Model: 1500/1600
Year: Low Windshield-64-67.5
Contact:

RE:Volvo Brakes

Post by S Allen »

Dan,

If your rotors are hitting the calipers as you say take more off. It will not hurt anything. The documentation is by no means a bible and some real world adjustments may be required. Mine fit okay but who knows how many different casting there are for the Volvo calipers. Several people have told me they notched the calipers instead of getting the rotors cut. Not what I would do but...... Several people have also reported problems with the manifold not sealing on the caliper as well. Make sure you use a crush washer on top and on the bottom of the manifold or it will leak. :oops: Be safe!!

Steve
66 Stroker-Going Orange
67 SRL311-00279-resto project
Stock '72 240Z-Blue
2002 Ford F250 7.3 Diesel 2WD Hauler
2008 Toyota FJ Cruiser
2009 Smart ForTwo Passion Coupe
2013 Fiat 500 Abarth
Dan Magliari

Volvo Brakes

Post by Dan Magliari »

Thanks for the feedback.

I had considered an adjustment to the caliper, but I think that is the scarrier (sp) of the two options.

Took a good look over them last night, and believe that a trim of the rotors is the appropriate next step. Like I said before, I'm taking baby steps on this since I would like to live a much longer life! :D

Re the new motor, installed my fresh mikunis and header to the block, boy is it looking nice. I can almost hear it running.

More to follow, thanks again

Dan
Dan Magliari

Hmmm, that rear brake Reservoir sure tall!

Post by Dan Magliari »

Hmmm,

I notice that the 280 Master Cyliner / Rear Brake Brake Fluid Reservoir seems to be quite a bit taller than the stock unit (~1" Taller).

Am I going to need to shim this master cyliner out at the top to get the hood to close, or will this clear the hood when I close the hood?

I guess I could transfer the old Rear Brake Reservoir, but thought I'd better ping you guys first.

Thanks Dan
TR

Post by TR »

You got it in the last sentance, transfer the old cup to the new. Good thing you didn't find out by slamming the hood! TR
User avatar
S Allen
Site Admin
Posts: 4539
Joined: Thu Dec 05, 2002 4:57 pm
Location: Knoxville, IA(Lake Redrock)Emory, TX
Model: 1500/1600
Year: Low Windshield-64-67.5
Contact:

RE:M/C

Post by S Allen »

Dan, you can either use the old resevoirs or cut the new ones down to clear. Cutting the new ones makes a cleaner looking installaion. I had to do that with an alternate clutch master I found as the resevoir hit the hood. Worked out just fine.


Steve
66 Stroker-Going Orange
67 SRL311-00279-resto project
Stock '72 240Z-Blue
2002 Ford F250 7.3 Diesel 2WD Hauler
2008 Toyota FJ Cruiser
2009 Smart ForTwo Passion Coupe
2013 Fiat 500 Abarth
Dan Magliari

Yikes, this might not be the correct Master Cylinder

Post by Dan Magliari »

Thanks all.

I appreciate the feedback. Thought the transfer of cups was OK, but it never hurts to be critical and ask questions.

(((The thing that is killing me on this project is it has turned into one of the proverbial “hurry-up and wait� projects, as I am doing it with my free time juggling 3- kids (… kids, please stay out of the garage, I don’t think you really need my earl’s fittings for your pet!) Ahhh, Such is life))).

Between delays in looking at parts, I am taking a more critical look at my master cylinder, am getting a nasty suspicion that I may not have the correct “new� Master Cylinder, so I appologize, but yet another question.

Looking at the parts list posted for the Volvo Conversion, I notice that it specifically refers to using a ’75–77 280Z Master Cylinder. I must confess, that I wasn’t sufficiently critical when I started out here, and I just realized I am using a ’78 280Z Master Cylinder, so that may be the root of my problems.

Visual inspection of “Old-69 Roadster Master Cylinder� vs “New-78 280Z Master Cylinder� is essentially OK (Cup aside), until I remove the old Master Cylinder from the car, remove it’s dust cap from the peddle/push-rod, and remove the push-rod from the Master Cylinder Piston-Cup (Hmmm this doesn’t look like it’ll transfer over to the new unit).

I notice that the old 69 push-rod end and Master Cylinder Piston Cup are essentially a ball-and-socket contact point set-up for where the parts come together in the Master Cylinder) (Where the peddle forces the push-rod into the master cylinder piston cup).

However with the new ’78 Master Cylinder Piston Cup is conical in shape ((hmmm, do I need a “conical ended push rod now?)). If I re-use the ’69 push-rod, I will essentially have a ball-shaped Push-Rod contacting with a new-“conical� Piston Cup. I suppose this could work, but it sure appears “funky� at best.

I am suspicious that …
1. The ’78 Master Cylinder is different from the ’75-77 (perhaps an interim change before the ZX) and I need a 75-77 master cylinder to maintain proper peddle height & functionality or
2. I need to find some variation of peddle-push rod to accommodate the new master cylinder or
3. I need to stop thinking so much.

Something is not quite right here. I suspect #1 may be my answer, but figured I’d ping you again to see if anyone out in our world familiar with this degree of detail on the Master Cylinder.

Thanks for your ongoing feedback.

Dan

P.S., Pictures to follow at some point, Just tried to load some & locked up the PC. Save that for next pass hopefully.
User avatar
S Allen
Site Admin
Posts: 4539
Joined: Thu Dec 05, 2002 4:57 pm
Location: Knoxville, IA(Lake Redrock)Emory, TX
Model: 1500/1600
Year: Low Windshield-64-67.5
Contact:

RE:Z Master Cylinder

Post by S Allen »

The 78 M/C is different from the earlier M/C's. You definitely have the wrong one. The Z's were pretty much all the same from 70 through 77 with changes in 1978. Many body and mechanical parts interchange with the earlier models. Sorry. :shock:

Steve
66 Stroker-Going Orange
67 SRL311-00279-resto project
Stock '72 240Z-Blue
2002 Ford F250 7.3 Diesel 2WD Hauler
2008 Toyota FJ Cruiser
2009 Smart ForTwo Passion Coupe
2013 Fiat 500 Abarth
Dan Magliari

280Z Master Cylinder

Post by Dan Magliari »

Ahhh, so I recall from the distant past. So I feared.

Looks like I have another part to order.

Such is life. :roll: At least this is nothing too out of the ordinary to hunt down.

Thank you again. To be continued.

Dan
Post Reply