Thank you Mike!msampsel wrote: Fri Jan 26, 2018 5:18 pmI glued mine with contact cement to the block, then a dose of white lithium grease to the pan side.bakerjf wrote: Wed Jan 24, 2018 11:16 am Rainy days and boredom are leading me to install my comp oil pan... Question: I purchased the blue “competition†gasket for it a while back - would that be a “dry†gasket I assume? I’m thinking it was designed as such because racers would be apt to reuse it over and over, but I may be wrong...again.
A roadster Yoda gave this tip which allows for a reusable pan gasket. of course this is not so easy with the engine installed ....
I guess you could use pan bolts and washers to hold the gasket to the block while the contact cement dries.
The Quick/Small/(Stupid?) Question Thread-take 2
Moderators: notoptoy, S Allen, Solex68
-
bakerjf

- Site Supporter
- Posts: 1391
- Joined: Wed Sep 07, 2011 5:48 pm
Re: The Quick/Small/(Stupid?) Question Thread-take 2
J. Baker
Lafayette, CA
'69 2000 (Solex)
Lafayette, CA
'69 2000 (Solex)
-
Fetch
- Roadster Fanatic
- Posts: 169
- Joined: Tue Dec 30, 2014 12:08 pm
- Location: Spokane, Wa.
Re: The Quick/Small/(Stupid?) Question Thread-take 2
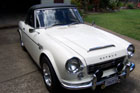
I have two of these gas caps, they work fine except the covers are broken off. Is there a replacement cover I can get?
 DSCN1483 by [url=https://www.flickr.com/photos/155192906@N06/]
DSCN1483 by [url=https://www.flickr.com/photos/155192906@N06/]
Last edited by Fetch on Fri Jan 26, 2018 11:37 pm, edited 1 time in total.
-
Curtis

- Site Supporter
- Posts: 4164
- Joined: Fri Jan 01, 2010 2:49 pm
- Location: Des Moines, WA
- Model: 1500/1600
- Year: Low Windshield-64-67.5
Re: The Quick/Small/(Stupid?) Question Thread-take 2
Every time I assemble a plug on a new harness I stand there and look at my drawings. Too much to remember.mraitch wrote: Fri Jan 26, 2018 8:38 pm I disconnected the five(?)of 6 connector that goes into the ignition to clean etc. Thought that I had 'carefully' marked a=a etc. but presumably I made a mistake.
Busy this afternoon, but with again studying your amazing blown up diagram, will find out which is left and which is right. That area is the only one I KNOW that is messed with. Logically that is where it is (for now). Will pursue -
thanks for interest - will report. <g>
66 stroker, almost done.
67 basket case, paint coming soon.
67 basket case, paint coming soon.
-
devo
- Roadsteraholic
- Posts: 550
- Joined: Mon Jun 17, 2013 7:58 pm
- Location: Texas
- Model: 1500/1600
- Year: Low Windshield-64-67.5
Re: The Quick/Small/(Stupid?) Question Thread-take 2
http://datsunparts.com/2148Fetch wrote: Fri Jan 26, 2018 9:12 pm I have two of these gas caps, they work fine except the covers are broken off. Is there a replacement cover I can get?
DSCN1483 by [url=https://www.flickr.com/photos/155192906@N06/]
-
Linda
- Fraternal Den Mother-RIP
- Posts: 7807
- Joined: Sat Nov 05, 2005 11:37 pm
- Location: Los Angeles
- Model: 1500/1600
- Year: High Windshield-68-70
Re: The Quick/Small/(Stupid?) Question Thread-take 2
Also described in the archives how one person used a screw I believe to fix the cap. If you want to search...
Sadly-Linda has passed away 2022. She was the 311's den mother and drove the first Rare-Parts ball joint project. RIP.
-
mraitch

- Roadsteraholic
- Posts: 3629
- Joined: Mon Oct 02, 2006 7:03 pm
- Location: Lake Balboa (SFV) - CA
- Model: 1500/1600
- Year: High Windshield-68-70
- Contact:
Re: The Quick/Small/(Stupid?) Question Thread-take 2
I have a bunch of KNOBS, faces are in good condition, but the areas around the bases are missing. Anyone found a method of rebulding so that they look OK, I have tried hobby 'putty' but not happy with the finish.
\And what have you used to 'white' the knobs and seal them??
Thorts??
\And what have you used to 'white' the knobs and seal them??
Thorts??
Peter Harrison
1970 1600 (Stroker) - TOAD SAN (Eliza)
1970 1600 (Stock) - As Yet Unnamed
Lake Balboa (SFV) , California
1970 1600 (Stroker) - TOAD SAN (Eliza)
1970 1600 (Stock) - As Yet Unnamed
Lake Balboa (SFV) , California
-
greydog
- Roadster Fanatic-Site Supporter
- Posts: 1790
- Joined: Sat Nov 21, 2009 11:37 pm
- Location: Vancouver, Washington
- Model: 1500/1600
- Year: High Windshield-68-70
Re: The Quick/Small/(Stupid?) Question Thread-take 2
I've fixed a few of them.
The ones I fixed were broken around the metal tube, up as far as the mounting screw hole.
The ones I fixed successfully had the entire bottom portion broken away.
I used polyester body filler (yup, bondo).
I cleaned up the knob, making sure I had the broken bakelite area clean and sound with no additional fractures or cracked portions remaining.
I sprayed silicone lube on a 4-40 hex head capscrew and screwed it into the metal liner so that the top of the capscrew head was flush with the body of the knob.
I mixed the filler and daubbed it on. It sorta slumps a bit so don't expect to build it up in one pass.
I used a 36 grit block to rough shape the bottom and square it up, then filled more as necessary.
I used a #11 Xacto to clean out the filler from the screw head and then removed the screw. I had to use a drill to clean out some bondo that had gotten under the screw head.
Once I was happy with the hole, I fastened the knob to short pc of round stock and chucked the round stock in a drill with the knob hanging down. Turn the drill on and sand with 220 gently while the drill spins the knob. It allowed me to sand the repair round and feather it to the knob body.
Once I was happy with the shape, I used some Testor's black enamel to paint the repaired area. It's nice and thick so worked pretty well.
Not a perfect color match to the knob body but it's at the back of the knob and not detectable once installed.
All the knobs I've redone had the function symbol or letter recessed in the surface of the knob. To redo them, I wash them in Dawn dish water with a toothbrush (great grease and oil remover). Then I use a cut down paint brush and Testors white paint to fill in the letter/symbol. Let it dry for a few minutes and then use a strip of tee shirt dampened with paint thinner to wipe away any paint from the surface of the knob. Be gentle and don't get the cloth too wet with thinner. The tee shirt works well as there is little nap to the fabric so it's pretty smooth.
Good luck.
Dan
SPL311 aka Skooter. Sold. Now wasting away in the SF area.
1990 Nissan 300zx. Sold this one too.
2018 VW Tiguan
1990 Nissan 300zx. Sold this one too.
2018 VW Tiguan
-
sunbeam590
- Roadster Fanatic-Site Supporter
- Posts: 413
- Joined: Sat Dec 10, 2005 6:28 pm
- Location: Wingham, NSW, Australia
Re: The Quick/Small/(Stupid?) Question Thread-take 2
Spot on ...
KEVIN
69 Datsun 2000, Factory Solexes.
69 Datsun 2000, Factory Solexes.
-
mraitch
- Roadsteraholic
- Posts: 3629
- Joined: Mon Oct 02, 2006 7:03 pm
- Location: Lake Balboa (SFV) - CA
- Model: 1500/1600
- Year: High Windshield-68-70
- Contact:
Re: The Quick/Small/(Stupid?) Question Thread-take 2
Poifect - thanks Dan,
Peter Harrison
1970 1600 (Stroker) - TOAD SAN (Eliza)
1970 1600 (Stock) - As Yet Unnamed
Lake Balboa (SFV) , California
1970 1600 (Stroker) - TOAD SAN (Eliza)
1970 1600 (Stock) - As Yet Unnamed
Lake Balboa (SFV) , California
-
tjp

- Site Supporter
- Posts: 2587
- Joined: Wed Aug 20, 2008 5:49 am
- Location: Midwest
- Model: 2000
- Year: High Windshield-68-70
Re: The Quick/Small/(Stupid?) Question Thread-take 2
what is the safest way to unstick the pistons on a frozen set of SUs? thanks
My junk pile:
71 Jeep Gladiator. Restored w/#s matching engine. My WeeBeasty
70 1600 legit 2nd owner. Stroked and bored
Several salvaged w access to a barn full of parts, part cars & whole cars
......What's in the barn is for sale. What do you need?
71 Jeep Gladiator. Restored w/#s matching engine. My WeeBeasty
70 1600 legit 2nd owner. Stroked and bored
Several salvaged w access to a barn full of parts, part cars & whole cars
......What's in the barn is for sale. What do you need?
-
Nissanman
- Roadster Fanatic-Site Supporter
- Posts: 3452
- Joined: Mon Apr 16, 2007 8:07 pm
- Location: Adelaide, South Australia
- Model: 1500/1600
- Year: Low Windshield-64-67.5
- Contact:
Re: The Quick/Small/(Stupid?) Question Thread-take 2
Are the pistons stuck in the bell? I would just upend the bell and use a spray like WD-40 or CRC around the perimeter of the piston and leave for a day or three 
Nissanman, just trying to help.
1965 SP310 Engine No. G-93326 Car No. SP310-10817
https://photos.shutterfly.com/album/60141836519
On the road again!
1965 SP310 Engine No. G-93326 Car No. SP310-10817
https://photos.shutterfly.com/album/60141836519
On the road again!
-
tjp
- Site Supporter
- Posts: 2587
- Joined: Wed Aug 20, 2008 5:49 am
- Location: Midwest
- Model: 2000
- Year: High Windshield-68-70
Re: The Quick/Small/(Stupid?) Question Thread-take 2
I put my finger in the air intake hole and cannot move them. At all. I already tried pulling the dipstick and filling the hole to the top with WD40. This attempt has been sitting for a couple weeks.Nissanman wrote: Thu Feb 01, 2018 8:05 pm Are the pistons stuck in the bell? I would just upend the bell and use a spray like WD-40 or CRC around the perimeter of the piston and leave for a day or three
If pulling the bells (domes) is next then no worries. I just am hoping to avoid disassembly.
My junk pile:
71 Jeep Gladiator. Restored w/#s matching engine. My WeeBeasty
70 1600 legit 2nd owner. Stroked and bored
Several salvaged w access to a barn full of parts, part cars & whole cars
......What's in the barn is for sale. What do you need?
71 Jeep Gladiator. Restored w/#s matching engine. My WeeBeasty
70 1600 legit 2nd owner. Stroked and bored
Several salvaged w access to a barn full of parts, part cars & whole cars
......What's in the barn is for sale. What do you need?
-
mraitch
- Roadsteraholic
- Posts: 3629
- Joined: Mon Oct 02, 2006 7:03 pm
- Location: Lake Balboa (SFV) - CA
- Model: 1500/1600
- Year: High Windshield-68-70
- Contact:
Re: The Quick/Small/(Stupid?) Question Thread-take 2
can't you gently tap them out from the top with a piece of appropriately sized wood doweling??
Peter Harrison
1970 1600 (Stroker) - TOAD SAN (Eliza)
1970 1600 (Stock) - As Yet Unnamed
Lake Balboa (SFV) , California
1970 1600 (Stroker) - TOAD SAN (Eliza)
1970 1600 (Stock) - As Yet Unnamed
Lake Balboa (SFV) , California
-
Lorna c
- Site Supporter
- Posts: 2428
- Joined: Sat Aug 20, 2016 12:47 am
- Location: central coast , ,ca
Re: The Quick/Small/(Stupid?) Question Thread-take 2
do you have a fiberglass kit laying around ? wrap with the fiber where you want to rebuild, slap on the resin , let harden then shape and paint .. if you still have those metal inserts even better to include them..mraitch wrote: Thu Feb 01, 2018 1:27 am I have a bunch of KNOBS, faces are in good condition, but the areas around the bases are missing. Anyone found a method of rebulding so that they look OK, I have tried hobby 'putty' but not happy with the finish.
\And what have you used to 'white' the knobs and seal them??
Thorts??
"Is it me, or does everyone want to race ?"
late 68 1600 3 main motor .
-
Linda
- Fraternal Den Mother-RIP
- Posts: 7807
- Joined: Sat Nov 05, 2005 11:37 pm
- Location: Los Angeles
- Model: 1500/1600
- Year: High Windshield-68-70
Re: The Quick/Small/(Stupid?) Question Thread-take 2
If the Su bell has been torqued on unevenly it can hang up the piston. This happened to me and it ran bad of course. I would take the bell or dome off, or even loosening the screws might work.
Sadly-Linda has passed away 2022. She was the 311's den mother and drove the first Rare-Parts ball joint project. RIP.