Orlando Engine Swap Project
Moderators: notoptoy, S Allen, Solex68
-
denniswagnerusa

- Roadster Fanatic
- Posts: 159
- Joined: Mon Dec 26, 2011 9:56 pm
- Location: Orlando, Florida
Re: Orlando Engine Swap Project
The photo was taken looking back from the front tire area toward the door post. The dirt lodged in that crevice was apparently holding moisture at times to encourage rust just in front of the door on the fender.
I've got to clean that area out and get some undercoating in there to seal it off.
You do not have the required permissions to view the files attached to this post.
-
scogre

- Roadster Fanatic
- Posts: 170
- Joined: Mon Oct 17, 2011 12:48 pm
- Location: San Diego, CA
- Contact:
Re: Orlando Engine Swap Project
Project looks like it's coming along nicely.
I just removed one of my front fenders the other day and I can't believe the amount of dirt and crud that was stuck up in the crevice areas. I agree with the article you read, it causes rust. I have never driven my Roadster and it's been in the garage for almost 6 months and some of the stuff that came out was still wet!
I just removed one of my front fenders the other day and I can't believe the amount of dirt and crud that was stuck up in the crevice areas. I agree with the article you read, it causes rust. I have never driven my Roadster and it's been in the garage for almost 6 months and some of the stuff that came out was still wet!
Dreaming of the day when I can drive my '69 Roadster with a SR20DET motor purring beneath the body. 
http://www.DatsunRoadsterFun.com" onclick="window.open(this.href);return false;
http://www.DatsunRoadsterFun.com" onclick="window.open(this.href);return false;
-
denniswagnerusa
- Roadster Fanatic
- Posts: 159
- Joined: Mon Dec 26, 2011 9:56 pm
- Location: Orlando, Florida
Re: Orlando Engine Swap Project
I believe it. Another area I need to work on is at the bottom in front of the rear wheel. I don't know how water gets in there. It seems that the only access is by removing the interior panels on each side of the back deck. Remind me, are they held on by clips?
-
denniswagnerusa
- Roadster Fanatic
- Posts: 159
- Joined: Mon Dec 26, 2011 9:56 pm
- Location: Orlando, Florida
Re: Orlando Engine Swap Project
Making progress. Got the jig recently from Spriso and ran into a problem with it sitting flat on the platforms with holes. A diagonal member of the jig prevented it from sitting flat on the platform on the right (passenger) side. I've got a message into Michael about whether I should grind a notch in the frame so that the diagonal member allows the jig to sit flat on the frame. I figure it is important to have the mount at the correct height.
You do not have the required permissions to view the files attached to this post.
-
spriso

- Vendor
- Posts: 1629
- Joined: Wed Jun 04, 2003 9:20 am
- Location: Oregon
- Contact:
Re: Orlando Engine Swap Project
Dennis,
The photo is very helpful! That is a new JIG (a customer in Georgia refused to return my old JIG, so I had to make a new one!)
If you can carefully clearance that leg on the JIG (this is the only time I would allow it to be modified) so it clears your frame (without cutting it off) you are welcome do do so (I will re-work it when it is returned to me) I sincerely apologize for the issue.
You are going to want to clearance that area under that leg anyway for some oil filter clearance-- just some food for thought.
Call me if you run into problems...
Michael
Spriso Motorsports
http://www.spriso.com
Instagram https://instagram.com/spriso/
SR20 Powered Roadsters
Engine swap kits Available! See my website!
http://www.spriso.com
Instagram https://instagram.com/spriso/
SR20 Powered Roadsters
Engine swap kits Available! See my website!
-
pebbles

- Roadster Fanatic-Site Supporter
- Posts: 3931
- Joined: Thu Dec 16, 2010 12:00 am
- Location: Washington
Re: Orlando Engine Swap Project
A small notch in the frame for clearance should not be an issue at this point. As Michael stated, a notch for O/F access will be required.
You do not have the required permissions to view the files attached to this post.
David
"When we were standing next to the motor while on the dyno, and the motor hit VVL, eyes went watery.."
"When we were standing next to the motor while on the dyno, and the motor hit VVL, eyes went watery.."
-
denniswagnerusa
- Roadster Fanatic
- Posts: 159
- Joined: Mon Dec 26, 2011 9:56 pm
- Location: Orlando, Florida
Re: Orlando Engine Swap Project
Michael,
Thank you so much for making a new jig so that I did not have to wait too long. I cut away some of the frame and the jig dropped right into place. I marked on the jig where you might want to modify the diagonal member to fit without modification. I can see that I am going to have to remove even more material in that area of the frame for the oil filter notch. Nice photo David.
I've marked up the frame where the notches will need to be made. My welder did not want me to bring the frame around until Saturday so I'm hoping he can work on it right away and I can get the jig on its way back next week.
Dennis
-
denniswagnerusa
- Roadster Fanatic
- Posts: 159
- Joined: Mon Dec 26, 2011 9:56 pm
- Location: Orlando, Florida
Re: Orlando Engine Swap Project
Lots of progress recently. Got word from my mechanic that the engine and rolling frame will be ready to pick up tomorrow. He said the Spriso jig allowed them to drop the engine in without problems. They used the photos supplied by Spriso to come up with the best way to modify the frame. When I get the rolling frame back I will remove the engine again and disassemble the suspension so that the frame can be sandblasted and powdercoated.
Meanwhile I have been working on the body. My car leaked oil for 30 years and much of it got on the underside of the car. I have been working with degreaser and a pressure washer to clean the underside of the body. I have been through many cycles of degreaser than rinse. It is really hard to lay on the cold concrete garage floor, spray degreaser, then spray with the pressure washer and avoid getting stuff in your eyes. Goggles helped but they fogged up. I managed to do it without injury. I will be spraying with cans of rubberized undercoating soon. Someone in the forum recommended avoiding cans and spraying with undercoating with a sprayer. I went down to a local body shop supply place to see about a sprayer and they recommended cans for my project.
I've removed the front fenders and found lots of rust underneath on both the fender and the inner fender. I have several areas of rust-through on both. I used a wire brush attachment to my drill and Dremel and removed as much rust as possible from the inner fender area. Then I used the three step POR-15 method. I used their marine degreaser and rinsed. Then I used the clean and prep and rinsed and then today I painted all the rust areas with POR-15. I am very confident that POR-15 will prevent rust. That stuff is amazing to work with. Here is a photo after painting on the POR-15. I then added a light coat of etching primer to get ready for more paint or undercoating.
The inside of the outer fender was rusty also. Several areas of rust-through had blistered the paint. I could not see a way to get inside the metal folds and spot welds to clear the rust so I checked into a way to immerse the fenders in a solution that will remove the hidden rust. I found a place about 2 hrs away called Revivation that specializes in restoring old cars. They have a Datsun roadster in the tank in their website gallery. Their process puts the fenders in an alkaline bath for a week which removes all paint, undercoating, bondo, and rust. You are left with virgin metal. They use a rust inhibitor at the end but it only works a short time. I will need to prime or use POR-15 soon after. I don't know how I'm going to get into the hidden areas in the fender with rust preventer. I wished they had a additional bath of POR-15 at the end. I will be dropping the fenders off on Wednesday.
As I proceed with this project I am seeing what others have said about doing engine swaps in terms of costs and time. Once your have bought the engine and freshened it up and went to the trouble of removing the body and modifying the frame you have already invested large amounts of time and money. Since you have the body off you might just as well powdercoat the frame and detail the underside of the body. Since the suspension is removed you might just as well rebuild that and then you might as well do the brake swap. Of course much time and money is needed to do the turbo plumbing. Why settle with 205 HP when you can have 250 for another $1000. It seems like a thousand here and a thousand there and pretty soon you are talking real money. I have a tremendous advantage that this car is a member of the family. It is woven into the fabric of who we are. How can you put a cost on caring for a family member. It is already amortized over the 33 years I've owned it and maybe for another 30 beyond. That being said I do not have unlimited funds so we will see where this ends up.
You do not have the required permissions to view the files attached to this post.
-
notoptoy

- Vendor-Site Supporter
- Posts: 9700
- Joined: Fri Oct 02, 2009 2:55 pm
- Location: Winston-Salem, NC and Ocala, FL
- Contact:
Re: Orlando Engine Swap Project
Great progress, would love to see more, and larger, pictures!
"When all else fails, force prevails!" Ummm, we're gonna need a bigger hammer here.
67.5 SPL311 H20 w/5 speed
65 Impala Convertible
2017 C43 AMG
67.5 SPL311 H20 w/5 speed
65 Impala Convertible
2017 C43 AMG
-
scogre
- Roadster Fanatic
- Posts: 170
- Joined: Mon Oct 17, 2011 12:48 pm
- Location: San Diego, CA
- Contact:
Re: Orlando Engine Swap Project
Just curious, I'm in the same boat as you right now and I was wondering what $1,000 would be spent on to up the HP to 250?
Dreaming of the day when I can drive my '69 Roadster with a SR20DET motor purring beneath the body.
http://www.DatsunRoadsterFun.com" onclick="window.open(this.href);return false;
http://www.DatsunRoadsterFun.com" onclick="window.open(this.href);return false;
-
Garm
- Roadster Enthusiast
- Posts: 2061
- Joined: Wed Dec 28, 2011 9:49 am
- Location: Canoga Park, CA
- Contact:
Re: Orlando Engine Swap Project
Dennis, what a great description of how any car project balloons. All of mine have.
I'm really trying to do my Roadster on a shoestring budget -- I admire you guys that are down to the frame and getting at every nook and cranny.
I'm really trying to do my Roadster on a shoestring budget -- I admire you guys that are down to the frame and getting at every nook and cranny.
1969 Roadster 1600-ish #26244 "Spike"
---------------------------------
OS GIKEN LSD $1720
AASCO light flywheels $398.95
---------------------------------
OS GIKEN LSD $1720
AASCO light flywheels $398.95
-
Gregs672000

- Roadster Fanatic-Site Supporter
- Posts: 9428
- Joined: Fri Aug 07, 2009 11:47 pm
- Location: Tacoma, WA
Re: Orlando Engine Swap Project
Car projects are huge undertakings that people often way under estimate in time and money. Just check Craigslist or Ebay for evidence! Before one undertakes such a project it is important to really plan it out and be very dedicated/motivated, otherwise we'll be bidding on the car before too long!
Nice work, so much better because Spriso is willing to share, above and beyond.
Nice work, so much better because Spriso is willing to share, above and beyond.
Greg Burrows
'67 2000 #588
Tacoma, WA
'67 2000 #588
Tacoma, WA
-
denniswagnerusa
- Roadster Fanatic
- Posts: 159
- Joined: Mon Dec 26, 2011 9:56 pm
- Location: Orlando, Florida
Re: Orlando Engine Swap Project
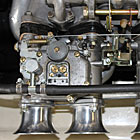
I may have been a little loose with the numbers, but my mechanic is suggesting that I can boost the horsepower significantly by using a premium turbo. I believe the S15 engines with a very good turbo will generate 250 HP. I could try to duplicate that with my S13 engine rather than stay with the stock turbo. My mechanic notices that photos I supplied from this site show that some people doing the SR swap are using premium turbos. Has anyone dyno'd (is that a word?) these engines?
There is something to be said for planning a project like this and budgeting for the costs, but I think if people really knew what they were getting into they may not proceed. There is something to be said for jumping in and just doing it like I did. When you have the car spread all over your garage and you run out of money at least you have the car apart so you will be motivated to do something when your bank account builds up again. Never stop a project before a difficult part. Take a break before something simple needs to be done. Makes it easy to get started again.
A note about working with POR-15. They recommend latex gloves and I strongly encourage that. POR-15 cannot be cleaned off anything including your skin. If you get it into the groove on the top of the can and close the lid you will not get it open again. The fumes are toxic. The first time I painted with it I did not take precautions and I had a horrible headache for 24 hours. The next time I had a fan to push the fumes away from my face and did not have any problems. Both times it ruined my contact lenses. I believe this stuff will encapsulate the metal to prevent any moisture from getting to it so it is worth the trouble.
How do you make the photos bigger?
-
spriso
- Vendor
- Posts: 1629
- Joined: Wed Jun 04, 2003 9:20 am
- Location: Oregon
- Contact:
Re: Orlando Engine Swap Project
Like the old fable goes, "How do you eat an elephant? One bite at a time..." the same goes for these kind of projects.
You are undertaking a huge project, which really can be daunting, especially for first-time swappers. We have tired to share as much about these swaps as possible to help others through the conversion, and great resources like 311s.org really help as well. Having parts like the ones we produce certainly make things much easier than if you had to scratch build everything and you get the benefit of being able to ask detailed questions to the roadblocks that you encounter.
There is such a tremendous knowledge base here, we are here to help, ask your questions, update us on your progress, and use this as the support group as you undertake your engine swap journey. The pain and long hours will soon be forgotten when you have the magical day when you turn the key and hear that SR come to life... it is an awesome feeling!
Keep at it!
Michael
Spriso Motorsports
http://www.spriso.com
Instagram https://instagram.com/spriso/
SR20 Powered Roadsters
Engine swap kits Available! See my website!
http://www.spriso.com
Instagram https://instagram.com/spriso/
SR20 Powered Roadsters
Engine swap kits Available! See my website!
-
Gregs672000
- Roadster Fanatic-Site Supporter
- Posts: 9428
- Joined: Fri Aug 07, 2009 11:47 pm
- Location: Tacoma, WA
Re: Orlando Engine Swap Project
I hear that, but for me it is the exact opposit: I would rather know what I am getting myself into (as much as one can!) vs diving in and getting overwhelmed. When I did my car 27 years ago it was an evolving process, but I also had a very clear deadline that I HAD to meet (going to CA for grad school, I'm not leaving the car in Washington!). I planned out everything on a timeline, separating out different sections or projects on the car (engine, body, interior, suspension, electrical, comfort/extras, etc.) and listing as many of the steps as I could. I literally laid it all out on poster board with anticipated start sequence, expected amount of time to complete and when. What this allowed me to do was KEEP ON TRACK, even when I would run short on funds or run into a road block. It also helped me anticipate and ASK QUESTIONS about things I knew nothing about (like bodywork and paint) BEFORE I was needing to get it done. The chart made it easy to see what things I COULD do (either what I planned to do, or what areas I could work on at that moment while waiting for other issues to clear up) as well as to anticipate what I SHOULDN'T do yet, as it could cause delays or extra work elsewhere. This allowed me to do my first frame off resto to the point I could afford and was prudent given a college student's budget. It also helped me focus on what was required vs what was desired. The car got done in a summer and a half and had 80 miles on the motor when I left for Long Beach... that's what worked for me and my situation! I want to point out that I am not an engineering type, or generally even that organized. As a therapist though it has had a great influence on me in how I approach problem solving with clients, often leading us to create written step by step solutions with people as they literally "restore" their lives. My Roadster experience has had as much influence on my therapy style as all my education combined! Maybe that's why I love seeing all the projects on this list as they move along.denniswagnerusa wrote:There is something to be said for planning a project like this and budgeting for the costs, but I think if people really knew what they were getting into they may not proceed.
Greg Burrows
'67 2000 #588
Tacoma, WA
'67 2000 #588
Tacoma, WA