After what seems like months of sandblasting and painting, the reward is a day of pure assembly. Nothing but clean, fresh refurbed parts, bags of clean Grade 8's, and new red grease.
My dad and I spent way more time than we should have swapping spindles and bushings to get just the right fit on the lower arms for zero bind once the ball joint and lower spring mount was torqued down.
With all pieces bolted on the front end is now solid as a rock! Next up is finishing the rebuild on the idler and steering box, leaf spring reassembly, rear end reassembly install.
We're working hard to get ole 33 back on wheels quickly, I have an anxious body man that needs to bolt down the tub to work on door, trunk, and fender fit.
1967 SRL311-00033
Moderators: notoptoy, S Allen, Solex68
-
nolastyankee
- Roadster Fanatic
- Posts: 89
- Joined: Sat Feb 01, 2014 10:11 am
- Location: Bentonville, AR
Re: 1967 SRL311-00033
You do not have the required permissions to view the files attached to this post.
-
cole455
- Roadsteraholic
- Posts: 580
- Joined: Tue Oct 23, 2007 12:03 pm
- Location: Lewisville, NC
Re: 1967 SRL311-00033
Looking good!
-
jamesw
- Roadsteraholic
- Posts: 2760
- Joined: Thu Aug 05, 2010 11:06 am
- Location: Houston TX
Re: 1967 SRL311-00033
Looking great! Keep up the good work - you'd make the POs proud.
Cheers
James
Cheers
James
SRL311-00275
'96 Porsche 993 C4
2001 Excursion 7.3l
'96 Porsche 993 C4
2001 Excursion 7.3l
-
spags1986
- Roadster Fanatic
- Posts: 368
- Joined: Fri Oct 07, 2016 10:31 am
- Location: Azusa California
-
nolastyankee
- Roadster Fanatic
- Posts: 89
- Joined: Sat Feb 01, 2014 10:11 am
- Location: Bentonville, AR
Re: 1967 SRL311-00033
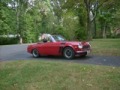
The body for #33 went for media blast way back in the early summer and typical of projects in my house took way more time to complete and get back than expected. My wife often takes my completion estimates for any project and factors up by a minimum of 3x. The roadster here is no exception.
This development is not totally unwelcome since I am still finishing up work (on the rolling chassis. I did take the opportunity to go and visit My roadster at the paint shop.
Things have a way of looking soooo much better when they are all the same color! Was also extremely pleased with the condition of the nearly 50 year old metal under all that primer, filler, and lots of caked on dirt.
Here's how she is coming along!
You do not have the required permissions to view the files attached to this post.
-
notoptoy

- Vendor-Site Supporter
- Posts: 9700
- Joined: Fri Oct 02, 2009 2:55 pm
- Location: Winston-Salem, NC and Ocala, FL
- Contact:
Re: 1967 SRL311-00033
Nice, looks very solid, progress is good no matter what speed!
"When all else fails, force prevails!" Ummm, we're gonna need a bigger hammer here.
67.5 SPL311 H20 w/5 speed
65 Impala Convertible
2017 C43 AMG
67.5 SPL311 H20 w/5 speed
65 Impala Convertible
2017 C43 AMG
-
cole455
- Roadsteraholic
- Posts: 580
- Joined: Tue Oct 23, 2007 12:03 pm
- Location: Lewisville, NC
Re: 1967 SRL311-00033
You guys are running right along! Looks great!
-
nolastyankee
- Roadster Fanatic
- Posts: 89
- Joined: Sat Feb 01, 2014 10:11 am
- Location: Bentonville, AR
Re: 1967 SRL311-00033
Received another box from Datsunparts.com with bearings and seals for the steering box. I scavenged the worm and sector from my parts car (they turned out to be near perfect) and picked up the liquid grease from Ross. A little blast cabinet, a lot of cleaning and chassis black, and a trip to the local bolt supply and 00033 gets a near new steering box.
Roadster learning from this exercise - did you know the bolts in the steering box (ones that hold the cover and the
worm bearing plates) are SAE diameter and pitch (5/16-24) but metric length? All the new grade 8's in standard size needed to be cut down to the nearest full cm length. Crazy.
I know I am missing the preload screw lock nut. Forgot to paint it but too excited about the results to post later.
You do not have the required permissions to view the files attached to this post.
-
Rodster
- Roadster Fanatic
- Posts: 128
- Joined: Thu Jun 13, 2013 8:35 am
- Location: Sacramento CA
Re: 1967 SRL311-00033
Great job. You should be proud of the work you are doing. Brings back memories when did car 485.
Yes to early 1967 the Roadsters are SAE. 67.5 a mixed bag of both SAE and mm. Then 1968 and up are all mm nuts and bolts.
Any questions this site and I am here to help please feel free to ask me.
Yes to early 1967 the Roadsters are SAE. 67.5 a mixed bag of both SAE and mm. Then 1968 and up are all mm nuts and bolts.
Any questions this site and I am here to help please feel free to ask me.
Rodney
Looking for a project - modified - what do you have.
Looking for a project - modified - what do you have.
-
nolastyankee
- Roadster Fanatic
- Posts: 89
- Joined: Sat Feb 01, 2014 10:11 am
- Location: Bentonville, AR
Re: 1967 SRL311-00033
I have been meaning to update this build log for a couple weeks since there has been much activity on the roadster. The shocks came back from Truechoice Koni and are spectacular. In addition to refinishing and rebuilding, they were also re valved and dyno'ed. The bill was as breathtaking as the dampers that I received back. Hopefully the expense is worthwhile, and at a minimum my Koni lifetime warranty is now in place.
Dad and I installed the new (old) shocks along with final torquing the ball joints and installing the springs. All of the hand fitting and work on the bushings and spindles was worthwhile - the suspension is amazingly smooth and free.
After finishing the suspension arms and. All joints we moved on to the backing plates and hubs. The front end was looking like a real car again!
After getting the front end back on the ground we used a spare rear end to get the chassis to a rolling state. My painter had been asking for the chassis so that he can align panel gaps on the doors and fenders. The painter is moving faster than I am for the first time in any of my projects.
With a rolling chassis I could not help but mount up
a wheel to dream a little. These spokes will be blasted back to natural and painted gray.
Knowing the chassis was going to be under the body during blocking I did my best to protect all of our hard work from getting buried in sanding dust. Here's the chassis all wrapped up like a Christmas present.
A week later and the body is back home and several days of sanding are in the books. It's starting to look good!
I'm excited about the progress we are making. Back at home I'm focused on getting brakes ready for rebuild and have been eyeing the big slug of iron on the engine stand and am getting anxious to pull out the micrometer, plastigauge, and assembly line. Soon, very soon.
You do not have the required permissions to view the files attached to this post.
-
jamesw
- Roadsteraholic
- Posts: 2760
- Joined: Thu Aug 05, 2010 11:06 am
- Location: Houston TX
Re: 1967 SRL311-00033
Looking good! Great idea to wrap the chassis as mine got covered with sanding dust just like you predicted.
Cheers
James
Cheers
James
SRL311-00275
'96 Porsche 993 C4
2001 Excursion 7.3l
'96 Porsche 993 C4
2001 Excursion 7.3l
-
cole455
- Roadsteraholic
- Posts: 580
- Joined: Tue Oct 23, 2007 12:03 pm
- Location: Lewisville, NC
Re: 1967 SRL311-00033
Looking good! I have overspray all over my chassis from the paint process 
Primer and graphite grey...
Looks awesome!
Primer and graphite grey...
Looks awesome!
-
nolastyankee
- Roadster Fanatic
- Posts: 89
- Joined: Sat Feb 01, 2014 10:11 am
- Location: Bentonville, AR
Re: 1967 SRL311-00033
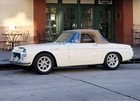
I was able to get over to the body shop last week to test fit my trim pieces. Turns out that a PO was drill happy in mounting the side trim and headlight buckets. The Datsun, hood, and trunk trim were equally crooked and needed at least one hole closed and repositioned.
My "S" is dragging. Aligning emblems at the body shop.
Back at home progress continued in random places. I disassembled and blasted the leaf springs, then rebuild with liners and hard plastic "buttons". This is my first use of spring liners and they really make the while spring pack move smoothly. I'm anxious to see how it rides.
The custom stencil was a bargain at $4 delivered from eBay, and gives a nice little extra detail.
Drive shaft was rebuilt with new Neapco u-joints with zerk fitting. Thanks 311's Wiki!
Comp pan gets glass beaded and clear coat for easy cleanup.
Bit the bullet for new brake pistons after disassembling 8 used ones and still could not get a nice usable set!
Next challenge - finalizing paint color...I have it down to 4 choices. More on that soon...input is welcome!
You do not have the required permissions to view the files attached to this post.
-
Gregs672000

- Roadster Fanatic-Site Supporter
- Posts: 9427
- Joined: Fri Aug 07, 2009 11:47 pm
- Location: Tacoma, WA
Re: 1967 SRL311-00033
Color I always wanted for my black car... black cherry, where it has just a hint of a cherry color in the sun, but is black otherwise. problem is, if it needs touch up you have to do the whole car or panel!
Greg Burrows
'67 2000 #588
Tacoma, WA
'67 2000 #588
Tacoma, WA
-
nolastyankee
- Roadster Fanatic
- Posts: 89
- Joined: Sat Feb 01, 2014 10:11 am
- Location: Bentonville, AR
Re: 1967 SRL311-00033
Greg - I like where you are thinking. My head is stuck on a dark non metallic Navy. Looks nearly black until you see a black car and double take.
Problem is the garage mate is already wearing a similar uniform. Guess I like blue.
This car was originally 666 Silver-Gray. I would adjust to more of a titanium. It's a handsome color for sure but many other cars like it already, and I'm not good with following convention.
Problem is the garage mate is already wearing a similar uniform. Guess I like blue.
This car was originally 666 Silver-Gray. I would adjust to more of a titanium. It's a handsome color for sure but many other cars like it already, and I'm not good with following convention.
You do not have the required permissions to view the files attached to this post.