Page 2 of 13
Re: Dash cap installatoin
Posted: Fri Jan 29, 2016 5:39 pm
by nismou20
I do recall the pesky little twisties becoming a thorn in my butt back when I covered mine. Since mine was a bit more beat up than yours, I went to town and removed more material from the gauge area and top on existing dash. That allowed more void to stretch the new cover over. Once it's on you never see the old crappy dash anyways. Just use lots of RTV.
Re: Dash cap installatoin
Posted: Fri Jan 29, 2016 6:18 pm
by bakerjf
I just removed my dash today, along with the radio and center consoles; it took about 2-1/2 hours. I think on your current course, you're heading towards spending many more hours than that, and in the end you probably won't get as good of a result without just pulling the whole thing. I can pm you with how I did it if you want. It was my second time doing it (last time over four years ago.).
Re: Dash cap installatoin
Posted: Fri Jan 29, 2016 6:59 pm
by Zedyone_Kenobi
Yes, Please, I am so close to being there anyway!
Re: Dash cap installatoin
Posted: Fri Jan 29, 2016 8:05 pm
by bakerjf
Pm sent
Re: Dash cap installatoin
Posted: Fri Jan 29, 2016 8:20 pm
by theunz
One thing I would recommend to anyone removing a high windshield dash would be to extend the wires coming off the clock. They are darn near impossible to hook back up once the dash is installed. Mike
Re: Dash cap installatoin
Posted: Fri Jan 29, 2016 8:29 pm
by Zedyone_Kenobi
That advice is money right there. And my clock still works, so I would like to keep it that way.
This all started with the purchase of a one wire alternator upgrade I wanted to do. Don't ask how I got on dash cap.. the train of thought and while I am at its, is staggering to try to follow.

Re: Dash cap installatoin
Posted: Fri Jan 29, 2016 8:48 pm
by theunz
Many of us here suffer from the same affliction.
Re: Dash cap installatoin
Posted: Sat Jan 30, 2016 12:44 am
by pebbles
Zedyone_Kenobi wrote:That advice is money right there. And my clock still works, so I would like to keep it that way.
This all started with the purchase of a one wire alternator upgrade I wanted to do. Don't ask how I got on dash cap.. the train of thought and while I am at its, is staggering to try to follow.
I would guestimate that 97 percent understand exactly.
heck I broke one bolt and,,,,,,,,
bodyoffdat.jpg 003.jpg
Re: Dash cap installatoin
Posted: Sat Jan 30, 2016 8:08 am
by msampsel
pebbles wrote:Zedyone_Kenobi wrote:That advice is money right there. And my clock still works, so I would like to keep it that way.
This all started with the purchase of a one wire alternator upgrade I wanted to do. Don't ask how I got on dash cap.. the train of thought and while I am at its, is staggering to try to follow.
I would guestimate that 97 percent understand exactly.
heck I broke one bolt and,,,,,,,,
bodyoffdat.jpg 003.jpg
Yes, Epic WYAI is an affliction many of us suffer from.
pebbles,
I'm unfamiliar with the green bottle upgrade on the traction bar. What is it for?

Re: Dash cap installatoin
Posted: Sat Jan 30, 2016 8:21 am
by Zedyone_Kenobi
Well today the plan is to get the center console out and then the radio console. Now sure this is going be possible, as I am always watching the kiddos on the weekends with my wife. Really eats into the old Datsun Roadster time.
I made the classic mistake again of starting projects on both my cars at once. The Z is getting new rear BRE rear spoiler that will have to be painted and fitted, and now the roadster is down. With perfect driving weather like this, I would have thought I would have learned by now. Still a mission is a mission.
The last time the WYAI hit me this bad was with the Z. I wanted to repair ONE of my heater control panel cables...and it was not even broke, it was just hard to move. By the time that was done I had a new retrosound receiver, custom fit plate surround for it that looked really OEM
, a new refurbished antenna, a new set of rear speakers, a new rear overflow tank for the gas tank, a completely cleaned and coated gas tank, all new hoses, new straps, oh yeah, and new heater control cables....
I cannot believe I am going pull the dash.. LOL...But it will make covering the dash much much easier I presume. I will go ahead and order the new datsun parts.com 4 piece window trim kit as well. I will have to strip all that old black adhesive off first. That is always just a splendid job.

I pray I can get the radio working. I cannot wait to hear that 'bump'n' 2W toshiba belting out the best of Ray Charles or Frank Sinatra (hey rule in my house is old cars have to play old music)
Re: Dash cap installatoin
Posted: Sat Jan 30, 2016 10:17 am
by bakerjf
Check in with me when you do the windshield pad set installation!!
Re: Dash cap installatoin
Posted: Sun Jan 31, 2016 3:22 pm
by Zedyone_Kenobi
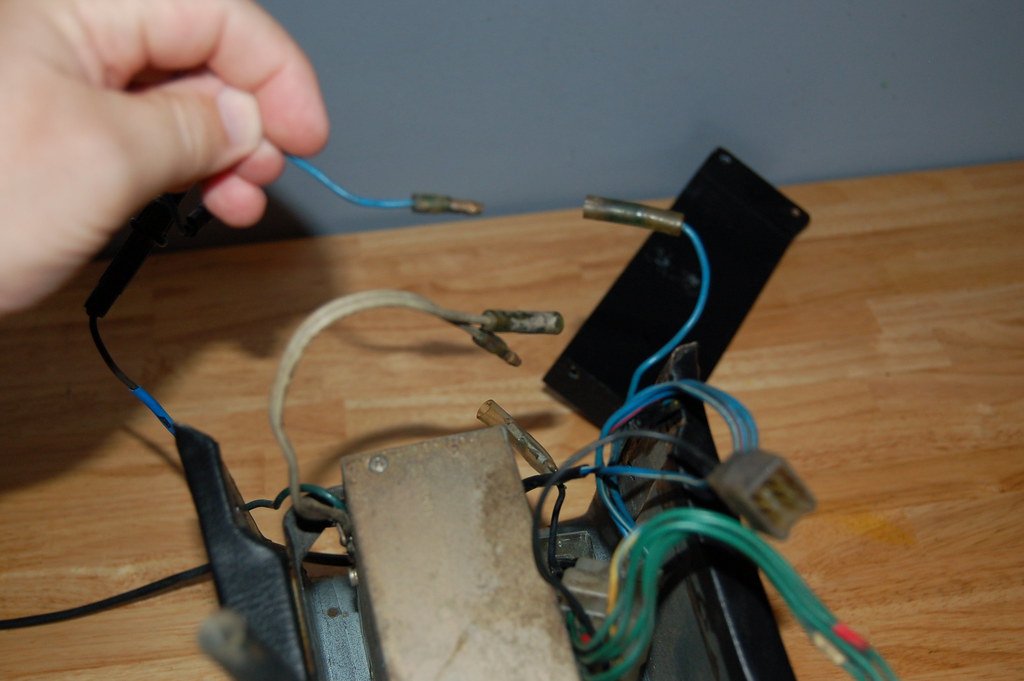
Today more progress was made! I pulled the center console out and the radio surround. I have no idea why I thought that was going to be hard. Just disconnect the center light, and cig lighter and out it comes. Also, the radio console with all those switches could not have been easier. A slight pull a couple of inches you are faced with the radio antenna (black wire), then the green bundle of wires, and the blue bundle of wires, and that is about it. I knew my speaker was not hooked up. But what I found was encouraging. The OEM speaker leads to the radio were still in good shape. So were the connectors. The only other wire coming out the radio was a blue wire with a small in line fuse and a male connector that was NOT hooked up to anything. Figuring this must be the power wire. I want to hook up a 12V source and see what happens. There was a matching blue female connector coming out of the blue bundle of wires that was also not connected. NO idea if it came lose, or if it was purposely disconnected. Here are some pics.
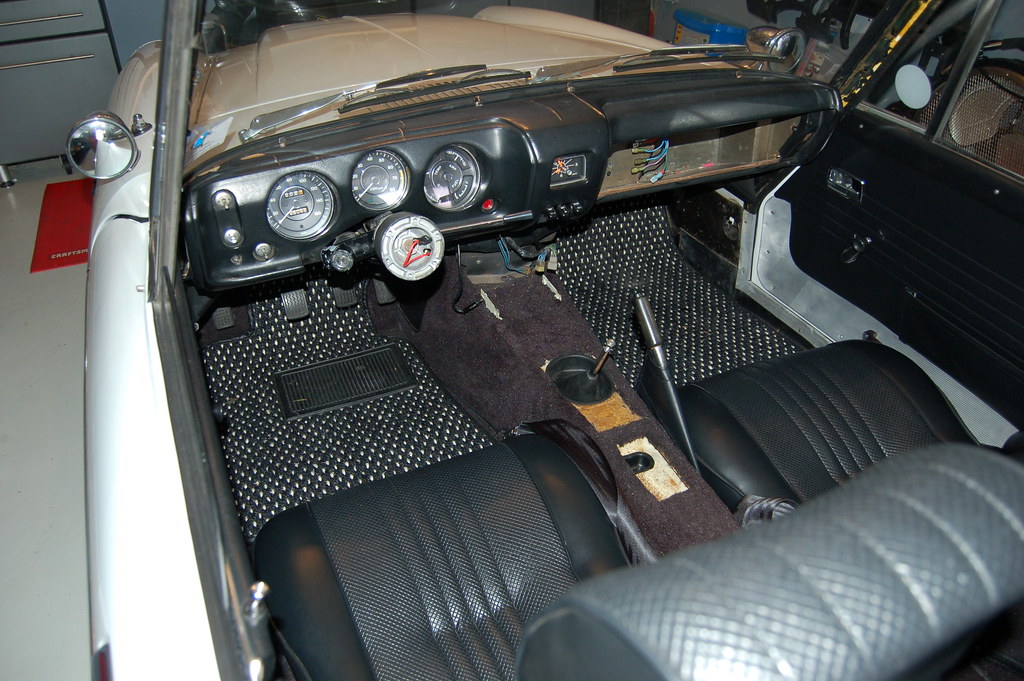
Amazing how these pictures make the carpet look old. Also, Look how amazing it would be without anything on the console. Just new carpet and a nice billet trim ring holding a leather shift boot. It would be so clean without any of the clutter. But my goal is not to make a vintage racer (yet) so I will be restoring all of it as I go.
Here are the pics of the blue wires.
Thanks Mr. Baker for giving me that step by step guide. It really alleviated my initial fear of pulling out the dash.
Re: Dash cap installatoin
Posted: Sun Jan 31, 2016 4:10 pm
by bakerjf
I'm like you in that I wanted everything working like it originally did - kudos on trying to get the radio up and working! Some tips that might help... My car had sat outside for years before I bought it, so before applying power to the radio I removed the case and gave it a long shower in freon (electrical connector cleaner). Fry's Electronics sells the can, which can be hard to find elsewhere.
Next, take a good look at the speaker and see if you can find any cracks, and also determine if it's oem or not. I seem to remember that it had a weird impedance rating, so you just can't run out and buy an ordinary car speaker - unless you want to reflect power back to the radio and potentially damage it. I remember I had to buy something like three speakers on EBay before I found one that still worked; however, your car looks much better taken car of than mine was so fingers-crossed.
If you manage to get the radio working, your jubilation and pride will quickly be overtaken by disappointment in what's out there to listen to now. To address that, I purchased a "redirad" hookup that allows me to play Pandora/MP3s through the radio. You just plug the antenna connection to the device, wire it for power, and tune to radio to "1000." I ran the connecting lead to the center console - the whole thing took about 40 minutes to install.
There's something to be said for listening to some period-correct music through the original radio while cruising down PCH. I highly recommend it.
Oh - the "J." Is for John
Re: Dash cap installatoin
Posted: Sun Jan 31, 2016 5:01 pm
by Zedyone_Kenobi
yup, it is a 4 Ohm 2W speaker. You can feel the power from here!
I stripped and painted the OEM speaker box. Now I want to get new hardware to reattach the speaker. I may even put some sound backer foam in the opening to help improve the sound a bit. I long for the AM static on an oldies station!
I am going to try a jumper tonight to see what I can make happen.
Re: Dash cap installatoin
Posted: Sun Jan 31, 2016 5:59 pm
by pebbles
driving thru a tunnel will test your lyrical memory,,,,

Nice work btw.