The Resource For All Things Datsun Roadster S211/SPL212/310/311 Datsun Sports Roadster 1959-April 1970 circa 40,000 produced https://www.311s.org/phpBB3/
This took some time. So will the other side. 18 gauge on the hinge pillar. 20 on the rest. It's not as lumpy as it looks the galvanized coating is sanded through in the darker spots which makes it look that way. Tomorrow is supposed to be another nice day. I hope to sand off the exterior paint.
Re: 69 2000 Derustoration
Posted: Wed Nov 04, 2015 4:50 pm
by Kman
Separated the body and frame today. The frame is in remarkably good shape. I could only find one 1/2 inch rust hole which when I poked at it with a screwdriver came to solid metal quickly.
Re: 69 2000 Derustoration
Posted: Thu Nov 05, 2015 8:49 am
by Kman
I was a bit confused as to the original paint color on my car. There were 3 shades of red on the exterior, the 1 st one being the most vibrant. The interior was original color but the sticker in the firewall proved elusive.
I have some experience and I know that the color matching camera/computers are iffy at best, especially with old paint so I really wanted an actual code. I thought maybe it was pagoda red after staring at it for a while but then a light bulb went over my head (ha ha) and I thought about using a black light.
BOOM! 664 - Red. Quite pleased. Maybe this tip will help someone else.
Very cool tip on the black light. That would not have occurred to me.
Re: 69 2000 Derustoration
Posted: Mon Nov 09, 2015 12:46 pm
by BobandVanessa
Body work looks great!
Re: 69 2000 Derustoration
Posted: Thu Mar 03, 2016 4:35 pm
by Kman
Been a little while since I've worked on this. Rebuilt a VW motor in the meantime. Been back at it recently.
Repaired and fitted fender.
Cut out the next problem area.
Beginning to put metal back.
Made parts to go back in.
Parts fitted in. Last one tacked in. I ran out of welding gas.
And now the next problem area cut out.
So much fun.
Re: 69 2000 Derustoration
Posted: Fri Mar 04, 2016 7:11 pm
by Kman
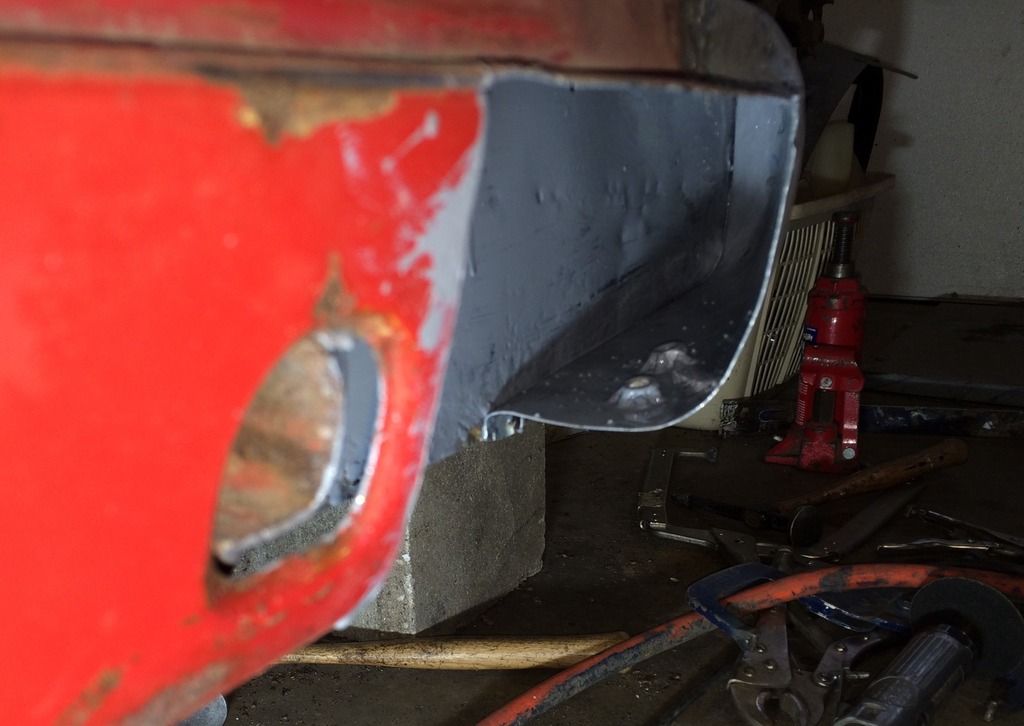
Got some more gas. Cut out rough shape and clamped to car to finish shaping inner fender.
Decided to do a lap joint on the inner fender. I roughed it out some more after spot welding. Taking measurements from the other side.
Cleaned up and epoxied.
Re: 69 2000 Derustoration
Posted: Sat Mar 05, 2016 12:28 pm
by Kman
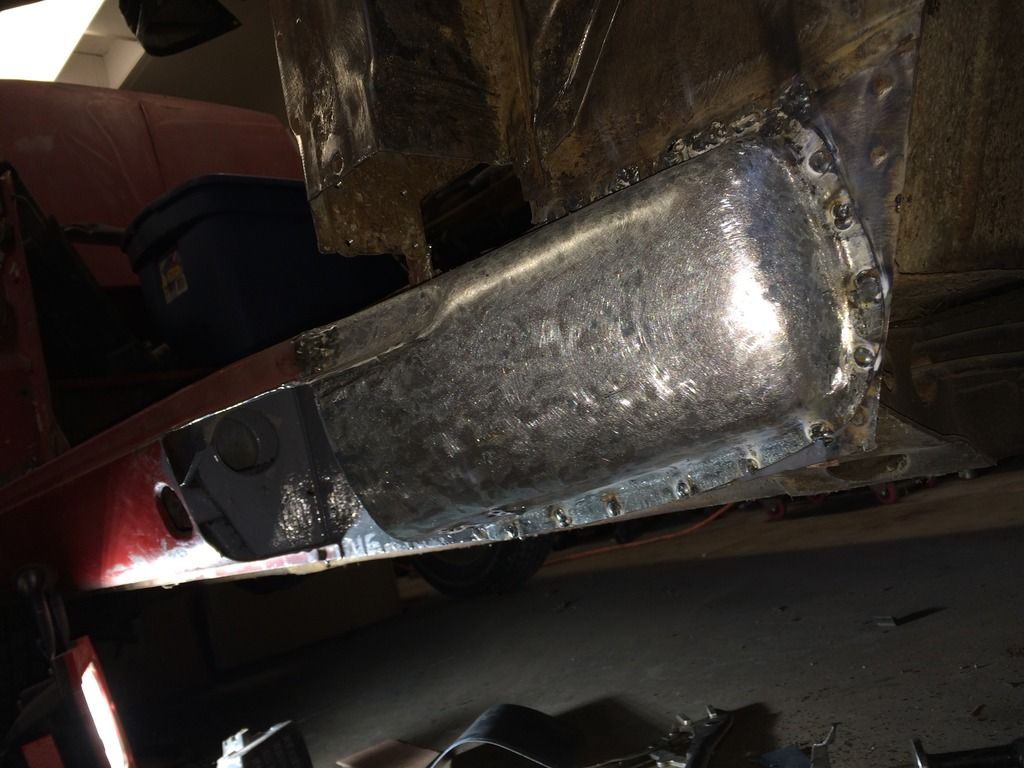
4-5 hours of work for this piece.
Re: 69 2000 Derustoration
Posted: Mon Mar 07, 2016 5:11 pm
by Kman
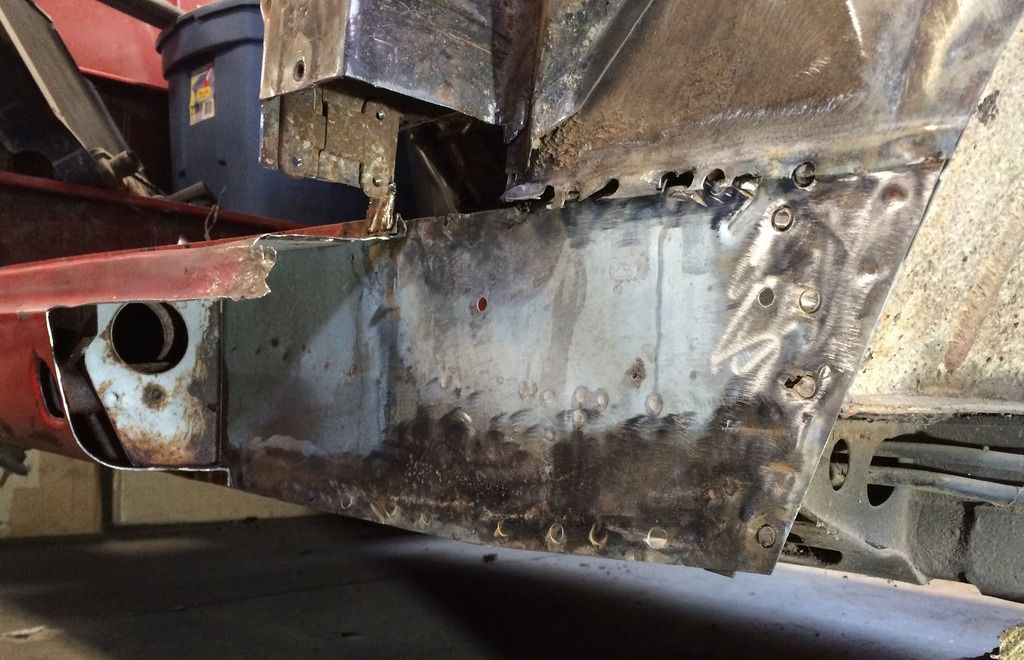
Next area to fix.
Parts
Fixed
Next area to fix.
I'm sensing a pattern.
Re: 69 2000 Derustoration
Posted: Mon Mar 07, 2016 7:08 pm
by spriso
Please be very careful when welding galvanized steel! I realize that you will be plug welding your sheet metal patches, but it is amazing how much they outgas when being welded!
Re: 69 2000 Derustoration
Posted: Mon Mar 07, 2016 7:20 pm
by Kman
Nothing like temporary zinc poisoning
Re: 69 2000 Derustoration
Posted: Mon Mar 07, 2016 8:12 pm
by pebbles
pretty amazing work, welding upside down and stuff, dam!
Re: 69 2000 Derustoration
Posted: Wed Mar 09, 2016 11:26 am
by Kman
This piece is such a pain to make. I'm glad I only had to make 2 for this car. It's already welded in but no picture of that. Looks a lot like the other side. After a couple small floor patches I'll mostly be done with the metal work on the body and be able to move on in the process.
Re: 69 2000 Derustoration
Posted: Wed Mar 09, 2016 4:17 pm
by Kman
Disassembled and test fitted the doors and fenders. The gaps are pretty even but HUGE. I understand this is normal but I am very tempted to add some 1/8" rod to the door edges. I also brushed bare metal areas with some Metal Ready to prevent flash rust.
Soon I need to scrape the underside which I'm not looking forward to. Goal is to get the body metal worked, epoxied filled and primed and let it sit while I work on the chassis. Also cutting in the interior with a new coat of red would be nice.