Well, I will say that I rarely have had issues in regard to ring end gap with stock replacement rings, but I also always check. Now, there are performance type rings that are called "file fit" that means just that, you need to file them to acheive the proper end gap, and sometimes it will NOT state this on the box. I know you may not want to pull the pistons back out again, but the small amount of time now is nothing compared to the time to pull it out and tear it down later. Also, if you pull the pistons, check the ring to land gap since you have it apart. If the rings are too tight in the land (groove), that could also be a possible problem.
Mark
engine build
Moderators: notoptoy, S Allen, Solex68
-
datsunrides
- Roadster Fanatic-Site Supporter
- Posts: 1571
- Joined: Sun Apr 25, 2004 7:15 pm
- Location: Roseburg, Or
Re: engine build
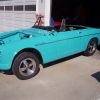
1966 Roadster
Turbo / EFI U20 (T25 w/ SDS EMU.)
Turbo / EFI U20 (T25 w/ SDS EMU.)
-
SLOroadster

- Roadsteraholic
- Posts: 5360
- Joined: Sun Dec 08, 2002 2:53 am
- Location: Napa Ca
Re: engine build
When I built my engine I noticed that my Deves rings had too large of a gap. I sent them back and they did a "custom" set. These also were too large, but I went with them anyway. 5 years later and 45-50000 miles later with a whole pile of races on it, its still going strong. I don't remember if it was hard to turn by hand (I think it was, I remember having a big ratchet on the crank so I could turn everything) but with the amount of assembly lube I used everything was well lubed before starting. When I had it apart last year, everything still looked good. Perhaps I'm just lucky (unlikely as I have the worst luck in the world,) but I was VERY carefull as I assembled it.
Will
Will
Sorry, I find modern engine swaps revolting. Keep your G, R, or U series in your Roadster!
-
crispy
Re: engine build
That is exactly how I have to turn the motor. With my big ratchet. I will check out the rings next week. The ring to land gap was perfect in my opinion. so I will check the ring end gap and let you all know.
Cris
Cris
-
Flintstone Charlie
- Roadster Nut
- Posts: 29
- Joined: Sun Jul 29, 2007 8:52 pm
- Location: Arizona Mountains
Re: engine build
Good Afternoon All,
Below is an assembly guide I put together for myself when I built my engine. As you'll note, I didn't have torque values handy so those need to be filled in. Maybe the list folks can correct and amend this and then we can put it somewhere handy?
Have a great day!
Charlie
Datsun R-16 Engine Assembly Guide
Assemble in the order below:
Cam:
• Insert Cam Bearings. Assure oil galleries are lined up with oil feed holes
• With block inverted lube and insert lifters. Assembly lube on shaft, cam lube on face
• Lube and insert cam carefully to avoid damaging bearings. Cam lube on lobes
• Install cam retainer and torque bolts to ??.
• Install woodruff key and cam gear using heavy washer, lock washer & bolt. Torque to ???.
• Check end play 0.003-0.011. Endplay adjusted via thickness of locating plate
• Check for free rotation
Crankshaft:
• Soak rear rope seal in oil for several hours. Insert upper half in block & trim flush
• Wipe block surface one last time to assure it is dust free.
• Insert upper bearing shells. Verify bearing tangs & oil holes are correct.
• Insert main with thrust bearing at #3 bearing web.
• Lubricate all bearing surfaces with assembly lube and insert crankshaft
• Starting with #3 cap, insert bearing shell with thrust bearing lubricate bearing faces with assembly lube and place bearing cap in place with marks to camshaft side. The longer bolts go on caps 2&4
• On rear cap install seal and trim, install rubber side seals and lightly coat bottom sealing surface with a light sealant
• Torque caps one by one to 75-80 ft-lbs , starting at the center and verify free rotation after each is tightened
• Install shim washers at front of crank
• Remove cam bolt. With the engine right side up, turn crank until keyway is vertical slide crank sprocket, cam sprocket and chain together onto the crank and cam. With the keyway in the crank vertical, the dots on the cam and crank gear should be across from each other.
• Reinstall cam bolt and torque to ???
• Install crank pulley and torque to about 50 ft lbs. Verify crank endplay is 0.002 – 0.006. If not, correct by adding or removing shims.
• Install timing chain tensioner and bend down lock tabs.
Pistons and Rods:
• Insert rings in bore, square with piston and verify end gap: Top 0.010-0.016; Second & oil control 0.006-0.012
• Install rings on pistons per manufacturer’s instructions starting with the oil ring. Verify if there is a top to the ring and make sure rings are installed correctly.
• Install pistons on rods. Pistons with notch in skirt toward cam. Pistons with an “F� on the dome F to front. Numbered side of rods away from cam.
• Liberally coat cylinder and piston with ATF. Turn crank so rod journal is away from cylinder you are installing. Compress rings with ring compressor and gently tap piston into bore with hammer handle.
• Wipe rod bearing area and insert bearing half in rod making sure tang is correctly aligned. Lubricate bearing with assembly lube and slowly lower piston in bore making sure rod bolts don’t damage the crank journal
• After rod is seated, wipe rod cap and install bearing shell and install cap on rod. Make sure cap is straight and lightly sung up bolts. Lightly tap back and forth to assure ron cap alignment. Torque bolts to 35-45 ft-lbs. Check side clearance. Ideal clearance is 0.007. If used, install pal nuts and torque to ???
• Repeat on remaining rods. Do cylinders 1 & 4 then 2 & 3 to save turning the engine over every time. Engine should still turn reasonably freely.
Distributor Drive Gear and Oil Pump:
• Turn the engine to top dead #1. Check the cam to be sure. (Lobes pointing toward oil pan)
• With engine right side up, install distributor drive gear. When correctly installed the slot will be perpendicular to the crankshaft centerline with the slot offset to the front (smaller moon forward)
• Install gasket and distributor housing
• Connect distributor oil line
• Invert engine and install oil pump gasket. Generously coat oil pump gears with assembly lube. Place pump in opening and slowly turn engine until oil pump engages drive tang and drops all the way in. Install bolts and torque to ???
Front Cover & Water Pump:
• Remove crank pulley
• Install new front cover gasket
• With fresh front seal already installed, lubricate seal with assembly lube and install timing cover and torque to ??
• Lubricate pulley snout and reinstall on crank making sure keyway is in place. Torque to 120 ft lbs
• Install water pump gasket, spacer, a second gasket and water pump. Install and torque bolts to ??? ft-lbs
Head:
• Coat head, block and gasket surfaces with copper coat and allow to dry.
• Place gasket on block making sure it is correctly oriented. Verify the water passages, oil feed hole, head bolt holes, etc. are all correctly aligned.
• Carefully place head on engine.
• Start all 10 head bolts and run in until they almost make contact with head. The longer bolt and lifting hook goes at the rear of the engine on the carb side. Gently tap side to side and front to back until the head is aligned and centered.
• Tighten bolts until just snug. Starting in the center (between cyls 2&3) torque head bolts to 45 ft lbs progressively toward the ends of the engine. After the first round re-torque to 55 ft lbs. After the engine has been run for a few hundred miles re-torque again to 55
• Lubricate the tips of the valve pushrods and insert with the ball end down.
• Install the rocker arms tightening the stands progressively in small increments.
Distributor & Engine Right Side:
• Turn the engine to top dead cylinder #1
• Distributor drive slot should be perpendicular to the crank centerline with the slot offset toward the front of the car.
• Verify the offset direction of the drive shoe on the bottom of the distributor. The slot is offset to assure the distributor doesn’t get put in backwards. However, it isn’t offset enough and it is possible to put the distributor in backwards. If you start the engine and the distributor is doing a little hula dance you have it in backwards.
• With new gaskets and gasket sealant, install the oil filter housing and fuel pump. The fuel pump installs using a gasket, phenolic block and another gasket.
• Install motor mount
Intake and Engine Left Side:
• Using a new manifold gasket, install the intake manifold/carbs and exhaust manifold. The shared studs between the intake and exhaust manifolds have a very heavy cast washer on them. Torque nuts to ??? ft-lbs. Make sure the shared studs are effectively clamping both manifolds. If for any reason one manifold is thicker than the other insert small shims under the heavy cast washer to assure even clamping.
• Install motor mount
Final Assembly:
• Install oil pan using new pan gasket. Torque pan bolts to ?? ft lbs
• Using gasket adhesive or weatherstrip adhesive cement valve cover gasket to the valve cover. Set the cover on and install the sealing washers and acorn nuts. Lightly snug the bolts while the gasket cement dries. After it is dry, remove the valve cover and lightly grease the bottom of the gasket. Reinstall cover and torque to ??? ft lbs
• Slip plate spacer plate over locating dowels on the rear of engine. Install flywheel using locktite on bolts and torque to ??? ft lbs
• Lightly lubricate pilot bushing in the rear of the crankshaft using a good moly grease
• Install clutch disk and clutch cover. Very lightly snug the bolts (just enough to hold the disk in place). Center the clutch disk either using a centering tool or by sighting through the disk toward the pilot bushing. Once centered, progressively tighten the cover bolts until the clutch cover is seated. Torque bolts to ?? ft lbs
1968 SPL-311 W/ Slot Mags
-
S Allen
- Site Admin
- Posts: 4572
- Joined: Thu Dec 05, 2002 4:57 pm
- Location: Knoxville, IA(Lake Redrock)Emory, TX
- Model: 1500/1600
- Year: Low Windshield-64-67.5
- Contact:
Re: engine build
Charlie,
Nice write-up. I will add it to the tech-wiki with torque values. Thanks.
Steve
Nice write-up. I will add it to the tech-wiki with torque values. Thanks.
Steve
66 Stroker-Going Orange
67 SRL311-00279-resto project
Stock '72 240Z-Blue
2002 Ford F250 7.3 Diesel 2WD Hauler
2008 Toyota FJ Cruiser
2009 Smart ForTwo Passion Coupe
2013 Fiat 500 Abarth
67 SRL311-00279-resto project
Stock '72 240Z-Blue
2002 Ford F250 7.3 Diesel 2WD Hauler
2008 Toyota FJ Cruiser
2009 Smart ForTwo Passion Coupe
2013 Fiat 500 Abarth
-
dbrick

- Roadster Fanatic-Site Supporter
- Posts: 10084
- Joined: Thu Sep 09, 2004 11:05 pm
- Location: Kenilworth, New Jersey
Re: engine build
Very nice. That's the kind of list you need, even if you've done a couple.
Dave Brisco
Take my advice, I'm not using it"
66 2000 The Bobster
64 1500 in pieces for sale
1980 Fiat X1/9
2009 Volvo C-70
08 Expedition EL, STUPID huge but comfy
1962 Thompson Sea Lancer, possible money pit
-
johnscf
- Roadster Fanatic-Site Supporter
- Posts: 363
- Joined: Thu Jun 30, 2016 1:54 pm
- Location: Grafton WV
- Model: 2000
- Year: High Windshield-68-70
Re: engine build
i haven’t found this in tech wiki We’re you able to add it with torque specs? if so what section?S Allen wrote: Mon Jul 28, 2008 8:38 pm Charlie,
Nice write-up. I will add it to the tech-wiki with torque values. Thanks.
Steve
Charlie
Grafton WV
68 2000
70 1600
71 Toyota Celica ST coupe
74 Toyota Celica GT coupe
Grafton WV
68 2000
70 1600
71 Toyota Celica ST coupe
74 Toyota Celica GT coupe
-
S Allen
- Site Admin
- Posts: 4572
- Joined: Thu Dec 05, 2002 4:57 pm
- Location: Knoxville, IA(Lake Redrock)Emory, TX
- Model: 1500/1600
- Year: Low Windshield-64-67.5
- Contact:
Re: engine build
Whoops. I never got around to it. Will add it shortly.
Steve
Steve
66 Stroker-Going Orange
67 SRL311-00279-resto project
Stock '72 240Z-Blue
2002 Ford F250 7.3 Diesel 2WD Hauler
2008 Toyota FJ Cruiser
2009 Smart ForTwo Passion Coupe
2013 Fiat 500 Abarth
67 SRL311-00279-resto project
Stock '72 240Z-Blue
2002 Ford F250 7.3 Diesel 2WD Hauler
2008 Toyota FJ Cruiser
2009 Smart ForTwo Passion Coupe
2013 Fiat 500 Abarth
-
S Allen
- Site Admin
- Posts: 4572
- Joined: Thu Dec 05, 2002 4:57 pm
- Location: Knoxville, IA(Lake Redrock)Emory, TX
- Model: 1500/1600
- Year: Low Windshield-64-67.5
- Contact:
Re: engine build
66 Stroker-Going Orange
67 SRL311-00279-resto project
Stock '72 240Z-Blue
2002 Ford F250 7.3 Diesel 2WD Hauler
2008 Toyota FJ Cruiser
2009 Smart ForTwo Passion Coupe
2013 Fiat 500 Abarth
67 SRL311-00279-resto project
Stock '72 240Z-Blue
2002 Ford F250 7.3 Diesel 2WD Hauler
2008 Toyota FJ Cruiser
2009 Smart ForTwo Passion Coupe
2013 Fiat 500 Abarth
-
Mochi
- Roadster Fanatic
- Posts: 167
- Joined: Mon Aug 10, 2020 6:02 pm
- Location: Vancouver Washington
- Model: 1500/1600
- Year: Low Windshield-64-67.5
Re: engine build
Thank you! i just got my crank back and will be starting clearance/building my first of two strokers this week! this saved me a ton of time creating my own list before assemblyS Allen wrote: Fri Dec 09, 2022 4:58 pm Added-still need to update with torque values.
R16 Engine Build
Steve