Repairing a rusted out "A" pillar & sill cap.

Place to put those little tricks or parts you used during the restoration of your roadster.

Moderators: notoptoy, S Allen, Solex68

Post Reply
User avatar
Nissanman
Roadster Fanatic-Site Supporter
Posts: 3452
Joined: Mon Apr 16, 2007 8:07 pm
Location: Adelaide, South Australia
Model: 1500/1600
Year: Low Windshield-64-67.5
Contact:

Repairing a rusted out "A" pillar & sill cap.

Post by Nissanman »

In the beginning, there was THIS!
Image
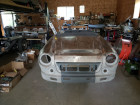
Bottom 1/2 of the LHS sill cap was absent, the 3 sides of the "A" pillar base are rotted and the cabin side panel has a huge hole behind the "A" pillar.
Image
Looks easy enough to repair doesn't it!
Image
Initial surgery to gain access to the inner sill panel and replace it.
Image
A view of the new inner sill panel.
Image
These plug welds will be done after the rest of the sill has been cut away.
Image
"A" pillar has lost all the rotten bits at the bottom and the top surface of the sill has been trimmed for a replacement patch.
Image
Worms eye view of the sill and "A" pillar surgery.
Interior looks bad but it is only surface rust, the metal is quite sound.
Image
Sill top under construction. Needs to be strong and accurate since the "A" pillar is welded to this area.
Image
The angles were pressed using the Sheet Metal Brake. All surfaces are flush so the patch is a good one.
Image
That is the basic shape. Now to clamp it in position and do some tacky welding.
Image
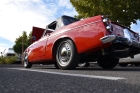
A recess has been pressed into the outside edge to accept the trailing edge of the front LHS guard.
I test fitted the guard and it fits fine.
Last edited by Nissanman on Tue Jul 15, 2008 8:45 pm, edited 4 times in total.
Nissanman, just trying to help.
1965 SP310 Engine No. G-93326 Car No. SP310-10817
https://photos.shutterfly.com/album/60141836519
On the road again!
User avatar
Nissanman
Roadster Fanatic-Site Supporter
Posts: 3452
Joined: Mon Apr 16, 2007 8:07 pm
Location: Adelaide, South Australia
Model: 1500/1600
Year: Low Windshield-64-67.5
Contact:

Post by Nissanman »

Continuing the work on the LHS sill and "A" pillar.
Image
There is a narrow patch at the back of the "A" pillar, the cabin wall.
It needed a joggle pressed into it so that it sat correctly.
Image
Leading edge "A" pillar patch cut to size and ready to go.
The outside face has already been done.
These repairs need to be very strong to re-establish the integrity of the "A" pillar to sill junction.
Image
The corners of the pillar have gaps left as per the original panel.
This to create an effective drain for moisture that collects inside the pillar.
Image
Trailing edge done.
The welds need a little bit of grinding to tidy them up but generally they turned out reasonably neat.
Last edited by Nissanman on Tue Jul 15, 2008 8:42 pm, edited 2 times in total.
Nissanman, just trying to help.
1965 SP310 Engine No. G-93326 Car No. SP310-10817
https://photos.shutterfly.com/album/60141836519
On the road again!
User avatar
S Allen
Site Admin
Posts: 4572
Joined: Thu Dec 05, 2002 4:57 pm
Location: Knoxville, IA(Lake Redrock)Emory, TX
Model: 1500/1600
Year: Low Windshield-64-67.5
Contact:

RE:Repairs to LHS sill and "A" pillar.

Post by S Allen »

Very nice pictorial write-up Graeme. Thanks for sharing.

Steve
66 Stroker-Going Orange
67 SRL311-00279-resto project
Stock '72 240Z-Blue
2002 Ford F250 7.3 Diesel 2WD Hauler
2008 Toyota FJ Cruiser
2009 Smart ForTwo Passion Coupe
2013 Fiat 500 Abarth
User avatar
itsa68
Roadsteraholic
Posts: 832
Joined: Sun Apr 18, 2004 11:24 am
Location: Winnipeg, Manitoba,Canada
Model: 1500/1600
Year: High Windshield-68-70

Post by itsa68 »

Looks like you're doing a great job on that pillar.
Brings back memories of when I had to do mine :smt089

Ray B.
Thats not a R16 death rattle....its a dried leaf hitting my heater blower fan.
1968 SPL311 non-smog
User avatar
Nissanman
Roadster Fanatic-Site Supporter
Posts: 3452
Joined: Mon Apr 16, 2007 8:07 pm
Location: Adelaide, South Australia
Model: 1500/1600
Year: Low Windshield-64-67.5
Contact:

Post by Nissanman »

Next chapter.
Image
The top edge of the original sill cap is the only part worth keeping.
Image
I am going to try and fold up the replacement cap from one piece of sheet.
Image
Need to do these plug weld first so that the sill panel is anchored in the right place.
Image
Chassis mount welded in position. This item certainly strengthens the whole area and fixes the sill back nice and vertical.
Image
Well, I had to section the cap to get all the curves to happen.
Image
The two pieces blend in nicely.
Image
All set to weld it on. I'm leaving the seam weld until the plug welds are done.
Image
The original cap top sheet was good enough to weld to so that is a bonus.
Image
That completes the first section of the cap.
Image
Template for the rear section. Compound curves and a flange, easy peasy.
Image
That should do the trick nicely.
I'll tack it in position then refit the guard to make sure everything is in position.
The trailing edge of this patch will be flared out slightly to mate up with the new sill centre section.
Image
If all goes to plan, there should be a 10mm gap between the guard bolt holes and the base of this section of the cap.
That will hopefully prevent the buildup of debris that causes this area to get trashed.
Last edited by Nissanman on Tue Jul 15, 2008 8:39 pm, edited 1 time in total.
Nissanman, just trying to help.
1965 SP310 Engine No. G-93326 Car No. SP310-10817
https://photos.shutterfly.com/album/60141836519
On the road again!
User avatar
fixitman04
Roadsteraholic
Posts: 726
Joined: Sat Nov 12, 2005 12:29 am
Location: grand forks nd

Post by fixitman04 »

i really hope that you put some rust converter or por-15 inside that rocker before sealing it up. if not it is gonna come back. you need to remove all rust, that stuff is like cancer if you leave any it will spread. nice metalwork btw.
67.5 srl-311-00407 u20
desperately looking for a 67.5 body that is rust free... id settle for any low window tub
User avatar
ppeters914
Roadster Fanatic-Site Supporter
Posts: 3125
Joined: Mon Jun 28, 2004 5:51 pm
Location: Lake Forest Park, WA (just north of Seattle)
Model: 1500/1600
Year: Low Windshield-64-67.5

Post by ppeters914 »

I'm sure I'm not the only one amazed. Btw, is that all MIG welding?
Pete
-------------------------------------
'67 1600 - frame off started in 2014. Now I know why roadster projects take so long. What a stupid idea. :smt021
'66 1600 - parts car
'66 WPL411 ***SOLD***
A couple of Porsches, a RAV4 Hybrid, and a motorcycle
User avatar
Nissanman
Roadster Fanatic-Site Supporter
Posts: 3452
Joined: Mon Apr 16, 2007 8:07 pm
Location: Adelaide, South Australia
Model: 1500/1600
Year: Low Windshield-64-67.5
Contact:

Post by Nissanman »

i really hope that you put some rust converter or por-15 inside that rocker before sealing it up.
All the inside surfaces will be dosed up with Metal Prep, it is a phosphoric acid based de-rusting treatment.
The plug welded joins will be seam sealed after etch priming has been sprayed.
The last step will be to squirt a Cavity wax inside all the box sections to seal and protect against moisture.
Btw, is that all MIG welding?
Mmmm, no, it is oxy-acetylene.
I use the DHC 2000 torch which requires only 5PSI gas pressure.
With the smallest tip you can weld an aluminium soft drink can back together :shock:
I have never had that requirement but apparently it is possible.
Image
I tried MIG once, wasn't real good but I'm sure with practice I would get the hang of it.
I was able to do a really neat weld bead as long as necessary but it was about 5mm from the join! D'Oh :roll:
Nissanman, just trying to help.
1965 SP310 Engine No. G-93326 Car No. SP310-10817
https://photos.shutterfly.com/album/60141836519
On the road again!
User avatar
fixitman04
Roadsteraholic
Posts: 726
Joined: Sat Nov 12, 2005 12:29 am
Location: grand forks nd

Post by fixitman04 »

more info on the torch , do they have a website?, address, phone

how much $$$ was it?


i want one
67.5 srl-311-00407 u20
desperately looking for a 67.5 body that is rust free... id settle for any low window tub
User avatar
spl310
Roadster Guru
Posts: 13241
Joined: Sun Dec 29, 2002 10:38 pm
Location: In front of this keyboard... in Jacksonville, Florida!

Post by spl310 »

Unless I am mistaken, that unit is retailed in the US as the Henrob 2000. Here is a link:

http://www.cut-like-plasma.com/
"Wow, a Roadster!" Stuart Little

1967.5 2000
1967.5 2000
1964 1500
1964 1500
1967.5 1600
1968 chassis
2006 Acura MDX
2013 Volkswagen Jetta TDI wagon
1995 F350 Powerstroke!
More...
MTyler

Post by MTyler »

Graeme, You're doing this with Gas welding? Wow! now I'm doubly impressed! :o
User avatar
Nissanman
Roadster Fanatic-Site Supporter
Posts: 3452
Joined: Mon Apr 16, 2007 8:07 pm
Location: Adelaide, South Australia
Model: 1500/1600
Year: Low Windshield-64-67.5
Contact:

Post by Nissanman »

For those in Oz: -
http://www.amweld.com.au/
I actually won my torch on eBay and it came from USA but they are available in Oz.
I never use Oxy-Acet to do cutting, I figure that it is cheaper and easier to use my big mutha cutoff wheel and angle grinders to do that.
So far I have been able to weld all my ferrous repairs successfully, I have yet to try anything with aluminium.
According to the sales pitch, alloy welding is fairly straight forward using alloy filler rod and NO FLUX :shock:
Because the gas pressure required is so low, there is a special procedure to set up the regulators to the correct setting.
It is a 20sec. exercise and once done and the line gauge or regulator knob is marked, job done :wink:
I don't suggest that MIG is not comparable but considering there is ZERO prep time for gas welding I'm sticking with it.
Plus, with gas, you can backtrack, re-heat etc. by simply moving the torch.
Try doing that with an electric powered wire feed system :roll: :roll:
Nissanman, just trying to help.
1965 SP310 Engine No. G-93326 Car No. SP310-10817
https://photos.shutterfly.com/album/60141836519
On the road again!
Post Reply