"I'm Not a Car Guy." - A 1967.5 1600 Refurb Saga

Here can put pictures and write-ups about your roadster or other vehicles.

Moderators: notoptoy, S Allen, Solex68

Post Reply
iloveredmeat
Roadster Nut-Site Supporter
Posts: 830
Joined: Thu Aug 08, 2019 3:36 pm
Location: San Diego
Model: 1500/1600
Year: Low Windshield-64-67.5

Re: "I'm Not a Car Guy." - A 1967.5 1600 Refurb Saga

Post by iloveredmeat »

funkaholik wrote: Fri Sep 10, 2021 8:48 am Peter,

Great write-up, as usual. That was a fun day, and it was good to finally meet you and your brother. I'm going to fully embrace my new persona as a somewhat shady parking lot parts dealer. All I need is a cool scar to make me look tougher. Nevermind, I have earned plenty of those working on the roadster.

Love the photo of your engine with the historic Isleton Speed Shop as a backdrop. But - a bait shop sign that says "The Master Baiter" - that is the absolute best!
Maybe you go with an eye-patch? Low-impact, not-permanent...

Yes, a really fun day.

And I encourage you to cruise that road someday. Take your girlfriend and find a good Chinese Restaurant. We also passed a couple of back alley bars that looked just the right amount of dangerous. Bring the eye patch!
Peter
––
1967.5 1600 – Second Owner – Under Reconstruction
1970 Honda CT70
1953 Airstream 21' Flying Cloud – Second Owner
iloveredmeat
Roadster Nut-Site Supporter
Posts: 830
Joined: Thu Aug 08, 2019 3:36 pm
Location: San Diego
Model: 1500/1600
Year: Low Windshield-64-67.5

Re: "I'm Not a Car Guy." - A 1967.5 1600 Refurb Saga

Post by iloveredmeat »

Previous trip: Day 3-6

If it hasn't been obvious, my refurb has been, and will continue to be, a non-linear, mostly reactive project.

That just means it's unorganized, unpredictable, and I don't know what I can do, how I can do it, or when I can do it.

Whenever I am able to fly up to work on the car, I do my best to make a plan, but that plan gets derailed nearly every time. So, I just do whatever I can to make some progress.

Last trip was no different.

The first plan for the weekend actually worked great - I drove down to Rebello's, pick up my engine, and crossed off one of the many beers I owe @Funkaholik. That went great and was a blast.

Other items on the agenda were:
Take inventory of parts: Check(ish)

Refinish the exterior of my cleaned and coated fuel tank: Meh. Only got about 70% of wire-wheeling done.

My Really Big Progress Plan was to spot-coat the tub with POR-15 where rust remediation and patches were completed. Then hopefully install KilMat in the tub. However, my KilMat shipment got delayed until after I'd gone, so I couldn't have done that even if I wanted to.

Image

Image

But, the KilMat wouldn't have mattered anyway because my entire project timeline and sequencing took a hard left turn. In short, I will soon be "losing' some "freedom-of-storage options' for my car project. This is a not a great thing for me, but is a great thing for many others… so I have no complaints.

During my trip, my brother asked that I shrink the footprint of my project. I need to get my old parts gone, and prepare the car/engine/transmission "ready to stab' as he calls it. So he can make room for some other things. And sooner than later.

So my focus pivoted to prepping the engine bay.

Image

Image

Image

Image

Image


For two very full days, we stripped the engine bay, cleaned it, sanded it, masked it, primed it, and wet-sanded it 3 or 4 times. My brother was invaluable and really encouraged me to do this properly (I probably would have just sanded and primed and sprayed. But we did it as right as we could given the space and equipment. The photos don't really do it justice.

Image


Image

Image

Image

Image

Image

And a big bonus that I didn't take a photo of. Since I can't do a frame off, I plan on just doing as much frame work as I can reach. The frame in the engine bay looked like it had some surface rust that would take some serious time and elbow grease to tackle. But a quick swipe with an SOS pad and I swear it cleaned right up. Nice black paint underneath. I'm sooo happy about that, and I'll tackle that next trip before I get the engine in.

Image


But this also meant I had to make a HUGE final decision — What color do I paint this thing??? Because I needed to get the paint made and get the engine bay painted on my last day, I had to decide immediately.

And for that decision, I'll need to backtrack here: One of the first things I did on this project was to visit Mr. Young's Roadster Ranch to buy just a replacement fender. I ended up with said fender… and… a 5-speed transmission with all the fixins to adapt to my car (drive shaft, backing plate, tranny mount, etc.).

If you haven't seen it, Mike has a Forest of Fenders and various other parts that reveal every original Roadster paint color. My original color was Silver Grey Metallic, and I would be fine with that. But, although I like ALL Roadster colors, I share @spriso's feeling that the world does not need any more red, black, or silver roadsters. And I really don't want to look like a sad version of Alvin's beautiful car.

Anyway, as I walked through The Fender Forest, suddenly the clouds separated, the angels sang, and a beam of light shone down on a half-buried piece of scrap metal. That color! That is the color I need. That is the color I fell in love with.

Mike told me that it's Beige Gray Metallic. And that it's a great color. And then he immediately and emphatically discouraged me from painting my car that color. He has very sensible and practical reasons for NOT painting your car a metallic color. But, why in the world would I start being sensible or practical now?

I soon found out that this is the elusive and enigmatic Paint Code #531 — (also called Beige Gray Metallic, also called Silver Bronze Metallic, also called Bronze, also called Super Frustrating Color to Try to Replicate).

Of course I had to fall for the hardest color to decode: Plenty of discussion on this color here:

viewtopic.php?t=10459

And I was able to find some color codes and equivalents here:

https://classicregister.com/field-colle ... d-id-3/241

http://paintref.com/cgi-bin/colorcodedi ... un&rows=50

But here's the thing. The scrap metal I fell in love with is beige-y, silver-y, with a distinct green-y hue to it. The color really changes depending on certain angles.

Image

A face only a mother could love.

Through reading and asking questions and even learning of a certain #531 Roadster that was kept in a crypt or something… I learned that even though a lot of photos of cars seem to have a green-y to them, the original color, as it came out of the factory, was mostly beige-y, with a good dose of kinda silver-y - little to no green.

So, the green I'm seeing on my scrap metal is most likely due to 50 years of oxidization. Great. I don't have 50 years to wait for this car to become the color I want it to be. So trying to replicate that post-oxidized color is where the "fun' came in. I looked many times at literally hundreds and hundreds of chips of various paint colors hoping to find the color, but no luck.

And now, I just have a morning to pull the trigger and get my color made.

I started by bringing my scrap to a place recommended to me that has a camera and a nice young lady who can match my sample and get me that paint in some spray cans. Perfect! So, I went down and to be honest it was a frustrating process to say the least. The camera spit out something really not that close, and although she gave it a heck of an effort and spent far too much time on it, we could not get the paint close. After a bit she had to take care of her orders then go to lunch. That's when I decided I'll just go to Sherwin Williams and get some paint using their code as a backup. Worst case scenario is that I'll be about 80% happy with the color, it just doesn't have that green I like.

So, after Sherwin Willliams, I went back to the first place and she tried again with no success. Time was getting to be a factor, so I said thank you and I'll just pay you for your effort. And that's when she pulled out a chip book. I leafed through and that's when I found my color! Or at least waaaaaay closer to my color. I don't know why we didn't start there, but we didn't, and literally 10 minutes later I was walking out with a 4 pack of spray cans.

While the primer dried some more, I painted a couple of patch panels I got from the super cool Ross Mullen, and I couldn't believe how close it is to a perfect match.

Below is my scrap metal in the center (with the little dabs of attempts to match), and the two patch panels with a quick spray to compare.

Image

Maybe even better??? It has an even wider range of color from beige-y to silver-y to green-y. You can see the variation in some of these photos depending on light source and background.

So, we painted, did a little wet sanding the last morning. And a little more painting and put it on the trailer, so I could go catch a plane out of there.

A big milestone and I'm very, very happy with it. Unfortunately, I'm now committed to actually doing a nice paint job. Eeesh - donations accepted.

Image

Image

Image

Image

Image

Image

Image

Two questions for you smart folk:

1. Can anyone tell me what cable came out of this hole in the firewall? I forget and it's broken.

Image

2. What are these numbers (appear to be a date) on the front driver side corner support of the engine bay. I've never seen them mentioned anywhere.

Image

Unfortunately I won't be able to see my car for quite some time. Next trip it would so huge if I could take out the old transmission and put in my new engine and transmission. Fingers crossed.

That's it for now.
Last edited by iloveredmeat on Tue Jul 02, 2024 5:24 pm, edited 1 time in total.
Peter
––
1967.5 1600 – Second Owner – Under Reconstruction
1970 Honda CT70
1953 Airstream 21' Flying Cloud – Second Owner
unklpat
Roadster Fanatic
Posts: 442
Joined: Fri Feb 15, 2019 8:43 pm

Re: "I'm Not a Car Guy." - A 1967.5 1600 Refurb Saga

Post by unklpat »

Peter, nice job on the engine bay, one of the worst areas to paint. When I pulled my engine/trans this time, I went ahead and had my non-stock color matched, and made my engine bay presentable. $128.00 later, and I had 3 cans of epoxy paint, enough to do the trunk, also. I unbolted the brake and clutch assembly, and moved them forward to avoid disconnecting the lines. I used POR15 top coat on the frame, bomb can, covers well, would use it again. I'll try to get a couple of pics up here. Pat
User avatar
spriso
Vendor
Posts: 1629
Joined: Wed Jun 04, 2003 9:20 am
Location: Oregon
Contact:

Re: "I'm Not a Car Guy." - A 1967.5 1600 Refurb Saga

Post by spriso »

Love beige gray metallic (my personal roadster is the same color), and yes, it was very difficult to find the correct paint for it.

To answer your questions:

1. The circled part of the firewall is where the heater control cable comes from the heater controls to the heater valve.

2. I have seen a lot of variations of those stamps on cars over the years, but yours is the first one that has a combination that looks like a date-- 11/13/66 if we looked at this North American date wise. Your car is a 67.5, but I don't think that your body would have been built that early...

Who knows, this could be your car!

Image
Spriso Motorsports
http://www.spriso.com
Instagram https://instagram.com/spriso/
SR20 Powered Roadsters
Engine swap kits Available! See my website!
iloveredmeat
Roadster Nut-Site Supporter
Posts: 830
Joined: Thu Aug 08, 2019 3:36 pm
Location: San Diego
Model: 1500/1600
Year: Low Windshield-64-67.5

Re: "I'm Not a Car Guy." - A 1967.5 1600 Refurb Saga

Post by iloveredmeat »

unklpat wrote: Thu Sep 30, 2021 9:49 pm Peter, nice job on the engine bay, one of the worst areas to paint. When I pulled my engine/trans this time, I went ahead and had my non-stock color matched, and made my engine bay presentable. $128.00 later, and I had 3 cans of epoxy paint, enough to do the trunk, also. I unbolted the brake and clutch assembly, and moved them forward to avoid disconnecting the lines. I used POR15 top coat on the frame, bomb can, covers well, would use it again. I'll try to get a couple of pics up here. Pat
Thanks Pat, it was not fun to work on... knuckle buster for sure. But it's a big relief to finally pick a color I like - and actually get some positive progress done, rather than dismantling. This is the first thing I've done to the body that is actually presentable and 'final'.

And I spent more on the 'backup paint' from Sherwin Williams than I did on the cans of paint I ended up using. So, if there's anyone who needs a quart of Sherwin Williams "Bronze" paint code 1500, with hardener and reducer... and can wait a couple of months, let me know.

For the frame... "Bomb Can"? I have no idea what that is, but I want one.

For all my lines, I reckon it was easier, and would result in a better coverage, to just strip everything out. And since all my brakes are out, I am considering @Spriso's Sting Grey brake line strategy. That looks soooo good!

And speaking of Mr. @Spriso
spriso wrote: Thu Sep 30, 2021 10:10 pm Love beige gray metallic (my personal roadster is the same color), and yes, it was very difficult to find the correct paint for it.

To answer your questions:

1. The circled part of the firewall is where the heater control cable comes from the heater controls to the heater valve.

2. I have seen a lot of variations of those stamps on cars over the years, but yours is the first one that has a combination that looks like a date-- 11/13/66 if we looked at this North American date wise. Your car is a 67.5, but I don't think that your body would have been built that early...

Who knows, this could be your car!

Image
Thanks Michael! I hope to see your 531 car someday... I'm guessing you've done a touch better on your paint job than I'm able to do in a smoky 90°F garage.

Thank you for the heater control cable info. I'll have to go search for one.

That factory line photo is awesome - and I do believe the body in the far corner is in fact mine. Amazing find!

And lastly, have you found any downside to your Sting Grey brake line route? Is that terribly difficult? Or like 'Tinker Toys' - just nicely and carefully bend and attach with connectors?

Thanks again!

Meanwhile, I guess I'll go work on straightening antennas now. Yay.
Last edited by iloveredmeat on Tue Jul 02, 2024 5:28 pm, edited 2 times in total.
Peter
––
1967.5 1600 – Second Owner – Under Reconstruction
1970 Honda CT70
1953 Airstream 21' Flying Cloud – Second Owner
unklpat
Roadster Fanatic
Posts: 442
Joined: Fri Feb 15, 2019 8:43 pm

Re: "I'm Not a Car Guy." - A 1967.5 1600 Refurb Saga

Post by unklpat »

Peter, "bomb can "refers to what happens when you throw them in a fire pit. POR15 top coat is the stuff, satin finish, no primer needed. Looking forward to meeting you someday, I'll bring smoked salmon. Pat
iloveredmeat
Roadster Nut-Site Supporter
Posts: 830
Joined: Thu Aug 08, 2019 3:36 pm
Location: San Diego
Model: 1500/1600
Year: Low Windshield-64-67.5

Re: "I'm Not a Car Guy." - A 1967.5 1600 Refurb Saga

Post by iloveredmeat »

unklpat wrote: Fri Oct 01, 2021 11:42 am Peter, "bomb can "refers to what happens when you throw them in a fire pit. POR15 top coat is the stuff, satin finish, no primer needed. Looking forward to meeting you someday, I'll bring smoked salmon. Pat
Aaaaahhh... Bomb Can, gotcha. I didn't know POR-15 had an aerosol can until just now.

And, I'm all too familiar with the fire+spraycan=bomb... had a really scary explosion that gave my high school buddy 3rd degree burns on one entire half of his face. There may have been underage drinking involved, and it was really gruesome and really scary.

Likewise on meeting someday! When I finish my car, I am planing on a big clockwise road trip through the PNW, MT, WY, UT and home.

Someday.
Peter
––
1967.5 1600 – Second Owner – Under Reconstruction
1970 Honda CT70
1953 Airstream 21' Flying Cloud – Second Owner
User avatar
2mAn
Roadsteraholic
Posts: 2238
Joined: Mon Jan 09, 2017 5:02 pm
Location: Westchester, CA
Model: 2000
Year: High Windshield-68-70

Re: "I'm Not a Car Guy." - A 1967.5 1600 Refurb Saga

Post by 2mAn »

Love the thread Peter! We gotta grab a steak next time Im down in SD, those cuts made me drool on my keyboard...

Glad to see the car still progressing
Simon
Current Cars:
-1999 Porsche 911 4/98-build, 3.8L M96
iloveredmeat
Roadster Nut-Site Supporter
Posts: 830
Joined: Thu Aug 08, 2019 3:36 pm
Location: San Diego
Model: 1500/1600
Year: Low Windshield-64-67.5

Re: "I'm Not a Car Guy." - A 1967.5 1600 Refurb Saga

Post by iloveredmeat »

2mAn wrote: Mon Nov 08, 2021 6:34 pm Love the thread Peter! We gotta grab a steak next time Im down in SD, those cuts made me drool on my keyboard...

Glad to see the car still progressing
Hey thanks Simon!

You're an indelible part of the project, so please do get in touch if you come down... and after my recent hunt, I have a freezer full of venison we can get into!

Unfortunately, I don't know when I'll be able to get back up to my car to do more work... feeling very unproductive lately.

Someday!

Good to hear from you,
Peter
Peter
––
1967.5 1600 – Second Owner – Under Reconstruction
1970 Honda CT70
1953 Airstream 21' Flying Cloud – Second Owner
iloveredmeat
Roadster Nut-Site Supporter
Posts: 830
Joined: Thu Aug 08, 2019 3:36 pm
Location: San Diego
Model: 1500/1600
Year: Low Windshield-64-67.5

Re: "I'm Not a Car Guy." - A 1967.5 1600 Refurb Saga

Post by iloveredmeat »

So… it's been a minute…

Frankly I just haven't been too excited to write about my progress, because: A: There hasn't been much B: lots of unnecessary running around/wrong parts/no parts, and C: almost none of it has been any fun…

But when I dove into starting this thread, I committed to documenting this project - the good, the bad, and everything in between. I hate cliff-hangers. Post 'til you die.

So — fair warning: this episode is long, convoluted, disorganized, and annoying… exactly how things have been going for me… you've been warned…

This Episode: Paint Shmaint
Two trips in December and January

As the ever-eloquent Mike Tyson once said: "Everyone has a plan until they get punched in the mouth."

Well… that's pretty much been the story of my trips up to work on my car. I always head into the long weekends excited, and with a clear plan… rarely does it go as anticipated. And I reckon the last couple of trips were the worst yet - weather conditions punched me in the mouth repeatedly - and my plans staggered into the corner and threw in the towel.

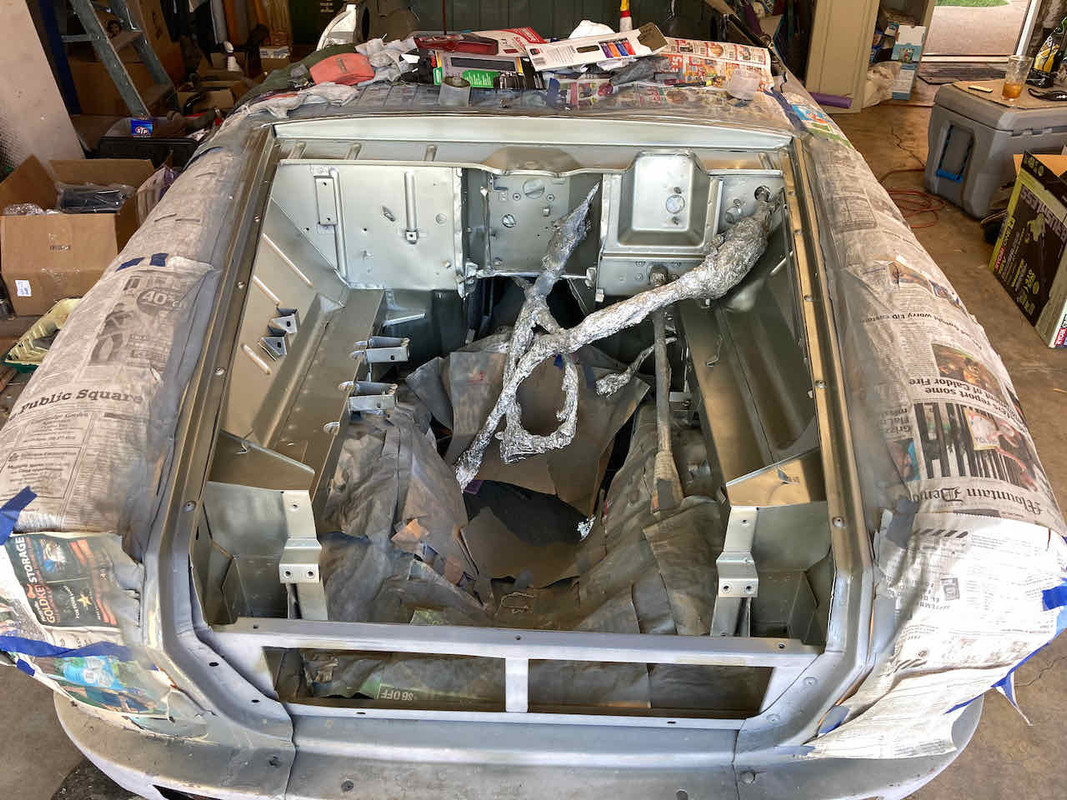
This time the plan going in was to finish the tub prep by coating the rust patches that my friend Dave has finished welding.

I'd then paint the portion of the frame accessible through the empty engine bay. And if I had time, I'd put down some final paint in the tub to be ready for Kilmat.

But as mentioned, the weather punched me in the mouth.It was cold, super foggy, drizzly, and even some actual rain. We sure do need it, so I won't complain… but it didn't allow for any of the original painting plan.

So, I was forced into a quick pivot.

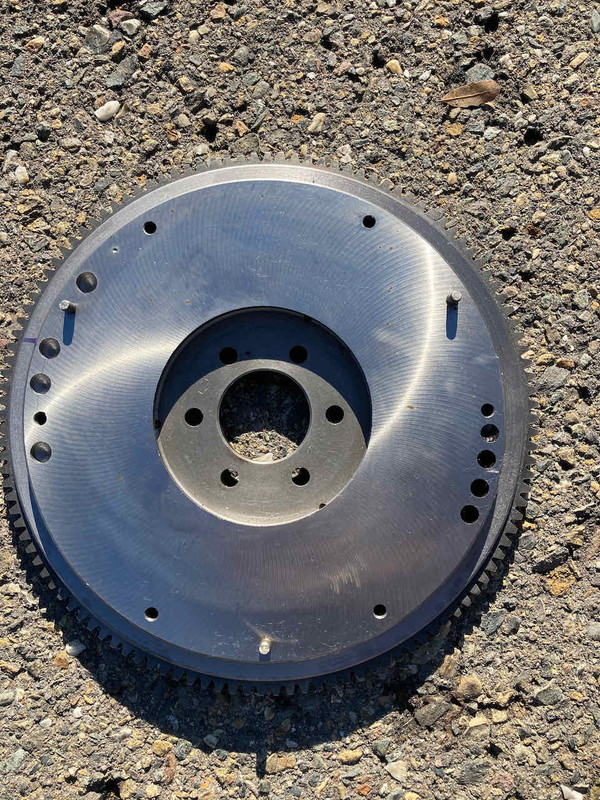
New priority: flywheel. I'd been kicking this can down the road… I've ogled at JT's super-light fly wheel, heard nothing but great reviews, but I asked my trusted group and the consensus was "Just get your original flywheel lightened a bit. You CAN go too light."

Flywheel Before:
Image

My stock flywheel weighed 21.7 lbs. Dave Rebello, among others, recommended 15-16 lbs for me and my stroker - which is right about half-way between JT's flywheels and stock - so I decided to try that for now. If I feel the need later, and budget permits, I'll pop for one of those beauties.

Anyway… all of this began on a Thursday, and I made an appointment with a well-respected speed shop about 30 minutes away to drop the flywheel off on Friday morning — and have it lightened, surfaced, and balanced.

Trying to kill two birds, I also asked if he could do a quick resurfacing of my crusty rusty front brake rotors to pick up end of day, Friday — we were to trailer the car from my brother's shop to his house for the weekend, so it was imperative that the car be rolling onto the trailer by the end of Friday. Off came the rotors and I drove those and the flywheel down Friday morning.

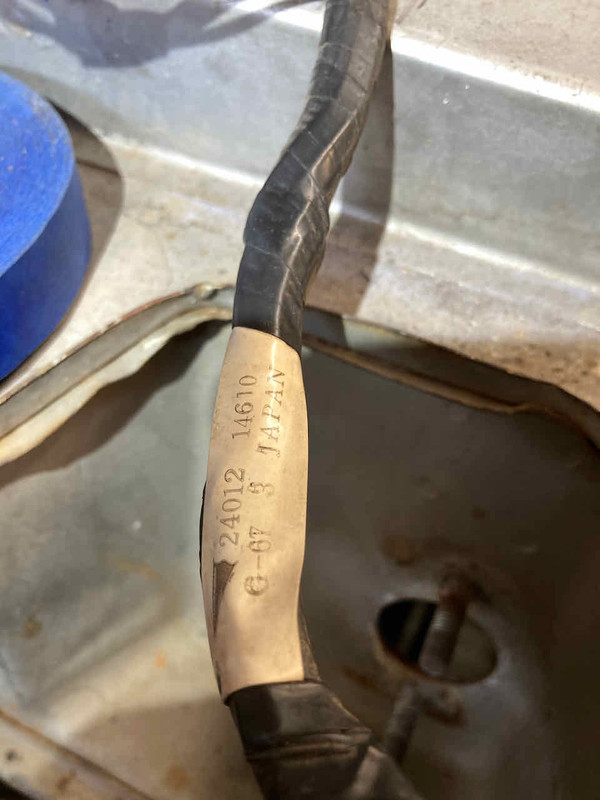
When I got there, we discussed the plan for the flywheel — he's done a ton of these, and I realized that he's reassuredly conservative — making sure there's no chance of taking too much off and weakening it. He figured to turn off about 5-6+ lbs, getting it down to 15-16 lbs. Perfect. I only asked that he keep the original "JAPAN" stamp — which he said he normally does anyway.

So, I left the flywheel and the brake rotors and headed back north, whistling a happy tune, planning to pick up the rotors in a few of hours. In the meantime, I'd go buy more paint where I bought the paint for my engine bay. I got there just after they closed for lunch (gotta love old-school), so I toodled around and found some chicken wings for lunch, made it back to the paint store, picked up the paint, and decided to drive back to my brother's shop and get some stuff done before picking up the rotors later in the day. As I pulled into the shop lot, the machine shop called and said he was very sorry, but wouldn't be able to do the rotors that day.

Shoooooot! But with "i's" instead of "o's".

So I had to immediately hustle back down and scramble… because the car HAS TO roll. I drove all the way back down there, and on the way called another machine shop I know who said they could do it, grabbed the rotors — and these guys were gems — they saved my tail by turning them very quickly, just to get the surface rust off. Revitalized rotors in hand, I raced back to the shop and worked like mad to get them back on the car before my brother closed up shop. I finished in the dark while he made a run to the store… and when he came back, we were able to roll the car on to the trailer. Phew. It was a just a fustercluck of a day… a lot of driving and very little actually accomplished. A frustrating way to start the weekend.

Sidebar: later in the weekend, talking with one of the gurus, I was told that turning the front rotors or the rear drums is "stupid"… that's me, I guess. Sigh. He feels that the materials are so stout that it's unnecessary, and normally just need sanding to get the rust or corrosion off.

But, because I'm stupid, I turned the front rotors… and you'll just have to trust me, but they ended up looking sweet, I didn't take a photo in the rush to reassemble in the dark.

Image
Rotors Before.

Saturday morning oozes in like whatever is seeping from my rear differential: thick, wet, dark, and cold. I will not be painting today.

Image

Soooo, what to do? I reckon it's time to saddle up and tackle another thing I've been avoiding — it was time to look at the rear brake situation!

Shiver.

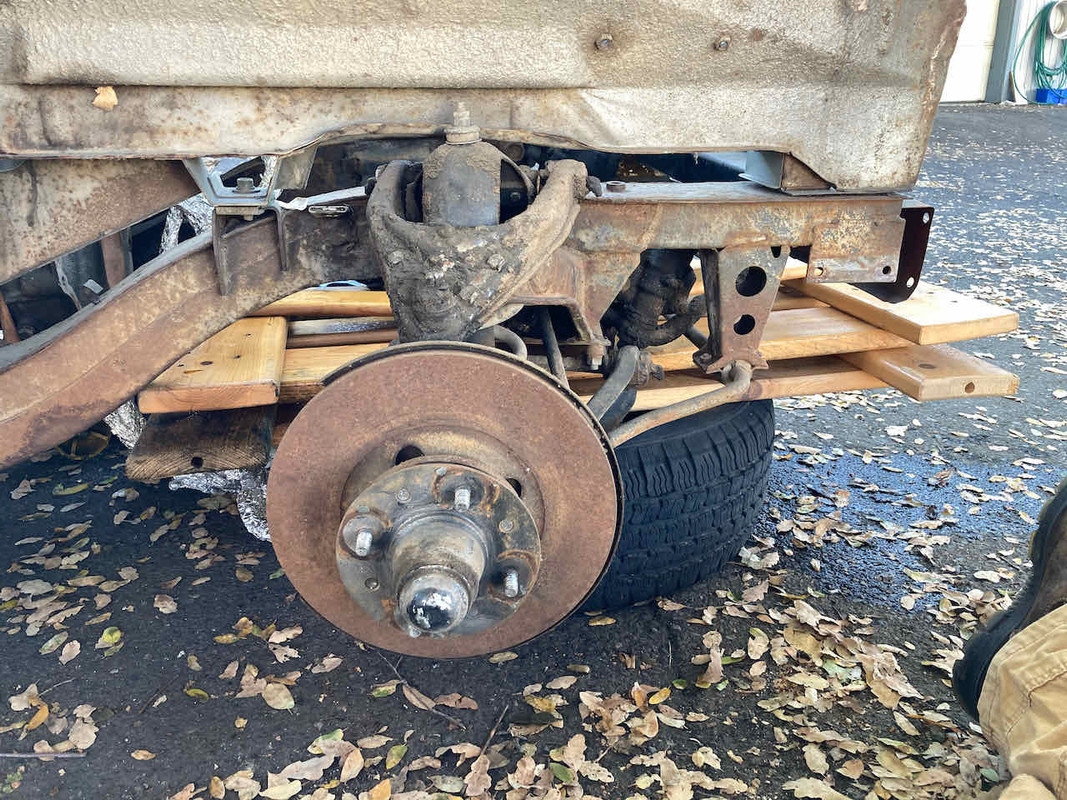
Rear brake assessment: from the surface, both sides have been untouched and unused for 30 years or so, and they look the part. Dirty. I enlisted my nephew to help me pull off the drums, but being impatient newbies, we ended up taking out the entire rear axle.

Heck, it was actually very easy, needed to be done anyway, and revealed a leaking rear axle seal on the passenger side.

So, then we took off just the drums. Both are rusty and rough, but they actually don't look beyond-repair-terrible, although the passenger side is loaded with gunk. A ridiculously sharp-eyed Mike Young recognized from a crappy cell phone image that the previous owner had put in that rear-seal backwards.

Rear Axle and Brake Drums Before Photos:

Image

Image

Image

Image

Image

Image

Thinking that it would be nice to just 'start anew', (before hearing from Guru) I brought the drums down to the local Big O Tires (who have been great in every way to this point) and asked them to turn them. However, they wouldn't do it because there is some weird, hard-to-find info out there that says the max inside diameter is 9.04", mine were 9.05"… so I was denied.

Sidebar #2: This measurement appears to be a common point of confusion — from my quick research, the published stock measurement is published as the same as the max Inside Diameter (???)… I'll keep looking, but whatever info is out there is not sufficient for the Big O/O'reilly/Autozone techs…

Call to action: Any of you Datsun Illuminati would be doing the Roadster Community a big favor by clarifying the Inside Diameter - stock/untouched measurement vs. the max allowable. I'll donate a sixpack / fancy coffee / smoothie / kombucha / soda / etc. to the cause.

First Tallboy goes to @unklpat for doing a bunch of research on the fly as I was trying to talk Big O into turning them.

With no commercial options, and the need to do SOMETHING productive, I went all hand-to-hand-combat on 'em. A lot of scour pads, sand paper, degreaser, tequila, and knuckle-busting got them looking pretty darn good.

Rear drums after:

Image

Image

And since I had all of this apart, I decided to go get new rear seals, front bearings, and rear brake shoes. Picked up the parts, got back to the car, and every part was wrong. Complete wiff. That's the other problem with having to switch plans on the fly, on the weekend… not easy to get your hands on parts to fit a 50 year old Japanese car. So, I was stalled again. I tried to heat up the garage and painted the rear brake back plates or whatever you call those. Huffing paint eased the pain a bit.

This is how the weekends went… just one setback after another.

Now, as I'm writing this many weeks later… I'm trying to recall the sequence of mostly annoying events… but it's a big blur, the fog of war. I was at my lowest point in this whole saga. Demoralized and wondering if I could ever finish this thing. It was overwhelming, and it actually stopped being fun. I know I'm not alone, I've seen the "Selling a project because I don't have the time/money/energy/desire/interest anymore" posts. I was almost there.

But… since then, I've rebounded a bit, in large part to what I see on this forum… ridiculously experienced people generously offering advice and encouragement, excited and enthusiastic folks just joining in, inspiring detail work by guys like @spriso, and even guys like @funkaholik always bragging about the impeccable work they do. Hee hee. Anyway, it helps keep me going.

Alright, since this post has been boring as heck so far, no sharks or recipes, I'm going to spare you the disheartening details and all of the crushing defeats… I'll just list some random stuff, the crappy bits, and the few highlights of what I actually accomplished.

In no particular order —

Gun cases are an excellent mode of transport for your freshly chromed windshield frame. Pro-tip: put a box of bullets in there, because if you're not actually transporting dangerous stuff, the airlines charge you for oversize luggage. If you have deadly weapons, they waive the fee. Crazy but true.

Image

Oh! Here is the highlight of the trips… I finally took out my original 4-speed transmission. I called @andyb. Andy loaned me some suspension parts, and I know that he has a couple of Roadsters, so I offered him my old transmission that he can use for parts if needed. I drove down to drop it off and checked out his project car - which is amazing - that thing is going to be awesome. Really top notch. He's a great guy with a great setup. Andy also convinced me (and offered to help!) to do a 'minor-rebuild' of my 5-speed transmission before I put it in. I've been reluctant, but I agree that it's the smart thing to do. Just one more task, but how great is Andy to offer to help!

Image

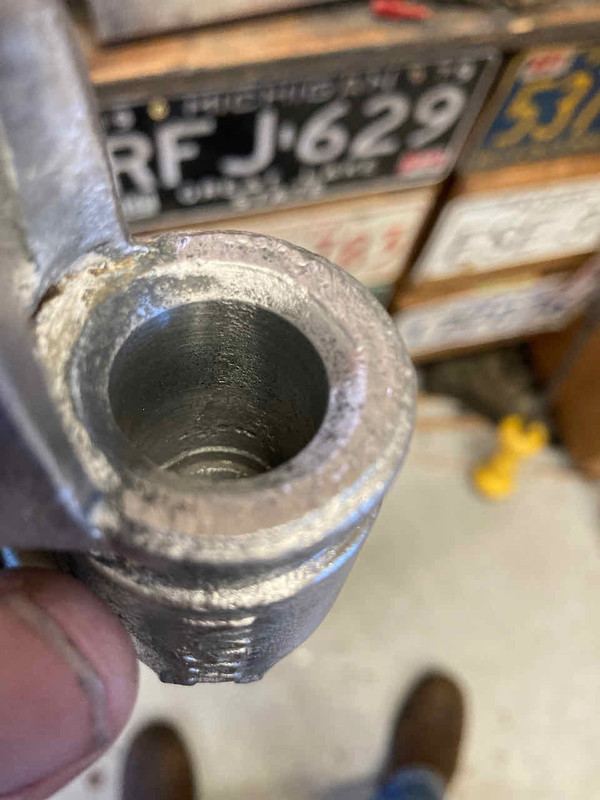
I also took apart the rear brake cylinders to rehone and rebuild. But that didn't go so good either. They're too far gone and need to be re-sleeved. More time and money. Aaargh.

Image

Image

Image

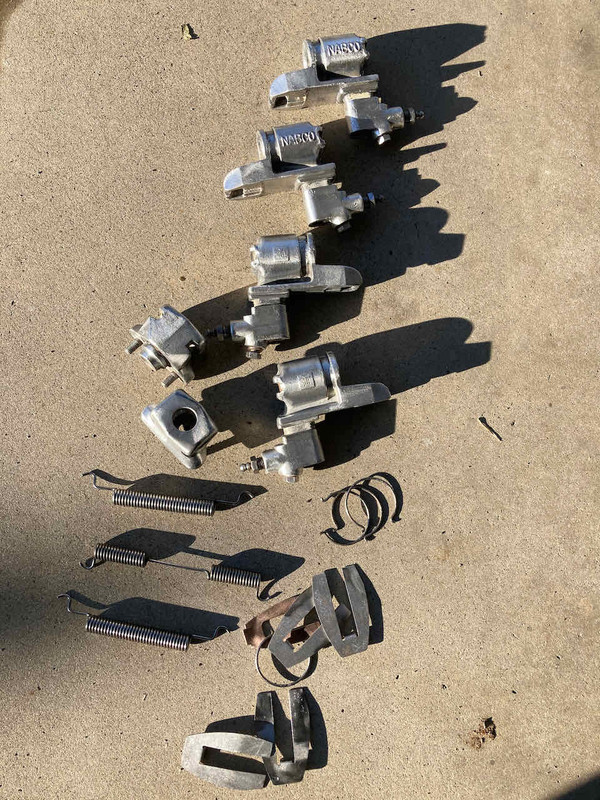
I flipped the rear seal (buy a $7 seal puller, trust me).

I cleaned up the rear brake line splitter thing and installed new stainless brake lines and stainless flexi hose.

Image

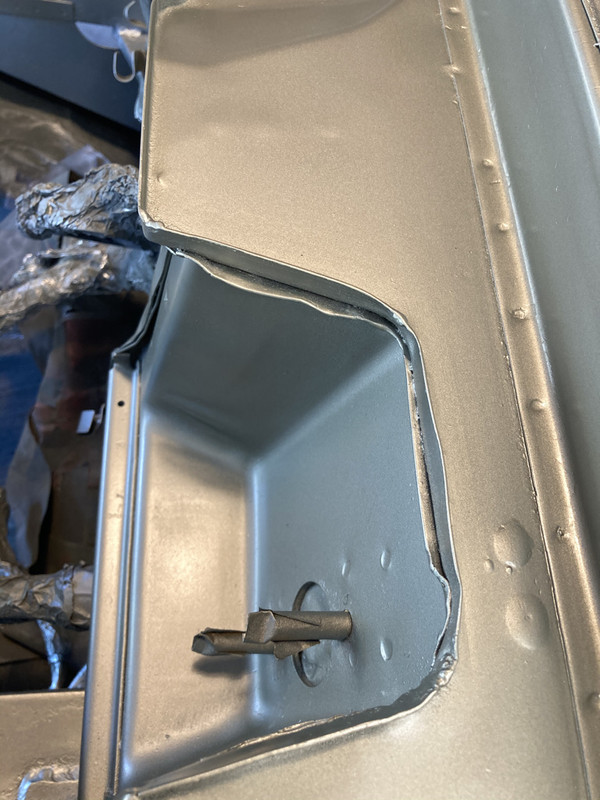
I tried unsuccessfully to remove the wiper nuts — and may have ruined the entire assembly… stripped the part on the inside of the car and messed up the nuts. And they're impossible to find. Yay. This pissed me off and almost tipped me over the edge.

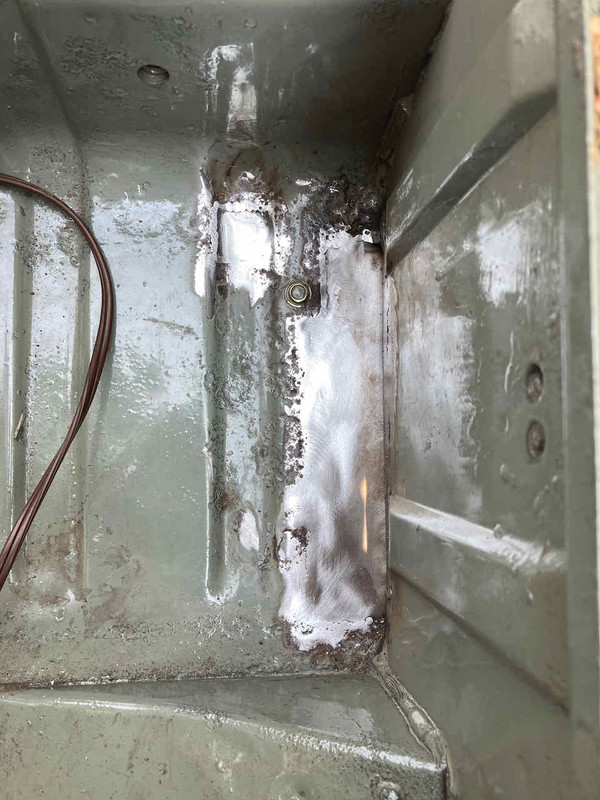
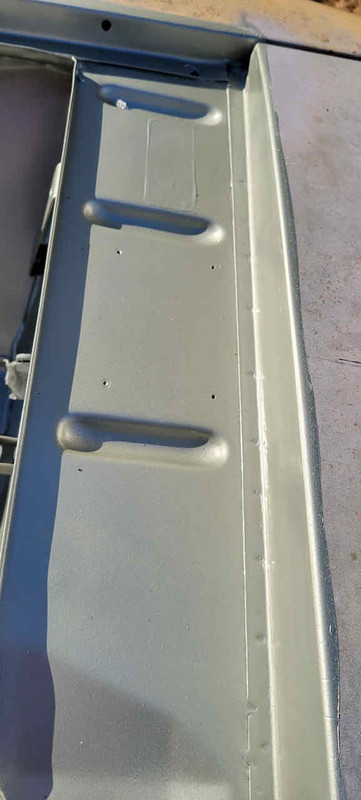
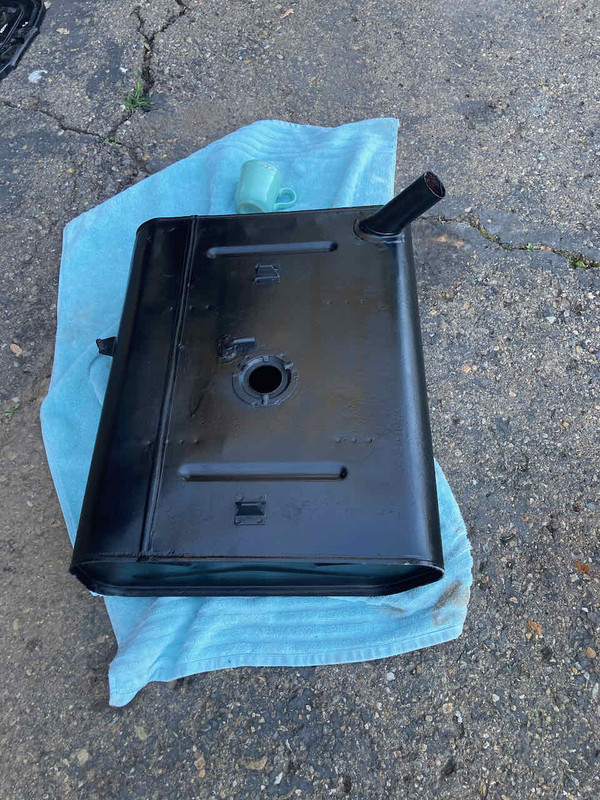
With one good weather morning I worked on my fuel tank. A while back I had it boiled and lined. I then took it down to bare metal, and on the one not-too-cold day I was able to paint it… Cool, right? But, that's when I noted there is a hole in it. I think it fell on sharp gravel and punched a hole like a tin can. So, now I need to get that welded. Yay.

Gas Tank Before:

Image

Stripping it down:

Image


Gas Tank After:
Image

Image

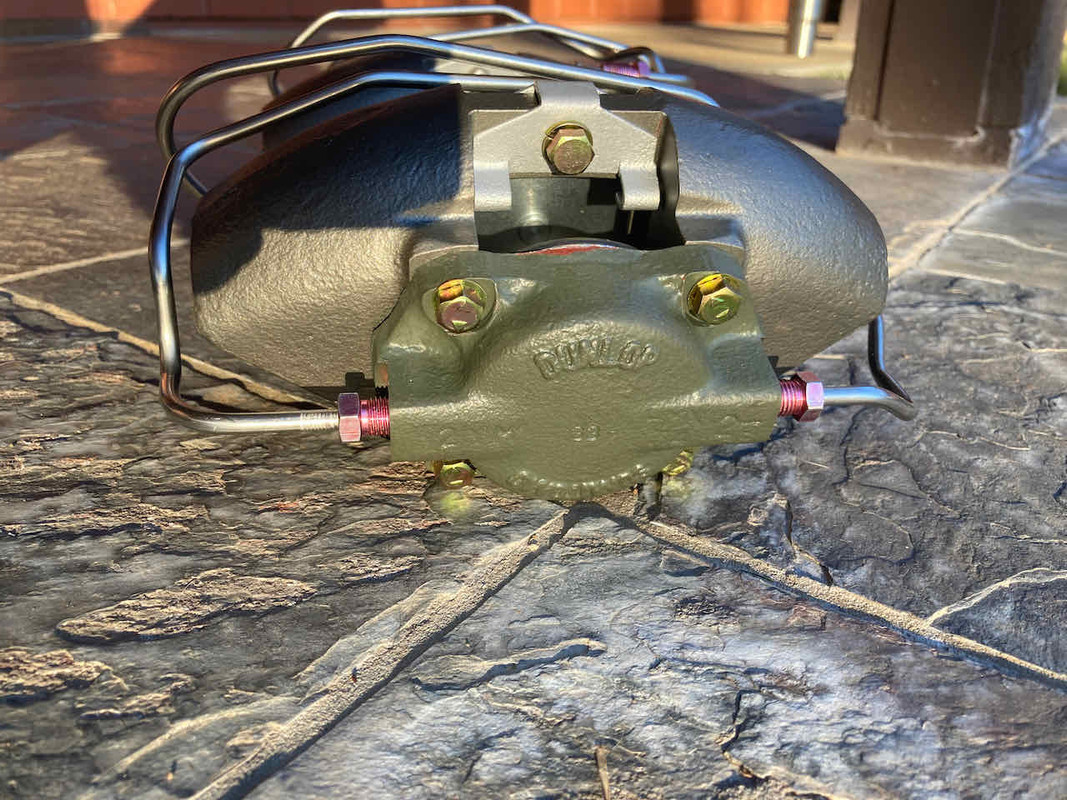
I did put my front calipers all together with new stainless lines. They turned out really sweet - a rare win.

Image

Image

Went on a nice hike and saw this really, really nice buck and had fun just watching and stalking and photographing. Peaceful.

Image

And some turkeys.

Image

Meals are always a highlight - hand-caught lobster, elk liver pâté, and venison from last year's buck were all amazing. I gotta keep my brother and his family well-fed for putting up with me. I don't ever take an animal for granted. It really is special and fulfilling to share game with people who appreciate it. The meals are a bit of a high note after a few crappy days.

Image

Image

Image

Image

So, that's where I am… and now that I've recovered and my ambition is slowly coming back, I'm looking at all my new pretty chrome bits and going to work on that stuff.

Sorry for the long, depressing post. But… I did warn you.

UPDATE Flywheel After:
Image

Image
Last edited by iloveredmeat on Tue Jul 02, 2024 5:31 pm, edited 1 time in total.
Peter
––
1967.5 1600 – Second Owner – Under Reconstruction
1970 Honda CT70
1953 Airstream 21' Flying Cloud – Second Owner
unklpat
Roadster Fanatic
Posts: 442
Joined: Fri Feb 15, 2019 8:43 pm

Re: "I'm Not a Car Guy." - A 1967.5 1600 Refurb Saga

Post by unklpat »

Peter, I love your meat pics, but would take that body off the frame, and be done with it. It may cost a bit, and delay a bit, but you will never have to worry about it. Don't put new parts on a old frame. Mine is covered in grease, yours is not. Rust is not kind. Pat
DAC21
Roadster Fanatic-Site Supporter
Posts: 1261
Joined: Tue Sep 15, 2020 7:44 am
Location: California
Model: 1500/1600
Year: Low Windshield-64-67.5

Re: "I'm Not a Car Guy." - A 1967.5 1600 Refurb Saga

Post by DAC21 »

Per Curtis's effort, wiper nut and gasket that fit his 1967.5. Check out this thread and Curtis's post. viewtopic.php?p=326231&hilit=wiper+nuts#p326231
1967 1600 in waiting SPL311-09002 / R-28178
2018 Hyundai Elantra GT Sport Ultimate
iloveredmeat
Roadster Nut-Site Supporter
Posts: 830
Joined: Thu Aug 08, 2019 3:36 pm
Location: San Diego
Model: 1500/1600
Year: Low Windshield-64-67.5

Re: "I'm Not a Car Guy." - A 1967.5 1600 Refurb Saga

Post by iloveredmeat »

unklpat wrote: Mon Mar 14, 2022 4:49 pm Peter, I love your meat pics, but would take that body off the frame, and be done with it. It may cost a bit, and delay a bit, but you will never have to worry about it. Don't put new parts on a old frame. Mine is covered in grease, yours is not. Rust is not kind. Pat
Hey Pat, I'm way better at getting and cooking game meat than I am at fixing my car... so, thank you.

Frame off... I've seriously thought about it, but unfortunately, I can't see a path to that happening. The guy I was hoping would do the body work can't even look at for at least a year, I don't have anyone I can ask to help with that, and I just can't manage that from 500 miles away. I can't impose on my brother's shop space, so the car has to roll around. I'm kinda handcuffed.

My frame is very clean and rust-free, so I think I have a good chance to preserve it. As a matter of fact, I took a brillo pad to the frame in the engine bay and it cleaned up surprisingly well.

In the photo below, the two circled areas are after maybe 5 minutes with a brillo pad by hand. The rest of the frame you can see in the photo was cleaned up just as well.

Image

I'll be completely removing the trunk floor, so will be able to treat a good bit of the frame there. So, as I can, I will be treating and painting every bit of the frame that I can reach, and just have to hope. I need to drive this thing sooner than later, or I'm worried I will give up. Another significant delay would be risky...

And I brought this over from Steve's thread:
unklpat wrote: Mon Mar 14, 2022 4:36 pm Peter, I found a used U20 crank sprocket, and will turn it down to 1 inch. Another option? If you want to fish for albacore in august, let me know. Pat
That should work perfectly, shouldn't it... just need the keyway. Good find.

Yes on albacore, and I'll buy you that tall boy.

Thanks,
pm
Peter
––
1967.5 1600 – Second Owner – Under Reconstruction
1970 Honda CT70
1953 Airstream 21' Flying Cloud – Second Owner
iloveredmeat
Roadster Nut-Site Supporter
Posts: 830
Joined: Thu Aug 08, 2019 3:36 pm
Location: San Diego
Model: 1500/1600
Year: Low Windshield-64-67.5

Re: "I'm Not a Car Guy." - A 1967.5 1600 Refurb Saga

Post by iloveredmeat »

DAC21 wrote: Mon Mar 14, 2022 5:58 pm Per Curtis's effort, wiper nut and gasket that fit his 1967.5. Check out this thread and Curtis's post. viewtopic.php?p=326231&hilit=wiper+nuts#p326231
Oh awesome! Thank you! I hadn't seen that.

Feeling a little relieved, but still need to figure out how to get the nuts off! Maddening.

Thanks again,
pm
Peter
––
1967.5 1600 – Second Owner – Under Reconstruction
1970 Honda CT70
1953 Airstream 21' Flying Cloud – Second Owner
User avatar
Gregs672000
Roadster Fanatic-Site Supporter
Posts: 9428
Joined: Fri Aug 07, 2009 11:47 pm
Location: Tacoma, WA

Re: "I'm Not a Car Guy." - A 1967.5 1600 Refurb Saga

Post by Gregs672000 »

Hey Peter, I'm so glad you're documenting this so fully and honestly. Restoring a car from this starting point is WORK. It may be a labor of love, but it is work, sometimes incredibly disheartening and certainly challenging to one's comittment and perseverance. Believe me, if you took a glance at the now 36 year old pics of my car the FIRST time I did it you would know I've walked in your shoes, as have many here. But you have what it takes, and in the same way you truly respect and appreciate the food you hunt, this car will be much more important to you than a car you bought already done... like the difference between venison and packaged chicken. Like climbing a mountain, the assent to the top of your car restoration will not be a straight line up to the top. Nope, there will be storms, avalanches, missing equipment and truly unexpected incidents, but it's your desire and VISION that pulls you forward and upward to the top... that, and your friends (sherpas if you will). Every challenge you face can be overcome... it can SUCK at times, but you will overcome them. What helped me during the times I had to shelter in my tent... storm raging, light fading... was imagining or visioning me driving the car on the coast or in the Mountains, complete and done, smile on my face for mile after mile. And that's what has become reality, and not just in a car, but in a car I did, in a car I KNOW, in a car that somehow "loves" me if a conglomeration of metal, plastic, rubber and vinyl can somehow do that. I don't have a lot of material things that actually mean something to me, and I have not spread my love around to many other cars... I've liked my various cars and daily drivers over the years, but never loved one like this one.

They say hindsight is 20/20... take my experience and know it's worth all the effort!
:smt006
Greg Burrows
'67 2000 #588
Tacoma, WA
Post Reply