Well I finally pulled the plug on the dash cap. Part of me cringes to put a cap on this car, but I have all but given up trying to find a way to restore my 68 2000's dash. I ordered the one from www.datsunparts.com along with the glove box cover that I may or may not use.
My question is are there any helpful hints or tricks. I have no intention of pulling out the windshield. But I can see the 4 twisties that hold the cover on by the window will probably need to go. I will have to find a way to remove them. Not sure quite yet how to get to them. I plan on removing the wheel and the plastic column cover. I also plan to take out the climate control push pull knobs above the radio.
Are there any gotcha moments I should watch out for? I have read many reviews on where to put the glue, and how much to use. But the cap looks to be well made.
Are there any things I should do 'while I am at it'.
I will take pics of my progress as I start the project.
Dash cap installatoin
Moderators: notoptoy, S Allen, Solex68
-
Zedyone_Kenobi

- Roadster Fanatic
- Posts: 200
- Joined: Thu Apr 03, 2014 8:27 am
- Location: League City, Texas
Dash cap installatoin
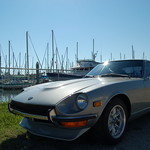
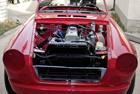
1971 240Z (94% done)
1968 2000 Roadster
-
bakerjf

- Site Supporter
- Posts: 1391
- Joined: Wed Sep 07, 2011 5:48 pm
Re: Dash cap installatoin
The windshield doesn't need to come out to remove those bolts. I used a Phillips apex tip held by some small vice grips and had no problem...
J. Baker
Lafayette, CA
'69 2000 (Solex)
Lafayette, CA
'69 2000 (Solex)
-
Zedyone_Kenobi
- Roadster Fanatic
- Posts: 200
- Joined: Thu Apr 03, 2014 8:27 am
- Location: League City, Texas
Re: Dash cap installatoin
That is good to know. I have a shorty socket I can get to those with . When those bolts come out, does the dash just pull forward?
1971 240Z (94% done)
1968 2000 Roadster
-
theunz
- Roadster Nut-Site Supporter
- Posts: 2469
- Joined: Sat May 02, 2009 1:54 pm
- Location: Catoosa Ok.
- Model: 2000
- Year: High Windshield-68-70
Re: Dash cap installatoin
When you do a test fit you will be able to see the areas along the windshield that will not be covered. You might want to repainted these before installing the cap. I did mine in gloss black but if I was doing it again would use flat or simi gloss. There are quite a few bolts to remove in order to remove the dash. I wouldn't do it unless you need it off for other reasons. Gluing the cap on is pretty straight forward, just be careful not to get any glue on the top side. The caps look pretty good, especially for the money. Not going to fool any judges, but unless you have a very large budget the $1500 you save can be spent in better ways. You will see a difference between the original glove box, but I just couldn't ruin a perfect original box. Mike
Mike M
Old enough to know better, too old to remember why!
1969 2000 solex mine since 1972, under resurrection. (Finally resurrected as of spring 2019!)
1969 Porsche 911s -worth more, but not as valuable! Gone!
2017 Lotus Evora 400 - Oh my!!
Old enough to know better, too old to remember why!
1969 2000 solex mine since 1972, under resurrection. (Finally resurrected as of spring 2019!)
1969 Porsche 911s -worth more, but not as valuable! Gone!
2017 Lotus Evora 400 - Oh my!!
-
bakerjf
- Site Supporter
- Posts: 1391
- Joined: Wed Sep 07, 2011 5:48 pm
Re: Dash cap installatoin
When I did my cap the dashboard was out of the car as it was part of a total restoration. I'm not sure how little you can do to get away with just doing the cap? It depends on the cap as well. I remember drilling holes where the aforementioned bolts are after I glued it so they would line up perfectly - I think some caps just have that area completely cut out already. I'm guessing for sure the steering wheel and ignition cover should be removed for ease of installation. Like most things on this car, just take it slow and come back later if you get stuck/frustrated. Good luck!
J. Baker
Lafayette, CA
'69 2000 (Solex)
Lafayette, CA
'69 2000 (Solex)
-
jonny8

- Roadster Fanatic
- Posts: 163
- Joined: Sun Apr 20, 2014 11:36 am
- Location: Sherman Oaks, CA
- Model: 1500/1600
- Year: Low Windshield-64-67.5
Re: Dash cap installatoin
I just did my on my '66 1600. Ordered mine from datsunparts.com as well. My notes
- I took the windshield off, just a couple of blots. Made it easier to get the 6 screws that hold the dashpad and the screw for the rear view mirror
- Trial fit several times with all the screws before you drill anything. I found it stretched out a little. Leaving it on overnight helped to get it seated right
- With the windshield off, you can spray the area between the heater vents and windshield. I chose flat black!
- For my model year, fit the chrome ring on the dash panel first and then fit the dash pad over it. I tried to put the ring on afterwards and nicked the new dash pad
- I re-powder coated the dash panel while everything was apart, so glad I did that - looks awesome with the new dash pad
- I needed a Dremel with a right angle connector so that I could drill the twisty and mirror location from underneath and then enlarged the hole from above. That would be super hard with the windshield on.
Alvin Richards
Sherman Oaks, CA
1965 Roadster 1600
Sherman Oaks, CA
1965 Roadster 1600
-
Zedyone_Kenobi
- Roadster Fanatic
- Posts: 200
- Joined: Thu Apr 03, 2014 8:27 am
- Location: League City, Texas
Re: Dash cap installatoin
Thanks for the updates! I will try loosening the bolts with the high windshield first. I am sure I can move them. The twisties form the bottom will be the biggest challenge, and resisting doing anything else while I am there. I will take pics when I get home today of the patient.
1971 240Z (94% done)
1968 2000 Roadster
-
mellis18

- Site Supporter
- Posts: 500
- Joined: Sun Apr 28, 2013 6:07 pm
- Location: Saratoga Springs, UT
Re: Dash cap installatoin
I put one on my 69 but the cap had holes for the twisties. Are you saying there are no holes for them? My windshield was out because it was just painted which made it a lot easier. A hair dryer or heat gun could help to soften up the cap in certain areas where it's a really tight fit. My wife let me use her hair dryer. What team work eh!! 
Robert Ellis
Saratoga Springs, UT
1969 SRL311
1969 SRL311-07332
Matching numbers
1966 Mustang Coupe
Saratoga Springs, UT
1969 SRL311
1969 SRL311-07332
Matching numbers
1966 Mustang Coupe
-
jonny8
- Roadster Fanatic
- Posts: 163
- Joined: Sun Apr 20, 2014 11:36 am
- Location: Sherman Oaks, CA
- Model: 1500/1600
- Year: Low Windshield-64-67.5
Re: Dash cap installatoin
The Dash Caps from datsunparts.com don't come pre-drilled for the twisties or the mirror... I guess that allows you to choose if you want them. Simple to drill from the underside with the right tool!
Alvin Richards
Sherman Oaks, CA
1965 Roadster 1600
Sherman Oaks, CA
1965 Roadster 1600
-
theunz
- Roadster Nut-Site Supporter
- Posts: 2469
- Joined: Sat May 02, 2009 1:54 pm
- Location: Catoosa Ok.
- Model: 2000
- Year: High Windshield-68-70
Re: Dash cap installatoin
We seem to be mixing both early and late dash's in this thread.
Mike M
Old enough to know better, too old to remember why!
1969 2000 solex mine since 1972, under resurrection. (Finally resurrected as of spring 2019!)
1969 Porsche 911s -worth more, but not as valuable! Gone!
2017 Lotus Evora 400 - Oh my!!
Old enough to know better, too old to remember why!
1969 2000 solex mine since 1972, under resurrection. (Finally resurrected as of spring 2019!)
1969 Porsche 911s -worth more, but not as valuable! Gone!
2017 Lotus Evora 400 - Oh my!!
-
brubojacru
- Site Supporter
- Posts: 73
- Joined: Tue Jan 25, 2011 9:53 pm
- Location: Regina, SK Canada
Re: Dash cap installatoin
My '69 dash cap came with holes. Looks like you can leave the twisties in place. My biggest concern would be holding the cap in place - i had mine clamped and wrapped with bungies from every conceivable angle and still had to redo one side. Happy with the results though!

Good luck!
Bruce
Good luck!
Bruce
1969 Datsun 2000
2006 Tahoe Z71
2006 Tahoe Z71
-
brubojacru
- Site Supporter
- Posts: 73
- Joined: Tue Jan 25, 2011 9:53 pm
- Location: Regina, SK Canada
Re: Dash cap installatoin
Forgot to mention I did the glovebox too which provides the same finish.

And this is what I meant about holding the cap on...

It was especially difficult to hold the heater controls area tight so I used several pieces of wood scraps.

Bruce
And this is what I meant about holding the cap on...
It was especially difficult to hold the heater controls area tight so I used several pieces of wood scraps.
Bruce
1969 Datsun 2000
2006 Tahoe Z71
2006 Tahoe Z71
-
jonny8
- Roadster Fanatic
- Posts: 163
- Joined: Sun Apr 20, 2014 11:36 am
- Location: Sherman Oaks, CA
- Model: 1500/1600
- Year: Low Windshield-64-67.5
Re: Dash cap installatoin
Apologies, my fault... finally there was a topic that I didn't feel a complete noob!theunz wrote:We seem to be mixing both early and late dash's in this thread.
Alvin Richards
Sherman Oaks, CA
1965 Roadster 1600
Sherman Oaks, CA
1965 Roadster 1600
-
Zedyone_Kenobi
- Roadster Fanatic
- Posts: 200
- Joined: Thu Apr 03, 2014 8:27 am
- Location: League City, Texas
Re: Dash cap installatoin
You guys are the absolute best. I can tell you the cap I have has holes cut out for the twisties already. If I can leave them in place and just put the cap over it, that would be ideal. Tomorrow I have the day off and will start populating this with pictures. Bruce, your dash looks wonderful! Great work!
1971 240Z (94% done)
1968 2000 Roadster
-
Zedyone_Kenobi
- Roadster Fanatic
- Posts: 200
- Joined: Thu Apr 03, 2014 8:27 am
- Location: League City, Texas
Re: Dash cap installatoin
Man, what an afternoon.
Needless to say the dash cap is not an easy task. I have managed to remove more stuff than I was planning and many cases of 'while I am at it's' has struck me.
Things started easy enough:

Pulled the wheel, and the shifter surround, in case I needed to remove the center console with the radio in it (which does not currently power on, but we will get to that) And then tried to get the dash cap to fit... Oh silly me... silly silly me
The OEM dash is smashed up against these trim pieces that run on the A pillar. Mine were vinyl wrapped and attached to the top of the window with pop rivets. Something tells me it is not suppose to be done that way:

Well there was no way possible to move the new dash cap into that... so only one thing to do...Yup you guessed it.

Now at this point, I have removed the side moldings and attempted to loosen the bolts hold the dash in. Well those are little buggers and even with the new custom bent 11mm boxed end wrench there were not cooperating. I got 4 of them out, but had a realization that I "HEY maybe I can leave these in. So with the sun visors and a few other things removed I kept going. Nope, the darn steering column key lock mechanism was in the way, well that is only 4 allen head screws away from being gone, so off it goes! NOW WE ARE GETTING SOMEWHERE.
Yeah, not really...
Still the dash cap does not want to go on. I can get the bottom lined up fairly well, but it takes an act of God to get it over the twists. I can get the two outer twisties in the cap, but I cannot get the two center ones to go into the holes. There is slack but just not enough. It does not want to go over them. Maybe a heat gun, or maybe something else. I do feel that if they were not on, I could get the cap closer. But the fit is not really what I was hoping. The cap still gets stuck on the inside windshield rubber and won't go in far enough it seems. But back to the twisties. I decided to remove the glove box to give me more room to work. That did not help. Then I decided to remove the glove box liner... well ...

I stared at that for a while. I cannot see a good way to get that liner out without destroying it. While I was staring at it, I noticed that neat little speaker box near the passenger's feet. Well that is too tempting. I have wanted to look at that and refinish it for awhile.
What a cool little set up. It has an awesome 2W Toshiba speaker in there. LOL


I am going to clean it up and reinstall it. But the wires were not even hooked up! So now I want to try to get the original AM radio working so I can get all of this functional again! Yes it is a digression, but I feel it will make the car more fun to drive.
So now the questions...
Is getting the dash cap on the dash suppose to be this hard?
Is it difficult to remove the center radio console? Anything I should be aware of?
Is it possible to get the glove box out without destroying it. Do I go through the front, or the bottom?
Have I reached the point where I should just pull the dash, or is that a whole other headache...
Needless to say the dash cap is not an easy task. I have managed to remove more stuff than I was planning and many cases of 'while I am at it's' has struck me.
Things started easy enough:
Pulled the wheel, and the shifter surround, in case I needed to remove the center console with the radio in it (which does not currently power on, but we will get to that) And then tried to get the dash cap to fit... Oh silly me... silly silly me
The OEM dash is smashed up against these trim pieces that run on the A pillar. Mine were vinyl wrapped and attached to the top of the window with pop rivets. Something tells me it is not suppose to be done that way:
Well there was no way possible to move the new dash cap into that... so only one thing to do...Yup you guessed it.
Now at this point, I have removed the side moldings and attempted to loosen the bolts hold the dash in. Well those are little buggers and even with the new custom bent 11mm boxed end wrench there were not cooperating. I got 4 of them out, but had a realization that I "HEY maybe I can leave these in. So with the sun visors and a few other things removed I kept going. Nope, the darn steering column key lock mechanism was in the way, well that is only 4 allen head screws away from being gone, so off it goes!
Yeah, not really...
Still the dash cap does not want to go on. I can get the bottom lined up fairly well, but it takes an act of God to get it over the twists. I can get the two outer twisties in the cap, but I cannot get the two center ones to go into the holes. There is slack but just not enough. It does not want to go over them. Maybe a heat gun, or maybe something else. I do feel that if they were not on, I could get the cap closer. But the fit is not really what I was hoping. The cap still gets stuck on the inside windshield rubber and won't go in far enough it seems. But back to the twisties. I decided to remove the glove box to give me more room to work. That did not help. Then I decided to remove the glove box liner... well ...
I stared at that for a while. I cannot see a good way to get that liner out without destroying it. While I was staring at it, I noticed that neat little speaker box near the passenger's feet. Well that is too tempting. I have wanted to look at that and refinish it for awhile.
What a cool little set up. It has an awesome 2W Toshiba speaker in there. LOL
I am going to clean it up and reinstall it. But the wires were not even hooked up! So now I want to try to get the original AM radio working so I can get all of this functional again! Yes it is a digression, but I feel it will make the car more fun to drive.
So now the questions...
Is getting the dash cap on the dash suppose to be this hard?
Is it difficult to remove the center radio console? Anything I should be aware of?
Is it possible to get the glove box out without destroying it. Do I go through the front, or the bottom?
Have I reached the point where I should just pull the dash, or is that a whole other headache...
1971 240Z (94% done)
1968 2000 Roadster