http://www.311s.org/phpBB3/viewtopic.ph ... 5&start=90" onclick="window.open(this.href);return false;" onclick="window.open(this.href);return false;
Orlando Engine Swap Project
Moderators: notoptoy, S Allen, Solex68
-
pebbles
- Roadster Fanatic-Site Supporter
- Posts: 3931
- Joined: Thu Dec 16, 2010 12:00 am
- Location: Washington
Re: Orlando Engine Swap Project
^ A couple coats of the self etching primer should stave off any moisture. gravity is your friend. a heavy application should run into the nooks and crannys. excess can be sanded later. I blew alot of paint and undercoat on my drivers fender and it still squeaks. But the more I drive it, the less it squeaks. 
http://www.311s.org/phpBB3/viewtopic.ph ... 5&start=90" onclick="window.open(this.href);return false;" onclick="window.open(this.href);return false;
http://www.311s.org/phpBB3/viewtopic.ph ... 5&start=90" onclick="window.open(this.href);return false;" onclick="window.open(this.href);return false;
David
"When we were standing next to the motor while on the dyno, and the motor hit VVL, eyes went watery.."
"When we were standing next to the motor while on the dyno, and the motor hit VVL, eyes went watery.."
-
denniswagnerusa
- Roadster Fanatic
- Posts: 159
- Joined: Mon Dec 26, 2011 9:56 pm
- Location: Orlando, Florida
Re: Orlando Engine Swap Project
Been awhile since last post. Got the frame back from the powder coater. Here are some photos of the frame mods after powder coating.
http://photobucket.com/framemods" onclick="window.open(this.href);return false;
http://photobucket.com/framemods" onclick="window.open(this.href);return false;
-
notoptoy

- Vendor-Site Supporter
- Posts: 9700
- Joined: Fri Oct 02, 2009 2:55 pm
- Location: Winston-Salem, NC and Ocala, FL
- Contact:
Re: Orlando Engine Swap Project
Wow! That's beautiful!
"When all else fails, force prevails!" Ummm, we're gonna need a bigger hammer here.
67.5 SPL311 H20 w/5 speed
65 Impala Convertible
2017 C43 AMG
67.5 SPL311 H20 w/5 speed
65 Impala Convertible
2017 C43 AMG
-
RCMike

- Roadsteraholic
- Posts: 2460
- Joined: Tue Mar 13, 2012 12:58 pm
- Location: Pomona, CA
-
denniswagnerusa
- Roadster Fanatic
- Posts: 159
- Joined: Mon Dec 26, 2011 9:56 pm
- Location: Orlando, Florida
Re: Orlando Engine Swap Project
Finished the Volvo brake conversion. I may have found a slightly different way to do it that requires fewer modifications to the caliper.
I accidentally ordered ATE calipers and pads instead of Girling. Before sending it back I tried them to see if they fit and got a few surprises. I discovered the caliper bolt holes did not need to be modified to fit the 1/2 bolts. They fit perfectly. The rotor clearance was as I expected where I needed to cut down the rotor diameter by 1/8". The threads for the brake line connections were the same.
One problem was that the calipers did not come with pins and hardware to hold the pads in. I found a set of those on Ebay for $7. They fit perfectly.
Anyway I decided to use the ATE calipers instead of sending them back for Girlings because they seem to work better. I ordered the brass T from whoever was recommended in the tech section. I bought a brake line flaring kit and bending tool and got the brake lines from Advance Auto. By the way someone recommended spending a little extra to get a good flaring tool and I would recommend that. I don't think my mid priced tool is going to last. A lot of stress is put on parts of the tool in the process. I bought the brake hoses and adapters from whoever was recommended in the tech section.
Everything went together perfectly. I guess I won't know how good a job I did until I get the master cylinder installed but I am happy about how well this went.
A word about the rotor diameter. I asked the machine shop to cut the diameter down to 11.03 inches. If I was to do this again I would have asked for 11 inches. There is not much clearance there and I could have problems if the rotors get warm. I will be watching that.
Anyway here are photos.
http://photobucket.com/volvobrakes" onclick="window.open(this.href);return false;" onclick="window.open(this.href);return false;
-
denniswagnerusa
- Roadster Fanatic
- Posts: 159
- Joined: Mon Dec 26, 2011 9:56 pm
- Location: Orlando, Florida
Re: Orlando Engine Swap Project
Finally got the shortened RX7 axle back from the drive line shop. It fit perfectly except I ran into problem with one of the calipers rubbing against a leaf spring. The part that touched was a floating part of the caliper at the end of the shaft that operates the emergency brake. The shortened end of the axle housing must have been rotated slightly to enable the caliper to touch the leaf springs. The other side was fine. I've determined that the end of the shaft can be ground down somewhat to allow more room without compromising the strength of the weld. Can't have that rubbing.
Got my Direzza Sport Z1 Star Spec 195/50/15s in from TireRack. They arrived in 24 hours. I'm waiting on the Panasport wheels and competition sway bar from Dean. I'm working on the brake lines. I bought a brake line flaring tool from Sears for $70 and it works much better than the one I got from Napa. Don't scrimp here. The cheaper tools don't last. Ordered the hoses online from Autozone. They have 1,600 different hoses so you are bound to find the one you need. When I ordered the remanufactured calipers from AutoPartsWarehouse they came from two different locations. The one from California came complete with mounting bracket, clips, and pad return springs. The one from Indiana came without the mounting bracket and springs. I can use the mounting bracket from the calipers I took off the RX7 axle so that was not a problem (unless you don't have the original calipers) but the springs had to be ordered from Ebay for $13. Hassle. It's quite a trick to install the pads with the springs. I used masking tape and taped the pads together near the ends and installed the springs and dropped the assembly in the slot and cut the tape on one end so that I could install that end in the clips and then cut the other. That is the only way I found to do it with the springs. Used silicone lubricant on the back and end of pads. By the way the instructions that came with the California calipers warned not to engage the emergency brake mechanism until the brakes have been bled. No instructions with the Indiana calipers.
I put the engine on the frame so that I can measure drive shaft length. Mine needed to be 32 7/8 inches long. On advice from the drive shaft shop I measured from the seal on the transmission shaft to the top and bottom of the plate on the differential shaft and averaged them. I did this with my son and wife standing on the frame to simulate the weight of the body. It makes a difference. If you don't add the weight the drive shaft may be too long.
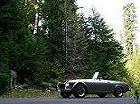
I'm getting excited about having the chassis together within a month and I will roll it out into the sun and take some photos. I'm going to have a chassis party to celebrate with friends who have been listening to my stories about the build. I will be sure to show them the modified axle with limited slip differential and disc brakes, Volvo front brakes, freshened SR20DET engine and transmission, rebuilt front suspension and steering box, powdercoated frame, custom drive shaft, custom brake lines with proportioning valve, competition front springs and sway bar, gas shocks, powdercoated valve cover with polished letters, Panasport wheels, and ultra performance tires. The problem with that is most of that won't show when I get the body back on the frame so the challenge will be to make the body look as good as the chassis. Will cost big bucks I'm sure.
Got my Direzza Sport Z1 Star Spec 195/50/15s in from TireRack. They arrived in 24 hours. I'm waiting on the Panasport wheels and competition sway bar from Dean. I'm working on the brake lines. I bought a brake line flaring tool from Sears for $70 and it works much better than the one I got from Napa. Don't scrimp here. The cheaper tools don't last. Ordered the hoses online from Autozone. They have 1,600 different hoses so you are bound to find the one you need. When I ordered the remanufactured calipers from AutoPartsWarehouse they came from two different locations. The one from California came complete with mounting bracket, clips, and pad return springs. The one from Indiana came without the mounting bracket and springs. I can use the mounting bracket from the calipers I took off the RX7 axle so that was not a problem (unless you don't have the original calipers) but the springs had to be ordered from Ebay for $13. Hassle. It's quite a trick to install the pads with the springs. I used masking tape and taped the pads together near the ends and installed the springs and dropped the assembly in the slot and cut the tape on one end so that I could install that end in the clips and then cut the other. That is the only way I found to do it with the springs. Used silicone lubricant on the back and end of pads. By the way the instructions that came with the California calipers warned not to engage the emergency brake mechanism until the brakes have been bled. No instructions with the Indiana calipers.
I put the engine on the frame so that I can measure drive shaft length. Mine needed to be 32 7/8 inches long. On advice from the drive shaft shop I measured from the seal on the transmission shaft to the top and bottom of the plate on the differential shaft and averaged them. I did this with my son and wife standing on the frame to simulate the weight of the body. It makes a difference. If you don't add the weight the drive shaft may be too long.
I'm getting excited about having the chassis together within a month and I will roll it out into the sun and take some photos. I'm going to have a chassis party to celebrate with friends who have been listening to my stories about the build. I will be sure to show them the modified axle with limited slip differential and disc brakes, Volvo front brakes, freshened SR20DET engine and transmission, rebuilt front suspension and steering box, powdercoated frame, custom drive shaft, custom brake lines with proportioning valve, competition front springs and sway bar, gas shocks, powdercoated valve cover with polished letters, Panasport wheels, and ultra performance tires. The problem with that is most of that won't show when I get the body back on the frame so the challenge will be to make the body look as good as the chassis. Will cost big bucks I'm sure.
-
notoptoy
- Vendor-Site Supporter
- Posts: 9700
- Joined: Fri Oct 02, 2009 2:55 pm
- Location: Winston-Salem, NC and Ocala, FL
- Contact:
Re: Orlando Engine Swap Project
Hey! I've been listening (OK, reading) your story, and I'm not that far away (currently in Ocala)- looking forward to the invite!! I'd love to see this budding beauty!!
"When all else fails, force prevails!" Ummm, we're gonna need a bigger hammer here.
67.5 SPL311 H20 w/5 speed
65 Impala Convertible
2017 C43 AMG
67.5 SPL311 H20 w/5 speed
65 Impala Convertible
2017 C43 AMG
-
denniswagnerusa
- Roadster Fanatic
- Posts: 159
- Joined: Mon Dec 26, 2011 9:56 pm
- Location: Orlando, Florida
Re: Orlando Engine Swap Project
Love to have you. I'll let you know. Will you be bringing your car?
-
notoptoy
- Vendor-Site Supporter
- Posts: 9700
- Joined: Fri Oct 02, 2009 2:55 pm
- Location: Winston-Salem, NC and Ocala, FL
- Contact:
Re: Orlando Engine Swap Project
Most likely not  , as mine is in NC at the moment.
"When all else fails, force prevails!" Ummm, we're gonna need a bigger hammer here.
67.5 SPL311 H20 w/5 speed
65 Impala Convertible
2017 C43 AMG
67.5 SPL311 H20 w/5 speed
65 Impala Convertible
2017 C43 AMG
-
Orlando Roadster
- Site Supporter
- Posts: 37
- Joined: Sun Oct 06, 2013 5:27 pm
- Location: Orlando , FL
Re: Orlando Engine Swap Project
Dennis was nice enough to let me stop by this weekend and check out his project. Really nice stand up guy who was happy to share his project with me. It was really cool to chat with him about his project and some of the issues he had to work through (aka learn from his mistakes  .) I am starting a similar project on my car and I am sure he will be my go to for questions. Just wanted to say thanks and I can't wait till he gets the body back on and the SR motor fired up! I know he dropped in the gas tank this weekend so hopefully he will post a update soon.
-
denniswagnerusa
- Roadster Fanatic
- Posts: 159
- Joined: Mon Dec 26, 2011 9:56 pm
- Location: Orlando, Florida
Re: Orlando Engine Swap Project
Dan, thank you for the kind comments. I enjoyed my time with you also. I've got the gas tank installed and now the body is ready to drop onto the powder coated frame. It feels good to be working on the project again after a summer off. I can offer lots of excuses for the delay but the bottom line is that the garage was 90 degrees most of the summer and I didn't feel like working there.
After attaching the body to the frame I will install the brake and clutch master cylinders and complete the lines to them. Since I fabricated all the lines myself, bending and flaring as I went, a great feeling of accomplishment would be felt if they did not leak. The engine will be put back in and then off to the mechanic to have the turbo and its plumbing installed along with the 3 inch exhaust. I'm hoping that he can get the basic wiring set up such that it will run when he is done. I cannot find the ECU in the basket of wires that came with the engine. I understood that it was included. Got to investigate that.
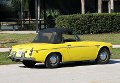
After it is done at the mechanic the engine will be removed and preparations will be made for a paint job including the engine compartment. I thought about changing the color to medium gray because it looks so good with the black top and chrome wheels but while sitting at a light I noticed that all the cars were gray, black, white, or brown, and with not a bright color to be seen I decided that I will keep my car a Corvette yellow. Sports cars should be bright so that they can be easily seen approaching from the rear and as they pass and leave you in the dust.
Lots of wprk to do and lots of money to spend.
After attaching the body to the frame I will install the brake and clutch master cylinders and complete the lines to them. Since I fabricated all the lines myself, bending and flaring as I went, a great feeling of accomplishment would be felt if they did not leak. The engine will be put back in and then off to the mechanic to have the turbo and its plumbing installed along with the 3 inch exhaust. I'm hoping that he can get the basic wiring set up such that it will run when he is done. I cannot find the ECU in the basket of wires that came with the engine. I understood that it was included. Got to investigate that.
After it is done at the mechanic the engine will be removed and preparations will be made for a paint job including the engine compartment. I thought about changing the color to medium gray because it looks so good with the black top and chrome wheels but while sitting at a light I noticed that all the cars were gray, black, white, or brown, and with not a bright color to be seen I decided that I will keep my car a Corvette yellow. Sports cars should be bright so that they can be easily seen approaching from the rear and as they pass and leave you in the dust.
Lots of wprk to do and lots of money to spend.
-
GoldHawg
- Roadsteraholic
- Posts: 643
- Joined: Sun Jul 30, 2006 3:27 pm
- Location: Spring Valley, OH
Re: Orlando Engine Swap Project
Why a 3" exhaust? I would've thought 2.5 more than enough.
-
denniswagnerusa
- Roadster Fanatic
- Posts: 159
- Joined: Mon Dec 26, 2011 9:56 pm
- Location: Orlando, Florida
Re: Orlando Engine Swap Project
Following other people's advice about the exhaust.
-
denniswagnerusa
- Roadster Fanatic
- Posts: 159
- Joined: Mon Dec 26, 2011 9:56 pm
- Location: Orlando, Florida
Re: Orlando Engine Swap Project
It feels good to be working on my roadster again. Been fabricating clutch and brake lines before I put the engine back in. I switched to a 280z brake master cylinder and traded reservoirs so it does not hit the hood. The Z master cylinder is about 3/4 inch longer but after studying photos of other projects I don't think that will interfere. I spent more time that I should trying to find the size for the nuts that hold the master cylinder on. Still working on that. Can't find the ones I took off. I would replace than anyway. Got the gas line completed in the back and put the battery cables into the trunk. Used size 4 cables for the battery. Hooked up my makeshift emergency brake cables. I will be very happy if it works like designed. Time will tell.
I got a bit of a surprise today with the master cylinder. Having owned this car for 35 years I have been cautioned about the weak firewall just about any time I opened a roadster catalog or website. Since my car has been driven conservatively with little strain on the brakes and the firewall was rust free I thought that I did not have much risk of having the firewall fail when braking. Today I found a 2 inch crack in my firewall near the bottom bolt holding on the brake master cylinder. I may have been a hard brake away from catastrophe. I could not even see the crack until I painted the firewall. Fortunately I had added the brace to a part order and had it to install. You are courting disaster if you do not install this brace. It took me all of 15 minutes to install and cost $28 from datsunparts.com.
I got a bit of a surprise today with the master cylinder. Having owned this car for 35 years I have been cautioned about the weak firewall just about any time I opened a roadster catalog or website. Since my car has been driven conservatively with little strain on the brakes and the firewall was rust free I thought that I did not have much risk of having the firewall fail when braking. Today I found a 2 inch crack in my firewall near the bottom bolt holding on the brake master cylinder. I may have been a hard brake away from catastrophe. I could not even see the crack until I painted the firewall. Fortunately I had added the brace to a part order and had it to install. You are courting disaster if you do not install this brace. It took me all of 15 minutes to install and cost $28 from datsunparts.com.
You do not have the required permissions to view the files attached to this post.
-
denniswagnerusa
- Roadster Fanatic
- Posts: 159
- Joined: Mon Dec 26, 2011 9:56 pm
- Location: Orlando, Florida
Re: Orlando Engine Swap Project
Frustrating day today. Worked much of today on finishing the brake lines and installing the master cylinder. The reservoirs from the stock master were transferred to the 280z master because some people were having trouble with the taller reservoirs touching the hood. Before adding any fluids the hood was put on to see if there was any touch and there was not. I bench bled the master before installing and filled with fluid and then bled the system at the calipers. Immediately found some leaks but fixed them, I think. After bleeding the system I still do not have a hard pedal. In fact it still goes to the floor. I must still have some leaks or air in the lines or both. After six hours I'm going to sleep on it and try again another day.
I did not use the shims between the firewall and the master cylinder. My understanding from the forum is that they were used to adjust how the push rod connects to the pedal so that there is no pressure on the master cylinder when the pedal is neutral. My push rod connected to the pedal without pushing on the cylinder so it is OK, I guess.
I did not use the shims between the firewall and the master cylinder. My understanding from the forum is that they were used to adjust how the push rod connects to the pedal so that there is no pressure on the master cylinder when the pedal is neutral. My push rod connected to the pedal without pushing on the cylinder so it is OK, I guess.