After 15 years, finally starting a restoration!
Moderators: notoptoy, S Allen, Solex68
-
zippy67roadster

- Roadster Fanatic-Site Supporter
- Posts: 1406
- Joined: Tue Dec 08, 2009 4:43 pm
- Location: Cameron, Texas
- Model: 1500/1600
- Year: Low Windshield-64-67.5
- Contact:
Re: After 15 years, finally starting a restoration!
Looks great. I will be tackling the same problem on my vintage racer project. The area to be cut out and replaced is only about 6inches square but really needs to be done. What gauge sheet metal did you use?
1967 Datsun SPL311-08935-vintage race car
1967 Datsun SPL311-10123 project
1967 Datsun 411 wagon
67.5 SPL311 Vintage Race car project
64 NL320 Pickup Truck
Brian
http://www.sincitydatsuns.com
https://www.facebook.com/sincitydatsuns
1967 Datsun SPL311-10123 project
1967 Datsun 411 wagon
67.5 SPL311 Vintage Race car project
64 NL320 Pickup Truck
Brian
http://www.sincitydatsuns.com
https://www.facebook.com/sincitydatsuns
-
notoptoy

- Vendor-Site Supporter
- Posts: 9700
- Joined: Fri Oct 02, 2009 2:55 pm
- Location: Winston-Salem, NC and Ocala, FL
- Contact:
Re: After 15 years, finally starting a restoration!
Looking good. You have a great friend to spend that much time with you on the project - hope he's STILL your friend. 
"When all else fails, force prevails!" Ummm, we're gonna need a bigger hammer here.
67.5 SPL311 H20 w/5 speed
65 Impala Convertible
2017 C43 AMG
67.5 SPL311 H20 w/5 speed
65 Impala Convertible
2017 C43 AMG
-
JMartin
- Roadster Fanatic
- Posts: 496
- Joined: Sun Aug 28, 2011 11:29 pm
- Location: Armstrong, BC Canada
Re: After 15 years, finally starting a restoration!
Brian; the metal I used to replace most of the floor pan was purchased from Ross Mullen in Vancouver. I think it's 20 guage, and the original sheet metal from Datsun was pretty close to the same size (I think it was 21 guage- seems like an unusual size). To replace more of the firewall and side kick panel I used some thicker metal, around 18 guage I believe.
No Toptoy: My friend really owed me, so it was time to collect. I spent the previous day replacing his rochester carb with a new Holley on his Iroc Camero for his son.
No Toptoy: My friend really owed me, so it was time to collect. I spent the previous day replacing his rochester carb with a new Holley on his Iroc Camero for his son.
________________________________
Jim Martin
Armstrong BC, Canada
69-2000
one done, one to go!
Jim Martin
Armstrong BC, Canada
69-2000
one done, one to go!
-
pebbles

- Roadster Fanatic-Site Supporter
- Posts: 3931
- Joined: Thu Dec 16, 2010 12:00 am
- Location: Washington
Re: After 15 years, finally starting a restoration!
[quote="JMartin" My friend really owed me, so it was time to collect. [/quote]
Collect you did! Thats tough working around the pedals and under the steering wheel!!
Floor is looking good.
Collect you did! Thats tough working around the pedals and under the steering wheel!!
Floor is looking good.
David
"When we were standing next to the motor while on the dyno, and the motor hit VVL, eyes went watery.."
"When we were standing next to the motor while on the dyno, and the motor hit VVL, eyes went watery.."
-
JMartin
- Roadster Fanatic
- Posts: 496
- Joined: Sun Aug 28, 2011 11:29 pm
- Location: Armstrong, BC Canada
Re: After 15 years, finally starting a restoration!
I used some good seam sealer on all the new edges (top and bottom) that I welded in, and undercoated with some spray can undercoat over the last 2 days. Of course in the process I found more problem areas that I had to clean up and put new metal over top of. I did use a POR type product first, then sprayed it with Tremclad, and then covered it. I used self tapping metal screws, I figured that should hold it.
I was about to put the fuel tank back in and notice 2 stress cracks near the rear bumper where the tank gets bolted on. I figure 42 years of flexing over the bumps caused it to crack. Thats tomorrow's job!
My question for the forum is "should I attempt to remove the fuel sending unit/fuel level unit from inside the tank, and get the tank boiled out first before I put it back into the car". I have a photo below of the top of the tank. In my manual it talks about set screws holding the unit into the tank. From this photo it looks like a Bayonet style (turn into the grooves to remove). I sprayed it liberally with a type of "loosenall", thats why it looks wet
You do not have the required permissions to view the files attached to this post.
________________________________
Jim Martin
Armstrong BC, Canada
69-2000
one done, one to go!
Jim Martin
Armstrong BC, Canada
69-2000
one done, one to go!
-
notoptoy
- Vendor-Site Supporter
- Posts: 9700
- Joined: Fri Oct 02, 2009 2:55 pm
- Location: Winston-Salem, NC and Ocala, FL
- Contact:
Re: After 15 years, finally starting a restoration!
As far as you have gone with your restoration, I would certainly take this opportunity to "do it right" "while you are there"!
So, yes, I would send the tank off.
So, yes, I would send the tank off.
"When all else fails, force prevails!" Ummm, we're gonna need a bigger hammer here.
67.5 SPL311 H20 w/5 speed
65 Impala Convertible
2017 C43 AMG
67.5 SPL311 H20 w/5 speed
65 Impala Convertible
2017 C43 AMG
-
JMartin
- Roadster Fanatic
- Posts: 496
- Joined: Sun Aug 28, 2011 11:29 pm
- Location: Armstrong, BC Canada
Re: After 15 years, finally starting a restoration!
Can anyone tell me how to take the top plate off the fuel tank? It doesn't look like screws it looks like the fuel level ubit turns clockwise or counter clockwise to unlock from the tabs. Is that right?
________________________________
Jim Martin
Armstrong BC, Canada
69-2000
one done, one to go!
Jim Martin
Armstrong BC, Canada
69-2000
one done, one to go!
-
68DSU
- Roadster Fanatic-Site Supporter
- Posts: 1005
- Joined: Thu Nov 03, 2011 10:02 am
- Location: Fair Oaks, Ca.
- Model: 1500/1600
- Year: High Windshield-68-70
Re: After 15 years, finally starting a restoration!
I believe I carefully tapped the tab with a screwdriver and hammer to spin it. And yes, get it cleaned. Who knows what old gas gunk may be living in there.
Rick
Constantly working on the Datsun whenever I get around to it.
1968 SPL 311
1987 Toyota MR2 T-top (don't hate, wife's car)
2014 Ford Mustang convertible
SPF 50
Constantly working on the Datsun whenever I get around to it.
1968 SPL 311
1987 Toyota MR2 T-top (don't hate, wife's car)
2014 Ford Mustang convertible
SPF 50
-
JMartin
- Roadster Fanatic
- Posts: 496
- Joined: Sun Aug 28, 2011 11:29 pm
- Location: Armstrong, BC Canada
Re: After 15 years, finally starting a restoration!
Still trying to spin off the top of the fuel tank. 42 years of dirt and grime has made the lid hard to remove. I sprayed it for 2 days with lubricant but I can't use heat(gas tank!) and I don't want to destroy what's left of those little tabs. Suggestions. Oh ya, I assume it removes by turning counter clockwise?
________________________________
Jim Martin
Armstrong BC, Canada
69-2000
one done, one to go!
Jim Martin
Armstrong BC, Canada
69-2000
one done, one to go!
-
jamesw
- Roadsteraholic
- Posts: 2760
- Joined: Thu Aug 05, 2010 11:06 am
- Location: Houston TX
Re: After 15 years, finally starting a restoration!
If you can get the locking ring off, there should be an o-ring underneath. If they get buggered up too much I think you can get replacements from the vendors. But if the o-ring is OK you can usually just flatten out the lock ring and re-use it.
Cheers
James
Cheers
James
SRL311-00275
'96 Porsche 993 C4
2001 Excursion 7.3l
'96 Porsche 993 C4
2001 Excursion 7.3l
-
George H
- Roadster Fanatic
- Posts: 294
- Joined: Sun Jun 25, 2006 8:22 pm
- Location: Smithville ON Canada
Re: After 15 years, finally starting a restoration!
The o ring and lock ring should still be available from your local Nissan dealer. The o ring always seems to grow once the gas gets at it. I removed my sending unit 2 weeks after I installed a new sending unit and the o ring was not reusable. If you can't get the ring off by tapping the ring then I would gently pry the tabs on the tank to loosen the ring. Getting an old lock ring off will usually destroy it. Good luck.
George
67 2000
69 2000
76 620 K/Cab
67 2000
69 2000
76 620 K/Cab
-
JMartin
- Roadster Fanatic
- Posts: 496
- Joined: Sun Aug 28, 2011 11:29 pm
- Location: Armstrong, BC Canada
Re: After 15 years, finally starting a restoration!
Thanks everyone. Man you have to love this list with all the great advise. I did get the ring off. I pried up the tank tabs just enough to allow the ring to slide around. Removed ring, unit, and O-ring. Cleaned up tab and unit on wire wheel. Tank still looks great inside. I may try to put in a solution and do it myself or get a price on sending it out. There is a 4th tab on the tank. I assume the unit fits under it to apply more pressure once the ring goes on top
________________________________
Jim Martin
Armstrong BC, Canada
69-2000
one done, one to go!
Jim Martin
Armstrong BC, Canada
69-2000
one done, one to go!
-
JMartin
- Roadster Fanatic
- Posts: 496
- Joined: Sun Aug 28, 2011 11:29 pm
- Location: Armstrong, BC Canada
Re: After 15 years, finally starting a restoration!
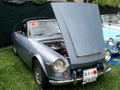
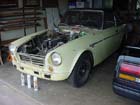
Here are some photos of the progress today. After spraying more undercoat on the underside of the car, I lowered it back onto the frame and bolted it down.
You do not have the required permissions to view the files attached to this post.
________________________________
Jim Martin
Armstrong BC, Canada
69-2000
one done, one to go!
Jim Martin
Armstrong BC, Canada
69-2000
one done, one to go!
-
JMartin
- Roadster Fanatic
- Posts: 496
- Joined: Sun Aug 28, 2011 11:29 pm
- Location: Armstrong, BC Canada
Re: After 15 years, finally starting a restoration!
I ran into an issue with coating the inside of the tank. When I looked inside the tank I noticed one of the baffles had become unwelded and was loose inside the tank. It took me 2 hours to cut the metal baffle into small enough pieces to get it to fit back out the small opening in the tank...what a PITA.
I purchased a good quality degreaser, and took the fuel tank to the car wash. I poured the degreaser into the fuel tank, sloshed it around for a few minutes (closed up all openings, rolled it over and over, etc) I then used the pressure washer to "steam clean" the tank. I brought it back home and dried it for several days before I poured in 1 Litre (1 quart) of tank sealer. (photos to follow). Be sure to roll tank over and over to cover all sides.
CAUTION; this stuff stains hands and clothing very well. Stinks a lot. Do this in a well vented area!
I poured the remaining contents back into a new sealed container
________________________________
Jim Martin
Armstrong BC, Canada
69-2000
one done, one to go!
Jim Martin
Armstrong BC, Canada
69-2000
one done, one to go!
-
JMartin
- Roadster Fanatic
- Posts: 496
- Joined: Sun Aug 28, 2011 11:29 pm
- Location: Armstrong, BC Canada
Re: After 15 years, finally starting a restoration!
I spent this past weekend working on a substituted for Dynamat. A friend gave me a roll of foil insulation that they use to wrap around boilers. I used a 3M spray adhesive and was very impressed with the results (photos to follow) I thought I would only need about 36 square feet, but I used closer to 50. I put it into the rear quarters as well, to help reduce sound levels.
I purchased a new Amp, and a new stereo with Ipod connections, USB, and aux input jack. Stupid me forgot that it won't fit into the stock opening. Now I have to decide if I want to butcher the stock opening, or find another location. I have to look on this list to see the posts about possible locations for it. Oh well, it will sound good once its done!
I purchased a new Amp, and a new stereo with Ipod connections, USB, and aux input jack. Stupid me forgot that it won't fit into the stock opening. Now I have to decide if I want to butcher the stock opening, or find another location. I have to look on this list to see the posts about possible locations for it. Oh well, it will sound good once its done!
________________________________
Jim Martin
Armstrong BC, Canada
69-2000
one done, one to go!
Jim Martin
Armstrong BC, Canada
69-2000
one done, one to go!