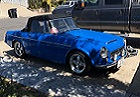
Some background. A few months ago I installed JT68's (Jim Tyler) Bilstein shocks on my 67.5 1600. The change was amazing completely changing the character of the car from a back breaker to a civilized and more enjoyable ride. So my next mission was to replace the leaf springs and install JT and FlexForm's jointly developed mono leaf springs to see the next improvements that could be had.
JT's kit was complete, springs came with the ends mounted and read to go with the spring bushings in place, 1/2 inch thick aluminum lowering blocks and longer replacement u-bolts. I ordered Urethane shackle bushings from Dean for the remaining bushing replacements. The original springs weighed 20 pounds each and the new FF's weigh 7 pounds each. I'll show comparison shots and measurements of the springs in another post.
I started with some measurements of the "stock height". though I believe my car has been lowered at some point, judging by the ride height.
When I researched previous installations of the FF's, everyone referenced that they raised the ride height up to one inch. I ordered the kit from JT with lowering blocks in anticipation of this. I chose not to use the blocks after measuring the springs - and the result was indeed a 1 inch higher ride height. But, at this point, I like the increase, I think mine must have been lowered at some point previously. The following was my process, your method may vary.
Removal and reinstallation Steps:
Note: Measure ride height before starting if desired.
1) Jack up and support frame.
2) Support differential/rear axle
3) Remove lower shock absorber bolt - note arrangement of bushings and washers for reassembly
4) Remove 4 u-bolts holding the spring perch/shock mount in place
5) Remove u-bolts from axle, and upper bump stop. You may want to mark position of the bump stop with a crayon for reinstallation ease.
6) Remove FRONT spring mount, the bolt installs from the outside to inside of frame, with an 11/16th nut on the inside. The bolt is special and has a flat to keep it from turning when properly installed in frame.
7) With the front lowered, you can now pull the spring forward so that you can get to the shackle assembly. Pulling it as far forward as possible will make disassembly easier.
8 ) Remove both shackle nuts - required if you are replacing the bushings, or removing the shackle mount for cleaning or painting. If you are not, you may need to only remove the bolt for the spring. HOWEVER - I found it was much easier to reinstall the shackle bolts onto the spring first for reassembly.
9). I removed the rear shackle mount (3 bolts) to clean and paint it. Two of the bolts have captive nuts, one is a nut/bolt arrangement. I had an offset, closed end wrench that would just squeeze in at the top bolt -this was a bit tricky and I was luck to have the right tool handy.
10) Optional - clean and paint to your desired level of attention.
Reassembly:
1) Re-attach shackle mount if removed.
2) Insert shackle U-bolt into the long end of the spring - I had to press this in as it was a tight fit - definitely clean the bolt surfaces and consider adding a light coat of grease to make this easier. The u-bolt goes from the outside of the frame toward the inside, and it goes into the LONG end of the spring (approximately 27 inches from bolt in middle of spring to rear shackle mount).
3) Insert bushings into shackle mount - if using urethane, lubricate everything with the special grease (you did remember to buy the special grease, right?). That grease is sticky stuff, wear gloves.
4) insert the remaining end of the shackle u-bolt into mount - note the correct position of this - The spring portion goes between the shackle mount and the frame. This is why you need to start by installing this first. Install both nuts loosely at this point, do not tighten them too much.
5) Install the Shock mounting plate assembly. I put the upper bump stop and both u-bolts on first. Position the bump stop correctly. NOTE: You MAY WANT TO cut the bump stop down if you are lowering the ride height! It is convenient to do this BEFORE you reinstall the bump stop. Install the upper spring rubber, the spring with the installed white nylon pieces and spacer block, and the lower spring rubber followed by the shock mount plate. IMPORTANT - install the end of the shock into the plate before installing any bolts! Make sure to put the upper rubber mounts and washers on the shock before you insert the shock in the plate. If you do not, you'll have to remove the shock or the plate to get it right - ask me how I know this!
install the 4 u-bolt nuts. Insure the u-bolts are properly routed and the upper bumpstop is lined up. Don't fully tighten them yet.
6) Install front spring in mount. Special bolt goes from outside of frame to inside. Make sure the flat is seated in the matching stop on the outside of the frame. Tighten the bolt to torque spec.
7) Tighten the 4 bolts on the shock mount plate. Install the remaining shock rubber and washer and tighten the bolt.
8 ) Tighten rear shackle bolts to torque spec.
9) Double check all your work.
9) Lower car and enjoy!
Note: Now is a good time to re-measure the ride height for comparison.
Installed Mono Leaf FlexForm Springs
Moderators: notoptoy, S Allen, Solex68
-
notoptoy

- Vendor-Site Supporter
- Posts: 9677
- Joined: Fri Oct 02, 2009 2:55 pm
- Location: Winston-Salem, NC and Ocala, FL
- Contact:
Installed Mono Leaf FlexForm Springs
You do not have the required permissions to view the files attached to this post.
"When all else fails, force prevails!" Ummm, we're gonna need a bigger hammer here.
67.5 SPL311 H20 w/5 speed
65 Impala Convertible
2017 C43 AMG
67.5 SPL311 H20 w/5 speed
65 Impala Convertible
2017 C43 AMG
-
notoptoy
- Vendor-Site Supporter
- Posts: 9677
- Joined: Fri Oct 02, 2009 2:55 pm
- Location: Winston-Salem, NC and Ocala, FL
- Contact:
Re: Installed Mono Leaf FlexForm Springs
Comparison of the springs.
When I compared and measured the springs, uninstalled, I was convinced that the flex forms were going to LOWER the height of the car by an inch, WITHOUT the lowering blocks. My measurements were based on the unsprung weight and height. I was wrong, very wrong. In the end it actually raised the height by one inch. I may go back and replace the lowering blocks - will have to wait and see after driving it a bit.
When I compared and measured the springs, uninstalled, I was convinced that the flex forms were going to LOWER the height of the car by an inch, WITHOUT the lowering blocks. My measurements were based on the unsprung weight and height. I was wrong, very wrong. In the end it actually raised the height by one inch. I may go back and replace the lowering blocks - will have to wait and see after driving it a bit.
You do not have the required permissions to view the files attached to this post.
"When all else fails, force prevails!" Ummm, we're gonna need a bigger hammer here.
67.5 SPL311 H20 w/5 speed
65 Impala Convertible
2017 C43 AMG
67.5 SPL311 H20 w/5 speed
65 Impala Convertible
2017 C43 AMG
-
baxtersit
- Roadster Nut
- Posts: 68
- Joined: Wed Aug 03, 2016 3:05 pm
- Location: North Olmsted, Ohio
- Model: 2000
- Year: Low Windshield-64-67.5
- Contact:
Re: Installed Mono Leaf FlexForm Springs
Nice write up and I have the same combination. Flexform and JT Bilsteins but I live in NE Ohio and the roads can be pretty bad. I used that set up for the summer but thought it was still a bit too harsh so I asked JT to revalve the shocks and soften the compression and rebound about 15-20%. I ride motorcycles and have a bit of experience adjusting fork and shock settings and felt the rear axle wasn't as compliant as I wanted. The revalve JT did was the answer for me. Every time I go out for a ride I think about how nice the Roaster rides now especially compared to when I first bought it. I've gone from stock worn out shocks to KYBs to Bilsteins to the revalved Bilsteins so each change has been a nice improvement. The Flexforms were a subtle change but they seemed more compliant on compression which helped reduce harshness. I don't feel the version 2 lower damping rates have affected performance when throwing the car around so they've been a nice improvement.
2019 VW Allroad 6 sp
1966 Datsun Roadster stroker
1966 Alfa Romeo Giulia 1300TI
2021 Ducati 950S
1883 Honda VF750F Interceptor
1966 Datsun Roadster stroker
1966 Alfa Romeo Giulia 1300TI
2021 Ducati 950S
1883 Honda VF750F Interceptor
-
notoptoy
- Vendor-Site Supporter
- Posts: 9677
- Joined: Fri Oct 02, 2009 2:55 pm
- Location: Winston-Salem, NC and Ocala, FL
- Contact:
Re: Installed Mono Leaf FlexForm Springs
Thanks. I went with the Bilstein's and the standard steel springs at first, and the difference was fantastic - I really liked the combination. When I then went to the flexforms, the ride got noticeably harsher - unless there is weight in the car. By myself the ride is a bit bouncy, but add an equally heavy (200#) friend and it's fantastic. JT suggested reducing the pressure in the shocks - which I have yet to do, not really sure how to go about that as I don't have a pressure gauge that goes high enough to measure where it starts as JT has said it can be up to 150PSI I think. I did get the "touring" valving which again, was perfect for the steel springs. And even though a little harsh, the road manners and cornering are night and day difference and a major improvement over the Steel springs and Koni shocks that I started with.
"When all else fails, force prevails!" Ummm, we're gonna need a bigger hammer here.
67.5 SPL311 H20 w/5 speed
65 Impala Convertible
2017 C43 AMG
67.5 SPL311 H20 w/5 speed
65 Impala Convertible
2017 C43 AMG
-
fj20spl311
- Roadsteraholic
- Posts: 5009
- Joined: Mon Nov 28, 2005 3:54 pm
- Location: San Diego, Ca
Re: Installed Mono Leaf FlexForm Springs
Most off-road dealer/installers should be able to adjust the shock nitrogen pressure.
Phil
67.5 SRL311-00148 Blue (FJ cruiser VOODOO Blue)
67.5 SPL311 FJ20E teal SDS EFI
69 SRL311 SOLD
19 Raptor SCAB
67.5 SRL311-00148 Blue (FJ cruiser VOODOO Blue)
67.5 SPL311 FJ20E teal SDS EFI
69 SRL311 SOLD
19 Raptor SCAB
-
notoptoy
- Vendor-Site Supporter
- Posts: 9677
- Joined: Fri Oct 02, 2009 2:55 pm
- Location: Winston-Salem, NC and Ocala, FL
- Contact:
Re: Installed Mono Leaf FlexForm Springs
Thanks Phil, just need to locate one that is willing to do it.
"When all else fails, force prevails!" Ummm, we're gonna need a bigger hammer here.
67.5 SPL311 H20 w/5 speed
65 Impala Convertible
2017 C43 AMG
67.5 SPL311 H20 w/5 speed
65 Impala Convertible
2017 C43 AMG