Well I finally decided to do it and replaced my old exhaust system which had terrible welds on it as a result of its proximity to the frame and body and it had two or more holes in the top sides of it at the muffler and flex pipe. It also occasionally hit the cross frame. It was over due for an upgrade!
The only good part of the old system was the totally stock and "almost new" Nissan resonator (which has only about 6,000 miles on it). It even still has the paper shipping label on it of when it was shipped to an Austin Texas Nissan dealership! And it has been mounted on the roadster for about 6 years all in the garage. So it still looks really good. The problem with it is that it is pretty restrictive on the output at the narrow end of the megaphone pipe. But it would be great for a complete original stock install. I may sell it as they are no longer available and are very rare to find.
I waffled between keeping stock small pipe size with the "almost new" stock resonator or jumping up to a less restrictive 2" system and use that same restrictive resonator or use a new 2 inch pipe resonator.
JT68, Jim Tyler, toplessdatsun, can supply both size systems from the flex pipe all the way back to and including muffler and the resonator which he designed. He also offers them in stainless steel or not.
Since I had just rebuilt my U20 head with a lot of JT68's help and many of his parts like new rockers and lash pads and also all new timing gears and chains from Jim as well having installed my reground A cam to a B-Cam and installed refurbished SU carbs and intake from Keith Williams, both which I had on the shelf for 5 years, I decided it made sense to let it all breath better and purchase the Stainless Steel 2" exhaust all the way back including a new resonator from Jim Tyler. He ovals the 2 inch pipes through the cross frame a little to give more clearance.
I chose to go with a clamp-on solution using SS Accuseal Band Clamps NBC200 2.0 inch clamps to clamp it all together. I wanted those as I used 3" version of those on my Z28 Camaro SS Borla cat back system and they have worked great for 17 years now. Jim provided those clamps and also modified a couple by welding on a mounting bracket that eliminates the use of the old pretzel mount clamps. It is a great system! He also provided all the rubber isolators, all mounts and hangers and nuts, bolts and washers and even the gasket between the flex pipe and the header flange. He also cut the front pipe to fit the flex pipe and fit my header flange position. It was a complete system. There was one SS U clamp used before the resonator for the hanger there like the stock system but the rest were Accuseal clamps. I chose to use a little exhaust pipe sealant in a few locations around the muffler and resonator connections. Probably not needed but I used some.
So I unbolted and cut out the old welded exhaust system using a large sawsall with a fine metal cutting blade. It only required two cuts. One in the pipe in the middle of the cross frame and one right after the rear of the muffler. The rest unbolted off.
Then I took some time to test fit the new system a few times and decided I wanted to cut two of the pipes a little to make it fit better. I cut about a 1/4 inch off the front of the pipe that goes from the muffler to the small connecting pipe in the middle of the cross frame. This was to help one of the welded on bracket clamps align with the welded bracket on the roadster frame at the rear of the cross frame. This was probably a result of Nissan mounting my bracket a bit off. It was real close to being correct but it twisted my isolator just a little. So I cut the pipe to fix that which also helped with the cross frame spacing.
The other cut I made was where the loop pipe/ hump pipe which goes up over the axle and into the rear of the muffler. It could have been used the way it was but it was sliding up into the muffler beyond the end of the muffler end wall. So I cut about an inch and a 1/4 off of it as I wanted to use all of the mufflers muffling capability. It probably makes no difference but it made me feel better. I used the sawsall for that too and just cleaned up the edge with a file.
I fitted the system from the front at the header end connection back to the rear of the roadster. It all went together pretty well as the pipes and components are pretty much precision fit for most roadsters. The test fitting was great. The only issue is that some roadster brackets are a bit off from other roadsters which caused a problem when I got to actually tightening everything up.
Other than the two trimming cuts I also had an issue trying to connect the one special bracket clamp at the front of the muffler. It is used to connect the muffler and exhaust pipe together and also has a welded on bracket on that Accuseal clamp that has to attach to a rubber isolator and to the stock frame bracket where the old pretzel clamps used to mount to. It is just really tight there for access and hides behind the pipe and up next to the floor pan and I could not get a wrench on the upper side of it once it was in position. You could get everything connected and fitting correctly but could not tighten it on the top. Also you could not rotate it into place if it was already pre-tightened as the bottom of the rubber isolator mount would not fit into the frame bracket hole. I also trimmed just a tad off the corner of that one isolator so it would fit up closer to the pipe and align with the frame bracket better.
It would be way easier with the body off! Piece of cake, just tighten it. But my body was still on the frame. It seemed that there was no way to get access with a wrench to tighten it up. But I figured out a convoluted way to do it. I had to mount the clamp to the frame and then put the pipes through it later. Don't laugh, it worked! I had to have the connecting pipe going thru the cross frame pushed up at an angle out of the way and slide all the way to the front and not inserted into the connecting pipe in the cross frame or into the clamp or into the muffler. But it had to already be in the cross frame hole as it could not be inserted later as there are space restrictions. Then I tightened the top of the rubber isolator to the clamp bracket while it was off and in my hands and then I fastened the bottom of the isolator to the bracket on the frame which was possible "without" either pipe in place in the clamp.
So the clamp is on the frame just hanging there but the pipe and muffler were not going through it at the time of attachment to the frame! Then I had to angle the connecting pipe back down and slide it to the rear thru the clamp and then aligned it with the pipe in front of it in the cross frame area and slide it up to the front while also aligning it and twisting it into place with the front bracket on the pipe that connect to the old front pretzel bracket frame mounts with another rubber isolator and seat it all in place. That connection went smoothly.
So now the muffler clamp is on the frame and the smaller connecting pipe is going thru the clamp but the larger muffler pipe end is not in the clamp yet. So then I had to slide the muffler up on the connecting pipe and wedge the muffler's front pipe end in between that connecting pipe and the clamp. This is all backwards as normally you connect the pipes with the clamp on the outside pipe which is the muffler and slide that onto the pipe in front if it. It took a while to figure this all out. It all worked out fine and I was then able to clamp down the clamp later just fine and everything fit. That was the only nut that had access issues.
Sorry for that extended explanation but it took me a while to figure that out and thought maybe it might help the next person that does a clamp on installation. Many go to a shop and weld it all on. I did not what to do that as I had some other stuff to do when the exhaust was off, like fabricate and install a heat shield and repair some seat floor pan holes. Also I wanted to be able to remove parts of this system at a later date if needed which would be near impossible if it was all welded.
After connecting the muffler, the loop pipe/hump pipe goes in over the axle and into the rear of the muffler and connects with a clamp. the other end is then slide over the resonator. Pushing the resonator into that end of the loop pipe and then twisting the resonator up into place so that the rear hanger welded to the resonator can attach to its isolator and stock mount bracket with proper gas tank clearance. Then a SS U clamp goes around those pipes and attaches to the new hanger in the stock location in front of the resonator.
Now you just align the loop pipe over the axle for clearance and check clearance everywhere else like the muffler and the floor pan and also the pipes that go through the cross frame for clearance everywhere. Once your satisfied you can tighten everything down from front to back and recheck alignment as you go. That all went great for me.
.
.
.
.
This is a great system. It all fits well and has no clearance issues or anything other than that one nut that I had issues getting to. But I figured that out eventually.
.
.
.
I started it and took it out the other day for its first test drive. I was concerned that maybe it was going to be too loud. But when I started it I thought sounded pretty stock at idle with regard to loudness. So that was a relief. I wanted it to be sporty but not obnoxious.
I took it out for a drive with the convertible top still on and up and noticed that it has a very nice low note to it. And it is very smooth sounding. There is no popping, spirting or raspiness or anything and no weird spots as going up the RPM curve that you get with some systems. It is just a smooth consistent nice sound with a low note.
When you get on it it is way better than a stock system! And it still is not too loud. It is quieter than I expected and I think my wife will not have any issues with it. If you are not reving it up much it is quite normal with regard to loudness. And like I said it has a nice quality sounding low note and sounds really smooth.
I told JT68 that he would laugh at me but when I accelerate hard I think it sounds like a Ferrari with 4 cylinders if you could "visualize" that with your ears!
When you go up through the first 3 or 4 gears from 3000-5000 RPM it sounds really nice to me. I have not gone higher yet as I usually stay below 4000. Also when I do hard acceleration now and look down at the tach guage I am usually surprised with the new exhaust that the RPM is not higher because it sounds higher than it reads. But it is just what I was looking for.
I cant wait to see how it sounds with the top down! My old system was very quiet and sounded like a VW bug some of the time even with the smog holes plugged. It was very quiet in the rear. The only real sound I used to hear was through the carbs which got louder with the top down. I am not sure what this will sound like with it down but I expect that I will not be disappointed. I may try it tomorrow. It is just a hassel to take the top down and then put it back up as my wife has issues with pollen and stuff with it down.
Also there are currently no rattling or odd vibrations or hitting on the frame or body or noticeable leaks anywhere. I think I do have a little harmonic vibration in my driver door as I transition through a higher RPM. I have not tried to isolate that yet other than it is door trim or in the door. But the exhaust system itself is solid.
I attached some pictures. Some are showing some of the bits and pieces from JT68. I don't think I have one shat shows the loop pipe too good before mounting it or all the clamps and stuff but they are in the pictures of them on the roadster near the end of the installation process. Some other pictures are while it was still up on my lift and some while on the floor after my first 20 mile test run. One shows the scrap pieces of exhaust pipes after I cut off a bit.
You may also notice the heat shield I installed above the muffler. I did that as the old muffler used to get the floor really warm/hot. So before I installed this muffler I got a 9X18 inch piece of 20 gauge SS and fastened it using the seat rail bolt and also used 3 rivets to keep it from having any tendancy to vibrate and I used the two tabs that were already on the bottom of the floor pan for insulation or something. JT68 gave me the idea for the heat shield. That seemed to work well as there are stiffener bends in the floor pan that provide for air flow between the floor pan and the heat shield. So far it has not heated up hardly any. it is nust slightly warm not hot under the carpet like before. However the heat shield does decrease the spacing between the muffler and the floor pan/heat shield area, especially the front of the muffler which happened to line up almost right below one of the rivets! But so far that has not moved or hit the floor pan. Like I said this system is pretty solid and stout. The mounts do a good job at keeping it all secure.
I will update as time goes on and after I do a top down run as well.
So far, I am loving it!
My new SS exhaust system
Moderators: notoptoy, S Allen, Solex68
-
svwilbur
- Roadster Fanatic-Site Supporter
- Posts: 688
- Joined: Fri Aug 10, 2012 1:29 am
- Location: Santa Cruz Mountains, California
My new SS exhaust system
You do not have the required permissions to view the files attached to this post.
Stacey Wilbur
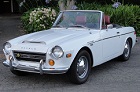
1970 2000 SRL311-14335 White
1970 2000 SRL311-14335 White