Horn Help
Moderators: notoptoy, S Allen, Solex68
-
Gars68
- Site Supporter
- Posts: 157
- Joined: Thu Jan 22, 2015 3:18 am
- Location: Auburn, CA
Horn Help
I know the actual horns work as a remote horn button/switch was mounted under the dash by the previous owner due to the OE horn not working. So, what/how do I need to test in the steering wheel/turn signal area? Should I be getting voltage to that brass, flexible arm that makes contact with the back of the wheel? What's that little white (maybe 3/16 diameter) round thing? Can someone list the components I should be seeing from the big round horn push/button and back? Thanks!
-
notoptoy

- Vendor-Site Supporter
- Posts: 9677
- Joined: Fri Oct 02, 2009 2:55 pm
- Location: Winston-Salem, NC and Ocala, FL
- Contact:
Re: Horn Help
Online parts manual is your friend!!
http://www.carpartsmanual.com/datsun311 ... fault.aspx" onclick="window.open(this.href);return false;
http://www.carpartsmanual.com/datsun311 ... fault.aspx" onclick="window.open(this.href);return false;
"When all else fails, force prevails!" Ummm, we're gonna need a bigger hammer here.
67.5 SPL311 H20 w/5 speed
65 Impala Convertible
2017 C43 AMG
67.5 SPL311 H20 w/5 speed
65 Impala Convertible
2017 C43 AMG
-
Nissanman
- Roadster Fanatic-Site Supporter
- Posts: 3363
- Joined: Mon Apr 16, 2007 8:07 pm
- Location: Adelaide, South Australia
- Model: 1500/1600
- Year: Low Windshield-64-67.5
- Contact:
Re: Horn Help
Unfortunately, that line drawing leaves a bit to be desired 
I have a series of pics. showing the horn button assembly which, at great expense, I post below: -

In the beginning, there was a steering wheel.

Horn button removed. This is from a '65 SP310.
There is a tiny rectangular notch at the base of the chromed button into which you insert a small flat blade screwdriver and twist to remove the button assembly.

The view of the steering wheel hub once the horn button is removed.
You can see the little jumper wire screwed down onto the HOT ring.

Underneath the steering wheel you can see the brass terminal that rubs onto the hub ring.....

..... which is shown here.

With the first part of the horn button removed you can see the other end of the jumper wire.
This end is electrically connected to the brass ring referred to in the previous pic.

Now you can see the horn button in detail and I'll peel it back, layer by layer.

Backside of previous item.

Essential part of the horn is the cushion spring, actually a rubber ring.
This is vital to separate the HOT and GROUND sides of the horn circuit and provide the spring return after the horn is pressed.

This where the cushion spring is placed in the assembly.

Now to dismantle the horn hub.

HOT plate is removed to expose the GROUND plate and insulated screw posts.

GROUND plate removed showing the insulating disc fitted to the horn button case.

Horn button assembly in order of components.
Now, I suppose the '68 is completely different but I couldn't help myself 
I have a series of pics. showing the horn button assembly which, at great expense, I post below: -
In the beginning, there was a steering wheel.
Horn button removed. This is from a '65 SP310.
There is a tiny rectangular notch at the base of the chromed button into which you insert a small flat blade screwdriver and twist to remove the button assembly.
The view of the steering wheel hub once the horn button is removed.
You can see the little jumper wire screwed down onto the HOT ring.
Underneath the steering wheel you can see the brass terminal that rubs onto the hub ring.....
..... which is shown here.
With the first part of the horn button removed you can see the other end of the jumper wire.
This end is electrically connected to the brass ring referred to in the previous pic.
Now you can see the horn button in detail and I'll peel it back, layer by layer.
Backside of previous item.
Essential part of the horn is the cushion spring, actually a rubber ring.
This is vital to separate the HOT and GROUND sides of the horn circuit and provide the spring return after the horn is pressed.
This where the cushion spring is placed in the assembly.
Now to dismantle the horn hub.
HOT plate is removed to expose the GROUND plate and insulated screw posts.
GROUND plate removed showing the insulating disc fitted to the horn button case.
Horn button assembly in order of components.
Now, I suppose the '68 is completely different
Last edited by Nissanman on Sat Jan 24, 2015 1:50 am, edited 2 times in total.
Nissanman, just trying to help.
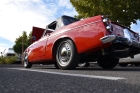
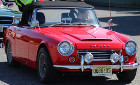
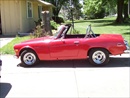
1965 SP310 Engine No. G-93326 Car No. SP310-10817
https://photos.shutterfly.com/album/60141836519
On the road again!
1965 SP310 Engine No. G-93326 Car No. SP310-10817
https://photos.shutterfly.com/album/60141836519
On the road again!
-
DanR
- Roadster Fanatic
- Posts: 395
- Joined: Thu Jun 09, 2011 12:01 am
- Location: South Jersey
Re: Horn Help
Nissanman, thanks for posting these pictures, it will help me later on when I buy the "spring" for my early car.
Gar's68, assuming you have a 68 by your name, here is the wiring schematic from the Tech Wiki section of the site. If I'm reading it correctly, it looks like the horn button is a grounding switch that goes to the relay.
http://www.311s.org/PDFs/1968%20Datsun% ... 20rev1.pdf" onclick="window.open(this.href);return false;
-
Gars68
- Site Supporter
- Posts: 157
- Joined: Thu Jan 22, 2015 3:18 am
- Location: Auburn, CA
Re: Horn Help
wow.....I'm impressed! Thank you all for the feedback. Now I have a project for the weekend and will report back soon.
-
brubojacru
- Site Supporter
- Posts: 73
- Joined: Tue Jan 25, 2011 9:53 pm
- Location: Regina, SK Canada
Re: Horn Help
If you have a 1968 your steering wheel and horn button should look more like these pictures taken during dis-assembly of my 1969:
Removing the horn button. Wheel with button removed. Wheel removed. Reverse side. Steering column showing spring contact at bottom. With plastic cover removed. ...and from the other side. Column removed and cleaned up...shows mount bracket and 2 halves of plastic ignition cover. I did not dis-assemble the parts from the horn button further than shown, nor on the steering column, but I think you can make out most of the pieces. Hope it helps!
Removing the horn button. Wheel with button removed. Wheel removed. Reverse side. Steering column showing spring contact at bottom. With plastic cover removed. ...and from the other side. Column removed and cleaned up...shows mount bracket and 2 halves of plastic ignition cover. I did not dis-assemble the parts from the horn button further than shown, nor on the steering column, but I think you can make out most of the pieces. Hope it helps!
You do not have the required permissions to view the files attached to this post.
1969 Datsun 2000
2006 Tahoe Z71
2006 Tahoe Z71
-
notoptoy
- Vendor-Site Supporter
- Posts: 9677
- Joined: Fri Oct 02, 2009 2:55 pm
- Location: Winston-Salem, NC and Ocala, FL
- Contact:
Re: Horn Help
Awesome sets of pictures Members, this should probably be in the wiki all by itself.
"When all else fails, force prevails!" Ummm, we're gonna need a bigger hammer here.
67.5 SPL311 H20 w/5 speed
65 Impala Convertible
2017 C43 AMG
67.5 SPL311 H20 w/5 speed
65 Impala Convertible
2017 C43 AMG
-
Gars68
- Site Supporter
- Posts: 157
- Joined: Thu Jan 22, 2015 3:18 am
- Location: Auburn, CA
Re: Horn Help
Things are getting better by the hour. Cleaned off all brass connectors and put the OE wheel back on and guess what.....she works!
-
Nissanman
- Roadster Fanatic-Site Supporter
- Posts: 3363
- Joined: Mon Apr 16, 2007 8:07 pm
- Location: Adelaide, South Australia
- Model: 1500/1600
- Year: Low Windshield-64-67.5
- Contact:
Re: Horn Help
Nissanman, just trying to help.
1965 SP310 Engine No. G-93326 Car No. SP310-10817
https://photos.shutterfly.com/album/60141836519
On the road again!
1965 SP310 Engine No. G-93326 Car No. SP310-10817
https://photos.shutterfly.com/album/60141836519
On the road again!
-
redroadster
- Roadsteraholic
- Posts: 2402
- Joined: Tue Mar 12, 2013 10:58 am
- Location: KCMO
- Model: 1500/1600
- Year: High Windshield-68-70
Re: Horn Help
you can get a high voltage shock from the horn connections on non relay systems
a problem if you have heart problems best to pull the fuse or replace the horns with a testlite in that case
a problem if you have heart problems best to pull the fuse or replace the horns with a testlite in that case
Datsun dealer tech 76 to 87
Mitsubishi tech 9 yrs
Volvo, Kia, Toyota too
6 month - Rolls Royce
ASE MASTER TECH 96. - 11
70 SPL 86 Z31 T , Sportster
Mitsubishi tech 9 yrs
Volvo, Kia, Toyota too
6 month - Rolls Royce
ASE MASTER TECH 96. - 11
70 SPL 86 Z31 T , Sportster
-
jarhead
- Roadster Enthusiast
- Posts: 230
- Joined: Sun Sep 09, 2012 11:55 am
- Location: Fairfield, CT
Re: Horn Help
Interesting thread. I noticed that when I put m horn assembly back together, I get a little shock when I push the horn button down. Good thing I don't have a pacemaker. Any thoughts as to what I did wrong reassembling? It's a '66
Lee
'66 SPL311-00676
'66 SPL311-00676
-
redroadster
- Roadsteraholic
- Posts: 2402
- Joined: Tue Mar 12, 2013 10:58 am
- Location: KCMO
- Model: 1500/1600
- Year: High Windshield-68-70
Re: Horn Help
all the pieces of the rotating ring ,swt. are to be non contact with the steering wheel metal
sounds like you may have a lite connection ,high ohm which the high voltage ( maybe 5000 V )jumps , in the summer high humidity it zaps alot
have you tested the horns with a jumper wire ?,it's way worse if they are stuck
sounds like you may have a lite connection ,high ohm which the high voltage ( maybe 5000 V )jumps , in the summer high humidity it zaps alot
have you tested the horns with a jumper wire ?,it's way worse if they are stuck
Datsun dealer tech 76 to 87
Mitsubishi tech 9 yrs
Volvo, Kia, Toyota too
6 month - Rolls Royce
ASE MASTER TECH 96. - 11
70 SPL 86 Z31 T , Sportster
Mitsubishi tech 9 yrs
Volvo, Kia, Toyota too
6 month - Rolls Royce
ASE MASTER TECH 96. - 11
70 SPL 86 Z31 T , Sportster
-
Phred58
- Vendor-Site Supporter
- Posts: 359
- Joined: Fri Nov 07, 2008 2:32 pm
- Location: Newport, OR
- Model: 2000
- Year: High Windshield-68-70
- Contact:
Re: Horn Help
A suggestion if this is going in the wiki is how to remove the horn button from the late model roadsters. I can't tell you the number of buttons I've seen ruined because the owner couldn't figure out how to remove the button and just tried to twist it off thus shearing the foam.
To remove the button, push on the button and then twist (counterclockwise IIRC - others please correct me if I'm wrong and it's the other direction). And yes, the horn will sound so you might want to pull the fuse or disconnect the horns to decrease the anxiety level when removing the button otherwise someone's going to come out and ask why you're honking the horn so much. Also, disconnecting avoids the shock problem.
To remove the button, push on the button and then twist (counterclockwise IIRC - others please correct me if I'm wrong and it's the other direction). And yes, the horn will sound so you might want to pull the fuse or disconnect the horns to decrease the anxiety level when removing the button otherwise someone's going to come out and ask why you're honking the horn so much. Also, disconnecting avoids the shock problem.
68 SRL311-05416
68 SRL311-03507 (currently undergoing restoration)
67.5 SPL311-12278 - big parts off to scrap, small stuff in buckets
www.datsun-roadster-parts.com
68 SRL311-03507 (currently undergoing restoration)
67.5 SPL311-12278 - big parts off to scrap, small stuff in buckets
www.datsun-roadster-parts.com
-
leonhart
- Roadster Fanatic
- Posts: 122
- Joined: Tue Mar 15, 2016 7:21 am
- Location: Indiana
Re: Horn Help
Sorry to resurrect the thread, but my horn came in a bag with pieces that didn't belong, and other parts MIA (including the "spring"). I've got a '67 and mostly looks similar (other than my steering wheel is on the left hand side  )
)
Anyway, the spring rubber sits between the steering wheel itself:
And the back of this section of the horn assembly?
Is that correct? I think that's what you are saying, and appears to be what the parts diagram shows.
Does the spring rubber just sit back there, or is there some way to properly attach/set it in? It just seems kind of wonky if left to its own devices ... it wants to curl on itself a little bit. But I don't really see an "obvious" way that it is supposed to be positioned, other than that it looks like the "open" end goes toward the steering wheel?
Thanks for any help!
1967 Datsun Roadster 1600 - 1.6L - 4 speed manual
2000 Toyota Celica GTS - 1.8L - 6 speed manual
2013 Scion FR-S - 2.0L - 6 speed manual
2000 Toyota Celica GTS - 1.8L - 6 speed manual
2013 Scion FR-S - 2.0L - 6 speed manual
-
devo
- Roadsteraholic
- Posts: 536
- Joined: Mon Jun 17, 2013 7:58 pm
- Location: Texas
- Model: 1500/1600
- Year: Low Windshield-64-67.5
Re: Horn Help
You are Correct in its orientation/position. I used a little weatherstrip adhesive to hold in position.leonhart wrote: ↑Sat Oct 06, 2018 10:20 am Sorry to resurrect the thread, but my horn came in a bag with pieces that didn't belong, and other parts MIA (including the "spring"). I've got a '67 and mostly looks similar (other than my steering wheel is on the left hand side
Anyway, the spring rubber sits between the steering wheel itself:
And the back of this section of the horn assembly?
Is that correct? I think that's what you are saying, and appears to be what the parts diagram shows.
Does the spring rubber just sit back there, or is there some way to properly attach/set it in? It just seems kind of wonky if left to its own devices ... it wants to curl on itself a little bit. But I don't really see an "obvious" way that it is supposed to be positioned, other than that it looks like the "open" end goes toward the steering wheel?
Thanks for any help!