When I installed my carpet kit, I first laid the padding on the floor to get the "dimensions" of each piece and then cut the individual pieces from the 2 larger items. This was done so I could maximize the coverage while determining the best way to lay the padding out to coordinate with the individual carpet pieces.
Once all the pieces were made from the larger and had them laid out on the floor of the car, I followed this up with the carpet, noting where the pieces of carpet overlapped each other, and also the vinyl. The side vinyl pieces, the ones just under the door opening, can be glued down, or laid over the padding. The choice is yours to make. I chose to put them over the padding, so that the padding would not be visible even by slightly lifting the corners or edges of the carpet. Once all this test fitting was done, I marked off on the padding where there was direct contact between the padding and the carpet and did not interfere with the vinyl. Last item to be noted was the location of the seat bolt holes in the floor pan. These I marked from the underside of the car.
Removed everything and first turned the padding that would be located under the seats on it's back to note where the seat bolt holes were. Using a hole punch (real cheap set available at Harbor Freight), I punched through the padding to make it easy to insert the seat bolts. Once that was done, the padding was turned right side up, and I proceeded to glue the carpet to the padding.
Using a contact type cement, I brushed the back of the carpet, and the top side of the padding. Allowed it to dry, then as the instructions for the cement call for, I brushed another light coat before mating the two pieces. I put a board with a weight over the piece while I worked on the next. It was easier to work one by one than to try to "assembly line" it because I only had two boards and weights. Once all the carpet and padding were mated, I used the hole punch again, to punch through the carpet.
Installed and aligned all the pieces, making sure that they mated at the proper edges, THEN I found the location for the snaps. Once the snap fastener locations were determined, using the hole punch again, but this time by hand and not a hammer I gently cut through the padding to the carpet in order to attach the snap cap. By doing it this way, the snap doesn't leave a "bump" in the carpet as the body of the snap is surrounded by padding.
I'll look through my archives to see if I have some pictures, or I can take pictures of the finished install.
FWIW
E
New Carpet Install
Moderators: notoptoy, S Allen, Solex68
-
JohnnyRoadster
- Roadster Fanatic
- Posts: 128
- Joined: Thu May 08, 2003 2:14 pm
- Location: Philadelphia SPL311-13956
Re: New Carpet Install
Well it took much longer than I thought (as always) to get started on the interior. I got most of the vinyl in today, and the transmission tunnel carpet. I messed up on the drivers side rear wheel cover. I will have to live with the wrinkles, or tear it off and buy a new piece.
http://rides.webshots.com/photo/2144664 ... 3787FJoYqG" onclick="window.open(this.href);return false;
John
http://rides.webshots.com/photo/2144664 ... 3787FJoYqG" onclick="window.open(this.href);return false;
John
SPL311-13956
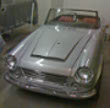
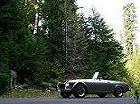
silver to cranberry to metallic brown to flat brown back to silver in 41 years!
http://united2311ster.googlepages.com"
John
silver to cranberry to metallic brown to flat brown back to silver in 41 years!
http://united2311ster.googlepages.com"
John
-
spl310

- Roadster Guru
- Posts: 13215
- Joined: Sun Dec 29, 2002 10:38 pm
- Location: In front of this keyboard... in Jacksonville, Florida!
Re: New Carpet Install
TEASE!! No finished photos yet!
"Wow, a Roadster!" Stuart Little
1967.5 2000
1967.5 2000
1964 1500
1964 1500
1967.5 1600
1968 chassis
2006 Acura MDX
2013 Volkswagen Jetta TDI wagon
1995 F350 Powerstroke!
More...
1967.5 2000
1967.5 2000
1964 1500
1964 1500
1967.5 1600
1968 chassis
2006 Acura MDX
2013 Volkswagen Jetta TDI wagon
1995 F350 Powerstroke!
More...
-
JohnnyRoadster
- Roadster Fanatic
- Posts: 128
- Joined: Thu May 08, 2003 2:14 pm
- Location: Philadelphia SPL311-13956
Re: New Carpet Install
I wish it were finished so I could post 
SPL311-13956
silver to cranberry to metallic brown to flat brown back to silver in 41 years!
http://united2311ster.googlepages.com"
John
silver to cranberry to metallic brown to flat brown back to silver in 41 years!
http://united2311ster.googlepages.com"
John
-
spl310
- Roadster Guru
- Posts: 13215
- Joined: Sun Dec 29, 2002 10:38 pm
- Location: In front of this keyboard... in Jacksonville, Florida!
Re: New Carpet Install
"Wow, a Roadster!" Stuart Little
1967.5 2000
1967.5 2000
1964 1500
1964 1500
1967.5 1600
1968 chassis
2006 Acura MDX
2013 Volkswagen Jetta TDI wagon
1995 F350 Powerstroke!
More...
1967.5 2000
1967.5 2000
1964 1500
1964 1500
1967.5 1600
1968 chassis
2006 Acura MDX
2013 Volkswagen Jetta TDI wagon
1995 F350 Powerstroke!
More...
-
notoptoy

- Vendor-Site Supporter
- Posts: 9677
- Joined: Fri Oct 02, 2009 2:55 pm
- Location: Winston-Salem, NC and Ocala, FL
- Contact:
Re: New Carpet Install
Great photo set! Heck of a lot of work has gone into that ride!
Looks great!
Looks great!
"When all else fails, force prevails!" Ummm, we're gonna need a bigger hammer here.
67.5 SPL311 H20 w/5 speed
65 Impala Convertible
2017 C43 AMG
67.5 SPL311 H20 w/5 speed
65 Impala Convertible
2017 C43 AMG
-
GaRoadsterRookie

- Site Supporter
- Posts: 117
- Joined: Mon Jul 11, 2011 1:20 pm
- Location: Sharpsburg, GA
Re: New Carpet Install
I have never installed carpet or upholstery before. I need help. I bought the carpet set from Dean that comes with carpet snaps. Here is my first set of questions.
1) Just for confirmation, do I remove the old snaps and try to put them in the exact same spot?
2) How do you install the new snaps? I don't quite understand how you use the two mating pieces.
Any help would be appreciated.
1) Just for confirmation, do I remove the old snaps and try to put them in the exact same spot?
2) How do you install the new snaps? I don't quite understand how you use the two mating pieces.
Any help would be appreciated.
You do not have the required permissions to view the files attached to this post.
Scott
__________________
1968 Roadster 1600
__________________
1968 Roadster 1600
-
mraitch

- Roadsteraholic
- Posts: 3629
- Joined: Mon Oct 02, 2006 7:03 pm
- Location: Lake Balboa (SFV) - CA
- Model: 1500/1600
- Year: High Windshield-68-70
- Contact:
Re: New Carpet Install
Maybe ask Dean?? - Just a thort!!
Peter Harrison
1970 1600 (Stroker) - TOAD SAN (Eliza)
1970 1600 (Stock) - As Yet Unnamed
Lake Balboa (SFV) , California
1970 1600 (Stroker) - TOAD SAN (Eliza)
1970 1600 (Stock) - As Yet Unnamed
Lake Balboa (SFV) , California
-
Garm
- Roadster Enthusiast
- Posts: 2061
- Joined: Wed Dec 28, 2011 9:49 am
- Location: Canoga Park, CA
- Contact:
Re: New Carpet Install
^ probably can't reach him til Tuesday when he's open -- no harm in asking on here. I wouldn't mind seeing the answer myself.
1969 Roadster 1600-ish #26244 "Spike"
---------------------------------
OS GIKEN LSD $1720
AASCO light flywheels $398.95
---------------------------------
OS GIKEN LSD $1720
AASCO light flywheels $398.95
-
mraitch
- Roadsteraholic
- Posts: 3629
- Joined: Mon Oct 02, 2006 7:03 pm
- Location: Lake Balboa (SFV) - CA
- Model: 1500/1600
- Year: High Windshield-68-70
- Contact:
Re: New Carpet Install
wait til tuesday ! <G>
Peter Harrison
1970 1600 (Stroker) - TOAD SAN (Eliza)
1970 1600 (Stock) - As Yet Unnamed
Lake Balboa (SFV) , California
1970 1600 (Stroker) - TOAD SAN (Eliza)
1970 1600 (Stock) - As Yet Unnamed
Lake Balboa (SFV) , California
-
akear

- Site Supporter
- Posts: 112
- Joined: Sun Feb 03, 2013 1:09 pm
- Location: Los Angeles
Re: New Carpet Install
I am interested in the answer too, as my carpet set is going in next weekend. I intended to install in the same manner as the original, except with the addition of the pad underneath. I've taken out the original wool carpet (or what was left of it), which was glued in place on the tunnel, and held only with snaps on the floor. Six snaps each side for the front floors. Looks like the back floor pieces were held only by the seat rails and one snap each at the back near the tunnel. I will do two at the back instead.
Adam
'69 2000
Los Angeles
'69 2000
Los Angeles
-
datsun1500

- Roadsteraholic
- Posts: 1334
- Joined: Wed Sep 19, 2007 8:24 pm
Re: New Carpet Install
Looks to me like you put the ring part on top of the carpet, push the 3 tabs through the carpet, put the other piece on the bottom with the tabs going through them and bend the tabs out to hold in place.
That's how the originals are done, only the ring shows from the top.
That's how the originals are done, only the ring shows from the top.
I remember when no one wanted the 1500s......
-
GaRoadsterRookie
- Site Supporter
- Posts: 117
- Joined: Mon Jul 11, 2011 1:20 pm
- Location: Sharpsburg, GA
Re: New Carpet Install
Yes, that is how Dean described it to me in an email. I have not tried it yet but I hope to soon. I have removed the remaining snaps from the floorboards and trunk. I drilled out the existing holes ever so slightly for the new ones to go in easier.
I have another question. Dean implied that there should be 8 snaps per floorboard.I could only find 7 on my good floorboard - the passenger side (don't even ask about the driver side). I had 3 pairs in front of the seat but only one individual behind the seat next to the transmission tunnel. Is there another one somewhere?
I have another question. Dean implied that there should be 8 snaps per floorboard.I could only find 7 on my good floorboard - the passenger side (don't even ask about the driver side). I had 3 pairs in front of the seat but only one individual behind the seat next to the transmission tunnel. Is there another one somewhere?
Scott
__________________
1968 Roadster 1600
__________________
1968 Roadster 1600
-
pebbles
- Roadster Fanatic-Site Supporter
- Posts: 3925
- Joined: Thu Dec 16, 2010 12:00 am
- Location: Washington
Re: New Carpet Install
GaRoadsterRookie wrote: I had 3 pairs in front of the seat but only one individual behind the seat next to the transmission tunnel. Is there another one somewhere?
What I am seeing is a pilot hole in the floor skin with no snap. Strait outboard of the 1 snap. Above and between the two big bolt holes on the "ramp". (roll bar bolt holes.?)
hope that makes sense.
David
"When we were standing next to the motor while on the dyno, and the motor hit VVL, eyes went watery.."
"When we were standing next to the motor while on the dyno, and the motor hit VVL, eyes went watery.."
-
mellis18

- Site Supporter
- Posts: 500
- Joined: Sun Apr 28, 2013 6:07 pm
- Location: Saratoga Springs, UT
Re: New Carpet Install
I wish these pix stilled showed up...I'm trying to figure out how to install vinyl I got from Dean...but I suck at puzzles. I have read through this string but still am at a loss as to how and where. If someone out there has pix of vinyl installation on 1969 2000 that would be greatly appreciated!!Woody Woodruff wrote:Here are some pics of my work...
I felt it very important to cut this piece, that hung over from the formed rear deck piece. It made a cleaner looking break, otherwise it just hung over and gave an ugly lip. You can also see I put down the Accumat, and ran my speaker/amp cables before the carpeting.
Here's a side view of the wheel well covered, and the areas that still need covering by the extra pieces of vinyl.
Additional shot of Accumat, and cabling
Side view of carpeting installed. Put the tranny tunnel down first, then the two pieces that go under the seats, followed by the piece that runs behind the seats (under the rear deck), then do the front pieces where your feet will go. The drivers side was a PITA. I cut jute pad, spray adhesive to the back of the carpet, then spray adhesive to the Accumat. I'm really hoping the seats will go through to the bottom so I can bolt them in.(the piece of carpet on the rear deck is just there to protect the vinyl while i work on the car)
Here is a shot of the trunk carpet, powdercoated jack, and hold down, upside down Amp
Center/radio console installed, more vinyl along door, pass. side door on.
I built a little speaker box with the extra vinyl I had, figured that was a good enough spot, since I didn't have a heater unit.
Outside view of the lines... I must say, I'm proud of myself on how the side trim turned out...they were so full of dings, but I used the method I found on this site, and think they're at about 9.5/10 now.
Good luck!!
Woody


Robert Ellis
Saratoga Springs, UT
1969 SRL311
1969 SRL311-07332
Matching numbers
1966 Mustang Coupe
Saratoga Springs, UT
1969 SRL311
1969 SRL311-07332
Matching numbers
1966 Mustang Coupe